

Your first embroidery project should be small, a little bit forgiving and finished by the end of the weekend. That’s the whole plan. You don’t need a big kit, a sampler of forty stitches or a perfect pattern. You need one hoop, one simple design and about four stitches.
This guide walks through the whole thing in the order you’ll actually do it: picking supplies, getting the design onto fabric, setting up the hoop, threading up, stitching, and finishing the hoop so it can go on a wall or into a gift bag. Each step links to a longer guide if you want more detail.
What you’ll need for a first hoop
- A 6-inch (15 cm) wooden or bamboo hoop with a screw at the top
- A piece of tightly woven cotton or cotton-linen, about 10 inches (25 cm) square
- 3 to 5 colors of six-strand cotton embroidery floss
- Embroidery (crewel) needles, a mixed pack in sizes 5 to 9
- Small sharp scissors
- A water-soluble pen or a fine pencil for tracing
- A simple line design about 4 inches (10 cm) across
If you want the reasons behind each item and what to skip for now, the beginner supply checklist covers it in more detail.
Step 1: Pick a design that suits a first project
The best first designs are made mostly of lines, with a few small filled shapes. A sprig of leaves, a simple flower, a word in loose handwriting or a tiny house all work well. Avoid big solid areas for now; satin-stitching a large shape evenly is one of the harder things in embroidery, and it’s discouraging to start there.
Keep the design smaller than your hoop with a margin all round. For a 6-inch hoop, a design about 4 inches across leaves room for your hand and keeps the stitching area inside the tightest part of the fabric.
Step 2: Get the design onto the fabric
On light, thin fabric the easiest method is tracing. Tape the printed design to a window or a bright screen turned to white, tape the fabric over it, and trace the lines with a water-soluble pen. Keep the lines thin. You’ll cover them with stitches, but a thick line is harder to hide.
For dark fabric, thick fabric or anything you can’t see through, use a different method, such as a water-soluble stabilizer you print or trace onto, or carbon transfer paper. How to transfer an embroidery pattern onto fabric compares all the common methods and when each one makes sense.
Step 3: Put the fabric in the hoop
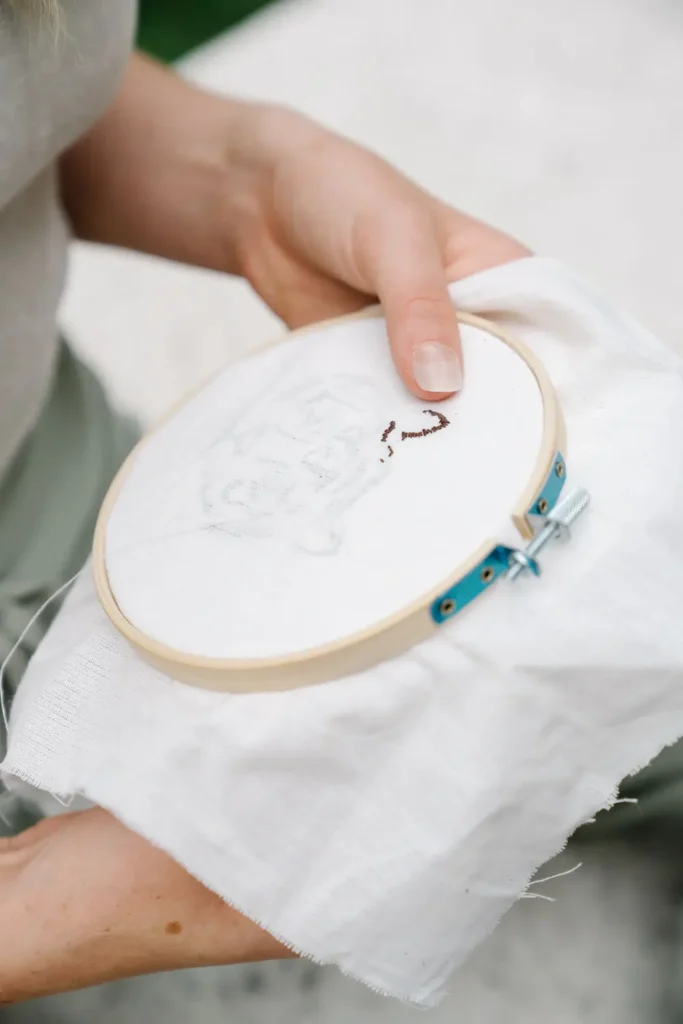
Loosen the screw and separate the two rings. Lay the inner ring on a table, center the design over it, press the outer ring down over the top and tighten the screw most of the way. Then work around the hoop, gently pulling the fabric edges outward until the surface is taut, and finish tightening.
Tap the fabric with a fingertip. It should sound and feel like a small drum. If it’s slack, your stitches will pull the fabric into ripples. Setting up an embroidery hoop has more on keeping it tight, protecting delicate fabric and using a hoop that’s smaller than your design.
Step 4: Separate the floss and thread the needle
Cut a length of floss about as long as your forearm, roughly 18 inches (45 cm). Longer pieces tangle and wear thin as they’re pulled through the fabric again and again.
Six-strand floss is six fine threads twisted together. For outlines, pull out two strands. Hold the cut end, pick one strand and pull it straight up while the rest of the bundle bunches below; it slides out cleanly. Repeat, then lay the two strands back together. Thread them through the needle and leave a short tail of a few inches.
There’s a neater way to start without a knot, and a few threading tricks, in Embroidery floss basics.
Step 5: Learn four stitches and use them
You can stitch a surprising amount with these four:
- Running stitch: in and out along the line at even spacing. It’s quick and gives a dashed look.
- Back stitch: a solid line. Bring the needle up one stitch length ahead, go back down into the end of the previous stitch, and repeat. Use it for outlines and lettering.
- Stem stitch: a slightly twisted, rope-like line that curves nicely. Use it for stems and flowing lines.
- Satin stitch: straight stitches laid side by side to fill a small shape. Keep the shapes small at first, about the size of a fingernail.
Two more that add a lot for very little effort are the French knot for dots and flower centers, and the lazy daisy for quick petals and leaves. If you want a picture of each, the basic embroidery stitches post shows them stitched out.
Keep your stitches a comfortable length, roughly 1/8 to 1/4 inch (3 to 6 mm). Shorter stitches follow curves more smoothly. Longer ones work on straight lines.
Step 6: Stitch the design in a sensible order
Stitch the outlines and stems first, then the filled shapes, then the details such as knots and tiny highlights. That way the details sit on top and nothing gets squashed.
When you move from one part of the design to another, don’t carry the thread across the back for more than about an inch. A long float on the back can show through light fabric and snag. It’s quicker in the long run to finish the thread off and start again.
To finish a thread, turn the hoop over and slide the needle under three or four stitches on the back, then trim. That’s usually enough to hold it, with no knot needed.
Step 7: Remove the marks and finish the hoop
If you used a water-soluble pen, the lines need water to disappear: dab with a damp cloth or rinse the stitched area in cool water, then let it dry flat. Don’t iron over water-soluble pen lines before they’re gone, because heat can set some of them.
To display the piece, put it back in the hoop centered and tight, trim the excess fabric to about an inch beyond the hoop, and gather or glue it to the back. A felt circle on the back hides everything. How to finish and back an embroidery hoop shows both the gathered method and the glued method.
Common first-project problems
The fabric ripples around the stitches
Usually the fabric loosened in the hoop or the stitches are pulled too hard. Re-tighten the hoop and let each stitch lie flat on the surface instead of tugging it snug. There’s a full checklist in Why is my embroidery puckering?
The thread keeps twisting and knotting
Let the needle hang down every so often so the thread untwists. A shorter length helps too, and so does separating the strands before you start.
The lines look jagged on curves
Shorten the stitches. On a tight curve, stitches as small as 1/8 inch (3 mm) make a smooth line, while long stitches turn a circle into a polygon.
The back looks messy
That’s normal. Unless the back will show, the only things that matter are no long loose loops and threads secured well enough not to pull out.
Where to go next
Once the first hoop is done, the next step is just another small project with one new stitch. Browse the beginner embroidery hub for easy patterns, or try something wearable from the embroidery on clothes hub once you’re comfortable with back stitch and satin stitch.
FAQ
How long does a first embroidery project take?
A simple 4-inch line design usually takes a few hours of stitching, which most people spread over a weekend or a few evenings. Filled designs take longer.
Do I need an embroidery machine to start?
No. Everything in this guide is hand embroidery, which needs only a needle, thread, fabric and a hoop.
Is cross stitch the same as embroidery?
Cross stitch is one type of embroidery, worked as small X shapes on an evenweave fabric such as Aida. The stitches in this guide are free surface embroidery, where you follow lines drawn on ordinary woven fabric.
