

Felt is one of the friendliest fabrics to embroider. It doesn’t fray, so you can cut any shape without hemming it, and it’s firm enough that small designs often don’t need a hoop. Stitch a simple motif on the front, sew it to a back piece, add a little stuffing and a loop, and you have an ornament that’s light enough for any branch and sturdy enough to come out again next year.
This guide walks through the whole process for a classic two-layer stuffed ornament about 3 to 4 inches tall: choosing felt, getting the design onto it, embroidering, joining the edges and adding the hanging loop. A first one usually takes an evening; once you’ve made one, a batch goes much faster. If you’d like pattern ideas before you start, my roundup of embroidered Christmas ornaments by other craft bloggers links to several free and paid designs.
What you’ll need
- Wool or wool-blend felt, about 1 mm thick (two pieces per ornament, plus scraps for appliqué)
- Six-strand embroidery floss in a few colors
- Embroidery or crewel needle, size 5 to 7
- Sharp fabric scissors and small embroidery scissors
- Paper or freezer paper for the template
- Tissue paper or sticky water-soluble stabilizer for transferring the design
- Polyester fiberfill or wool roving for stuffing
- Narrow ribbon, baker’s twine or a length of floss for the hanging loop
- Optional: seed beads, sequins, a 4-inch hoop, fabric glue
Choosing the right felt
Felt quality makes more difference here than anything else. Cheap acrylic craft felt is thin, stretches out of shape as you stitch, and pills when it’s handled. Wool felt or a wool and rayon blend is thicker, holds stitches cleanly and keeps its edge when you cut it. You only need small pieces, so a few sheets of good felt go a long way.
Pick a background color that lets your floss stand out. Red, white and deep green are traditional, but mid tones such as sage, dusty pink or mustard make embroidery easier to see than black or very dark green. Light floss on a dark felt looks lovely but is harder to transfer onto, which comes up again below.
Step 1: Make a template and cut the felt
Draw or print your ornament shape at the finished size: a circle, star, mitten, stocking, bell or tree all work. Keep the outline simple, with no narrow points, because narrow points are hard to stuff and to stitch neatly around.
Cut out the paper template and pin it to the felt, or iron freezer paper (shiny side down) onto the felt so it can’t shift while you cut. Cut two identical shapes, one front and one back. Use long, smooth strokes with sharp scissors for a clean edge rather than lots of small snips.
Many makers embroider the front before cutting it out, which leaves a margin to hold or to hoop. If your design runs close to the edge, do it this way: trace the outline on the felt, stitch the design, then cut on the line.
Step 2: Transfer the design onto the felt
Felt is too thick to trace through with a light source, and pens don’t glide on its fuzzy surface. Two methods work reliably:
- Tissue paper or tear-away: trace the design onto tissue paper, baste or pin it to the felt, stitch through the paper, then tear it away gently. This is the safest choice for acrylic felt and anything you don’t want to get wet.
- Sticky water-soluble stabilizer: print or trace onto the stabilizer, stick it on, stitch through it, then rinse it away in cool water and dry the piece flat. Wool felt can shrink or go fuzzy in hot water or with rubbing, so keep the water cool and press gently rather than scrubbing.
Not sure which suits your felt? The pattern transfer method picker asks a few questions about your fabric and suggests a method, and the full guide to transferring embroidery patterns covers each one step by step.
Step 3: Embroider the front
Use two or three strands of floss for most of the design. Two strands give fine lines and small lettering; three strands fill faster and show up better on darker felt. If you’re new to splitting floss, here’s how to separate strands and start without a knot.
A handful of stitches covers almost every ornament design:
- Back stitch for outlines, branches and lettering.
- French knots for snow, berries, eyes and polka dots.
- Lazy daisy for leaves, petals and holly.
- Satin stitch for small solid shapes like a heart or a star. Keep satin areas small on felt; long stitches can snag when the ornament is handled.
Stitch with a relaxed tension. Felt compresses, and stitches pulled tight sink into it and pucker the surface. A hoop is optional: stiff wool felt is easy to hold in your hand, but a small hoop helps if you’re stitching a larger front before cutting it out. The flower stitch comparison is handy if your ornament has a floral design.
Keep the back tidy and secure each thread end under nearby stitches. Loose tails and knots on the back show up as lumps once the ornament is stuffed.
Step 4: Add beads or appliqué (optional)
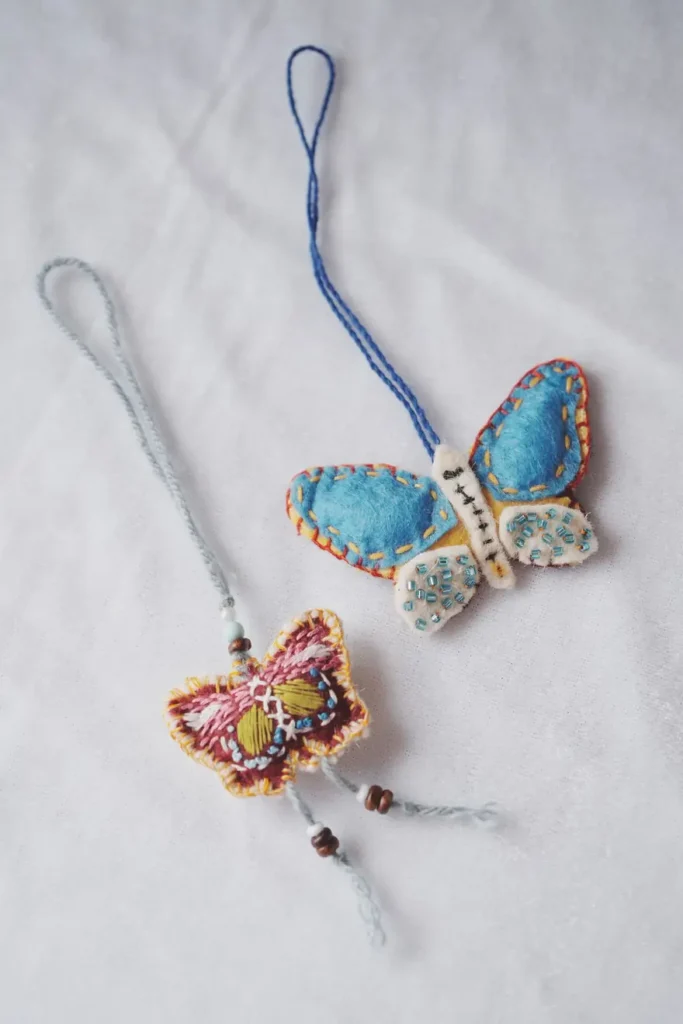
A few seed beads add sparkle to snowflakes, baubles and star tips. Stitch each bead on with two passes of a single strand of matching thread or beading thread, and finish all beading before you join the two layers. The beginner’s guide to bead embroidery explains needle and bead sizes. For appliqué, cut small felt shapes (a hat, a scarf, a heart), hold them in place with a dot of fabric glue or a pin, and attach them with tiny whip stitches or a running stitch around the edge.
Step 5: Join the front and back
Place the embroidered front on top of the back piece, wrong sides together, edges lined up. Pin or clip them, or use a dot of glue in the middle so they don’t slide.
Use two or three strands of floss in a matching or contrasting color and join the edges with one of these stitches:
- Blanket stitch gives the classic finished edge you see on most felt ornaments. Keep the stitch depth even, about 1/8 inch (3 mm) from the edge, and the spacing regular.
- Whip stitch is quicker and less visible in a matching color.
- Running stitch a little in from the edge gives a simple, modern look.
Start at the bottom or side, not the top, and sew around until you have a gap of about an inch left for stuffing.
Step 6: Stuff, add the loop and close
Push small tufts of fiberfill in through the gap with a chopstick or the blunt end of a pencil. Fill the far points first. Stop while the ornament is still soft and slightly flat; overstuffing distorts the shape and strains the edge stitching.
Fold a 6 to 7 inch length of ribbon or twine in half and tuck both cut ends between the layers at the top. Stitch over it a couple of times so it’s anchored through both layers, then continue around to close the gap. Finish by passing the needle between the layers and out through the side, pulling gently, and trimming the thread close so the tail disappears inside.
Putting the loop in as you sew is much stronger than gluing it to the back afterwards, and it means the loop can’t pull out when the ornament is lifted off a branch.
Gifting and packing your ornaments
Felt ornaments travel well. Wrap each one in tissue and pack them flat in a small box so the stuffing doesn’t get crushed. Stitching the year or a name on the back with back stitch turns a simple ornament into a keepsake. If you’re stitching several as gifts before a deadline, my guide to planning embroidered gifts you can finish in time helps you work out how many you can realistically make.
Troubleshooting
The felt is stretching or pilling as I stitch
That’s usually thin acrylic felt. Switch to wool or wool-blend felt, or back the front with a lightweight iron-on interfacing before you embroider to stop it stretching.
My stitches have sunk into the felt
The tension is too tight. Let each stitch sit on the surface, and use three strands for outlines on thick felt so they stay visible.
The two layers don’t line up
Felt can shift and stretch while you embroider. Trim the front to match the back after embroidering (or cut the back from the finished front), then pin or glue before joining.
The blanket stitch edge looks uneven
Mark the stitch spacing lightly with a water-soluble pen or count the felt fibers between stitches. Even depth matters more than even spacing; keep your needle entering at the same distance from the edge.
Stuffing shows through or makes lumps
Use smaller tufts and fewer of them, and add a second felt layer under a light-colored front if the felt is thin.
FAQ
Do I need a hoop to embroider felt?
Not usually. Firm wool felt holds its shape in your hand for small designs. Use a hoop if you’re stitching on a larger piece before cutting it out, or if your felt is thin and soft.
How big should a felt ornament be?
About 3 to 4 inches tall suits most trees and gives enough room for a simple design. Smaller ornaments are quick but fiddly to stuff; larger ones can droop on thinner branches.
Can I wash felt ornaments?
It’s best not to. Wool felt can shrink and acrylic felt pills. Remove dust with a soft brush or a lint roller and spot clean marks with a damp cloth.
How many strands of floss should I use on felt?
Two strands for detail and lettering, three for outlines and filling on thicker or darker felt. Use the same number for the edge stitching or one more for a bolder border.
What’s the best stuffing for small ornaments?
Polyester fiberfill is light and easy to find. Wool roving gives a firmer, more traditional feel. Use a small amount either way; flat, softly filled ornaments hang better.
