
I have been working on tote bag embroidery projects lately and noticed how small changes make a difference.
Placement of the design is one thing I pay attention to since it determines how visible it stays after regular use.
Color choices and thread textures add another layer without requiring fancy stitches.
I collected 25 ideas that focus on these three elements.
They range from basic to slightly more detailed depending on what you want to try.
Circular Wreath Centered on a Canvas Tote
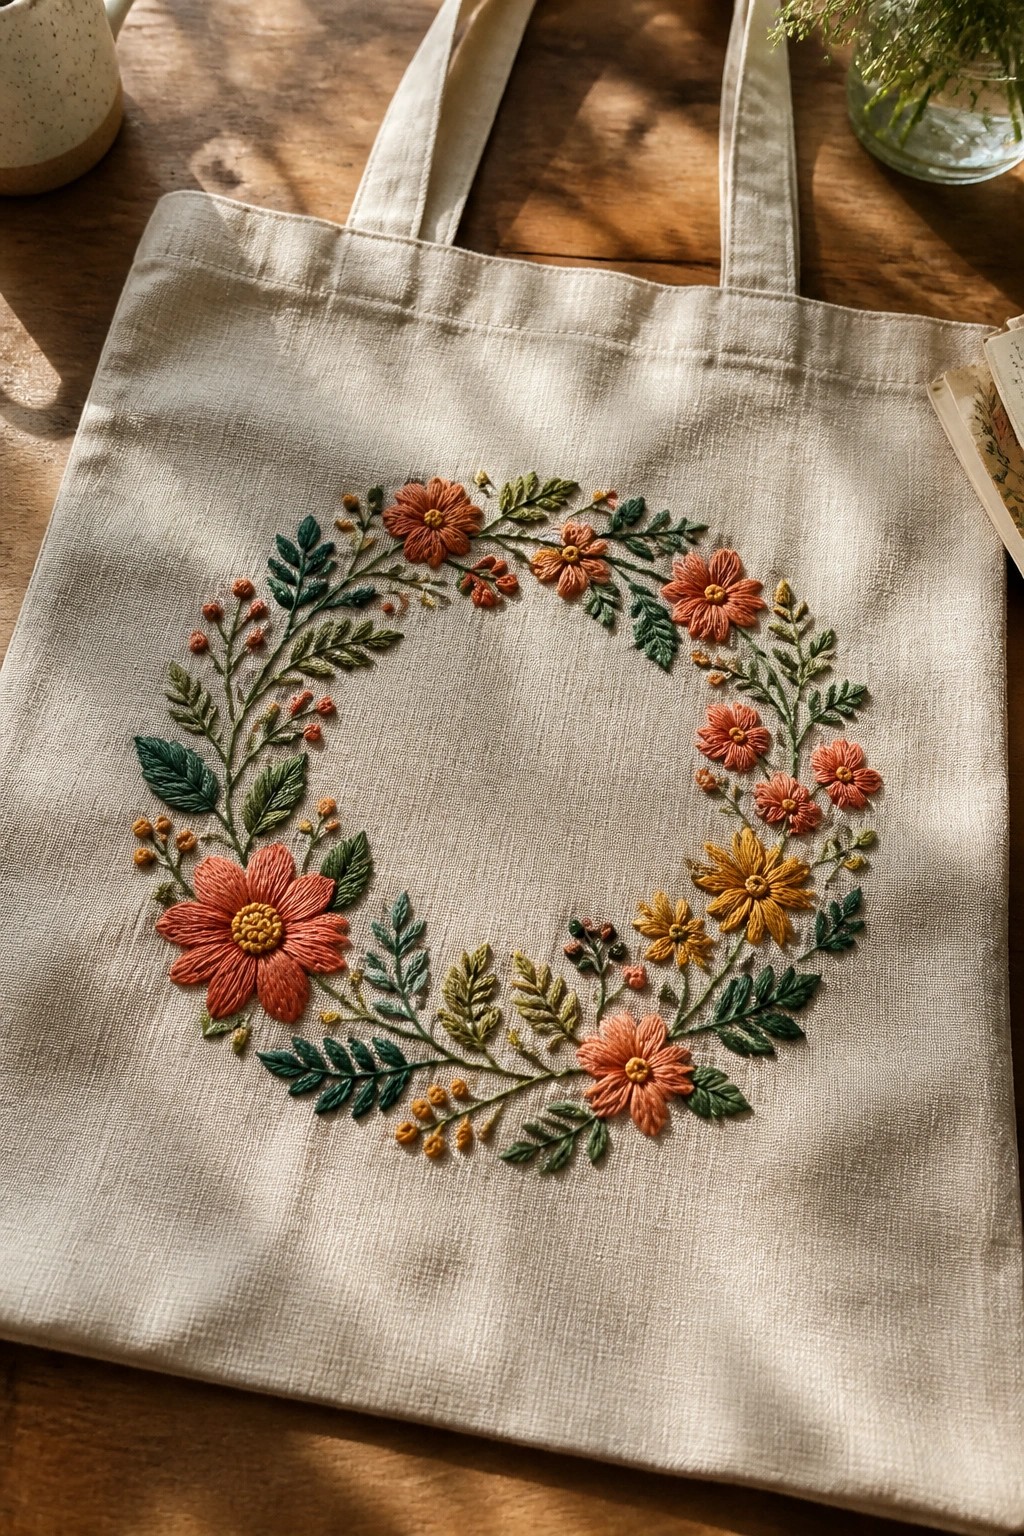
A loose floral wreath made from orange and coral blooms with green leaves forms a partial circle across the front of a canvas tote bag. The design leaves the center open and uses varied flower sizes plus small filler stitches to keep the ring from looking too rigid. Placement right in the middle means the embroidery stays visible whether the bag hangs from your shoulder or sits upright. This approach suits tote bags and similar flat accessories because the scale fills the space without crowding the fabric.
What makes this idea useful is how the open center prevents the stitching from stiffening the bag too much when it is loaded. You could shrink the same wreath for a smaller pouch or repeat just one section along the side seam for a different look. Changing the palette to cooler tones would shift it toward spring use while keeping the same layout. The color contrast against light canvas helps the design read clearly from a distance on social media feeds.
Crab and Shell Cluster for Tote Bags

A crab worked in warm orange tones sits as the main element on a canvas tote, with smaller shells and pebbles stitched in muted shades around it in a loose group. The design stays low on the bag surface so it does not interfere with the main carrying area. The mix of one larger motif and several tiny ones gives the piece a collected look while keeping the overall size small enough for quick stitching. This approach suits tote bags, pouches, or any fabric item where you want a light theme without heavy coverage.
What makes this idea useful is how the scattered layout fits neatly into a corner or side panel of a tote. You can shrink the whole group further to fit on a pocket or enlarge just the crab for a bolder version on a larger bag. Changing the shell colors to match the tote fabric keeps the same idea fresh across different projects. The small scale also makes it simple to repeat on matching items like a zipper pouch or hat for a set.
Repeating Diamonds Along the Tote Strap

A vertical row of diamond shapes embroidered down the center of a tote bag strap turns the handle into the main design element. The pattern repeats at a steady scale that matches the strap width, with the diamonds filled in one thread color and edged in a second for clear separation. This placement keeps the bag body plain while the strap carries the detail, which works especially well on canvas totes meant for daily use.
What makes this idea useful is how the linear layout fits narrow fabric areas without needing extra space. You could shrink the diamonds for a thinner strap or swap the thread colors to match a different bag fabric. The same row of shapes would translate to a crossbody purse handle or even a fabric belt. On Pinterest it stands out because the strap becomes the focal point instead of scattered motifs across the bag front.
Trailing Vine Along the Tote Side

A vertical vine of layered leaves and small clustered stitches runs down one side of a plain canvas tote using soft green threads for the leaves and stems with lighter tones for the clusters. The design sits off-center along the edge rather than filling the main panel. This placement keeps the bag functional while the narrow vertical format adds interest without competing with the tote’s shape or other items inside it.
The placement does a lot of the work here because the side position leaves the front clear for everyday use. You could shorten the vine for a smaller bag or repeat a shorter section on the opposite side for balance. Shifting the greens to brighter tones or adding a second color to the clusters would change the look quickly for different seasons or gift versions. This style shows up well in searches because the clean line stands out against solid fabric without needing dense stitching.
Constellation Design on an Interior Tote Pocket

A simple constellation made from small flower shapes connected by straight lines works well on the front of an inner pocket in a canvas tote. The crescent moon sits to one side with a few scattered dots, keeping the whole pattern contained within the pocket rectangle. Light thread on the same neutral fabric keeps the stitches visible only when the pocket is in use. This approach suits tote bags, pouches, or any fabric item where the interior gets occasional attention without competing with the outside.
The placement does a lot of the work here by turning a plain pocket into the focal point. You could shift the same layout to a makeup bag or the inside of a jacket lining by shrinking the scale. Using a slightly darker thread would increase contrast on light fabric while keeping the delicate look. This idea shows up well in searches because few people expect detailed stitching on the inside of a bag.
Koi Fish on a Denim Tote Pocket
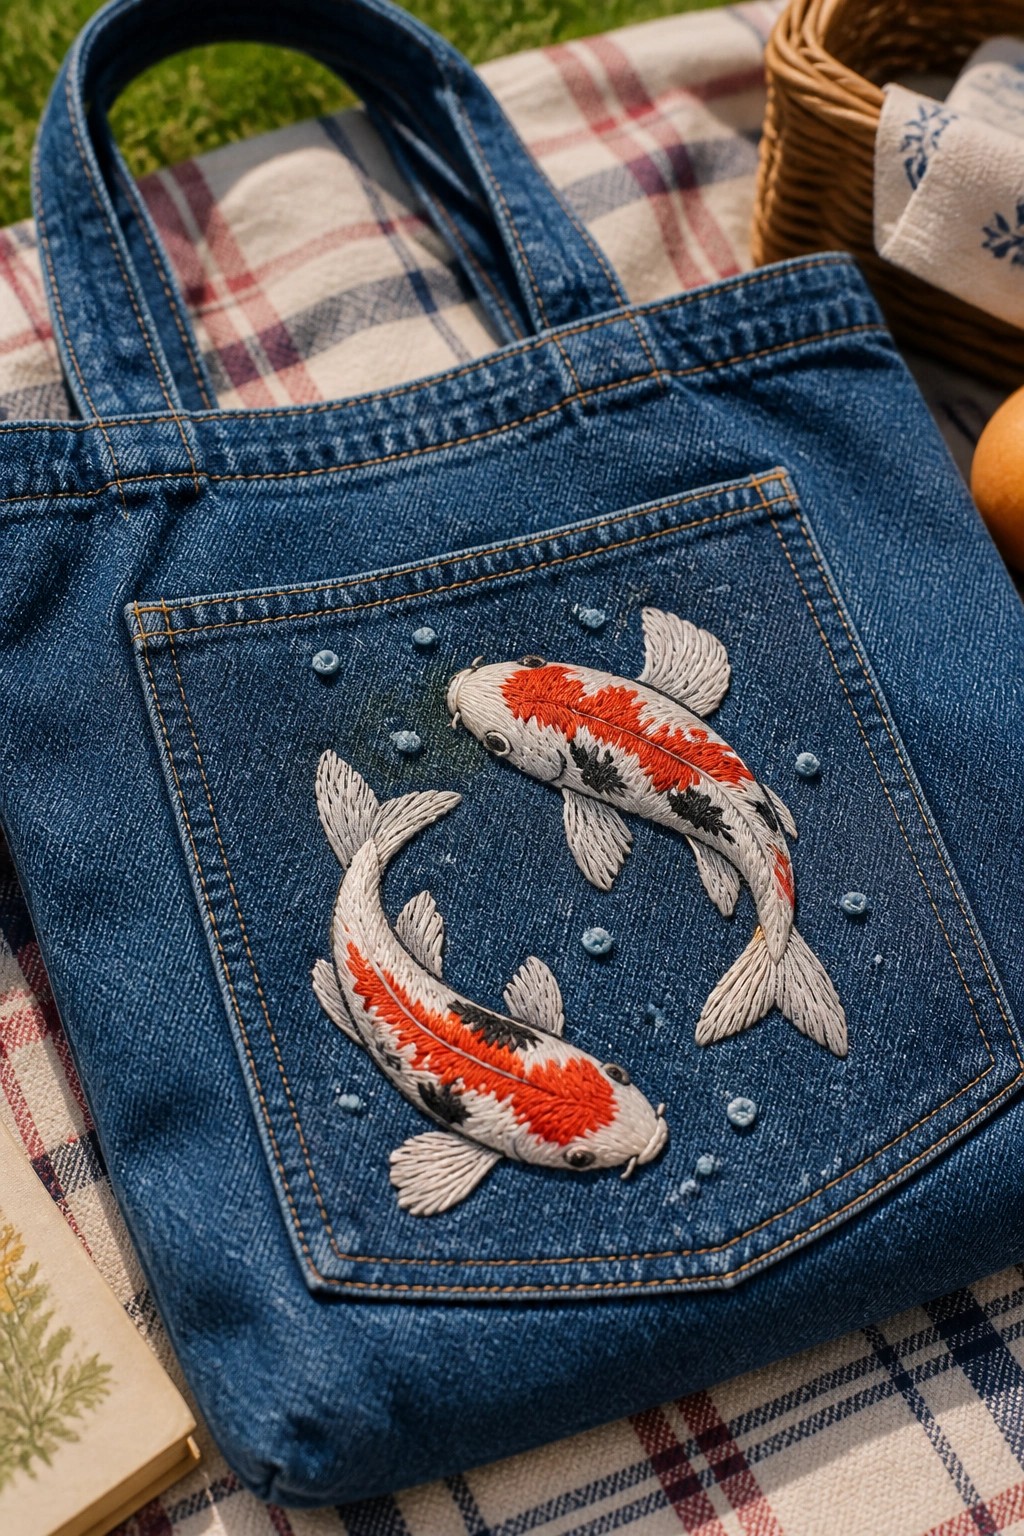
Embroider two koi fish onto the front pocket of a denim tote so the design sits right where the hand rests when carrying the bag. Position one fish higher and angled upward while the second curves below it to suggest motion across the pocket surface. Bright orange sections on the fish bodies create strong contrast against the blue denim, and a few small blue stitches scattered around them hint at water without filling the space. This approach suits tote bags or any accessory where the pocket can serve as a ready-made frame for the motif.
What makes this idea useful is how the pocket edges naturally contain the design and protect the stitches from rubbing against other items. You could change the fish colors to blues or greens for a different fabric tone or shrink the whole layout to fit a smaller pouch or backpack pocket. The simple bubble accents are easy to add or remove depending on how much detail you want. A design like this stands out in photos because the fish break up the solid denim area without covering the entire bag.
Tufted Diagonal Band on a Tote

A wide band of looped tufting runs diagonally across the lower half of a canvas tote in repeating color blocks. The placement keeps the top section plain so the bag remains practical for carrying items while the textured stripe draws attention. Shifting colors from warm yellows into cooler greens and soft pinks creates movement across the surface without needing complex stitching. This style suits tote bags or similar accessories where a single bold strip of texture can replace an all-over design.
What makes this idea useful is the way the tufting sits in one concentrated area rather than scattered motifs. You can adapt the band to run straight across the bottom or shorten the width for smaller bags like lunch totes. Swapping the color sequence for two tones only would simplify the look while keeping the raised texture intact. The strong contrast between the loops and flat canvas helps the design read clearly in photos.
Abstract Contour Lines on a Canvas Tote
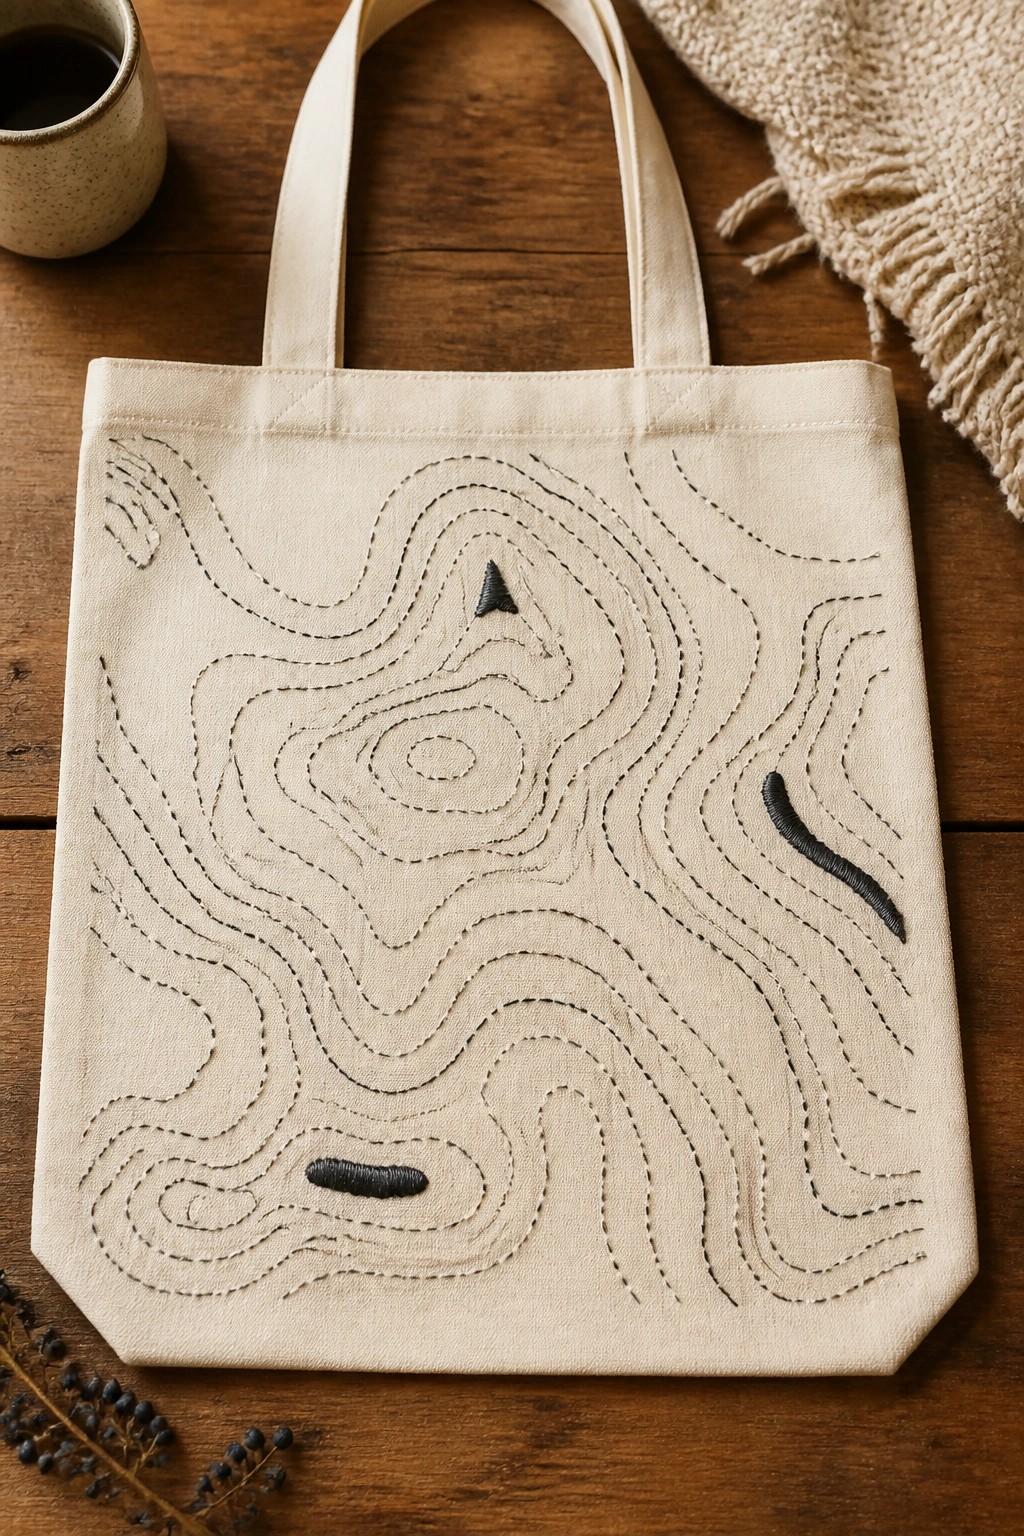
Contour lines form a loose topographic pattern that covers most of the tote’s front panel. The design stays centered with open outlines making up the bulk of the motif and a few solid black shapes placed at different points to break up the flow. This layout keeps the pattern visible even when the bag is carried or folded, and the scale fits the full width without crowding the edges. The approach suits tote bags and other flat fabric accessories where a single large motif can be viewed straight on.
What makes this idea useful is how the open line work leaves plenty of blank fabric between the stitches. You can shrink the whole pattern to fit a pocket or stretch it taller for a taller bag shape. Changing the thread to a single mid-tone color softens the look while keeping the same layout, and adding one extra solid shape in a second color gives the design more weight without redrawing anything. The style shows up well in search results because the simple line structure reads clearly even in small preview images.
Strawberry and Cherry Border on a Canvas Tote

A straight row of strawberries and cherries stitched across the upper section of a tote bag forms a simple repeating border. The fruits sit close together with their stems and leaves creating natural connections between each piece. This placement keeps the embroidery high enough to show when the bag is in use while leaving the lower area plain for carrying items. The idea works especially well on flat accessories like totes or market bags where you want a finished look without heavy coverage.
What makes this idea useful is how the fixed width of the row lets you adjust spacing to match any tote size. You could shorten it to just three or four fruits for a smaller pouch or stretch the same pattern across a wider beach bag. Changing the fruit colors or swapping one type for another keeps the layout fresh without redesigning the whole thing. The compact scale also makes it a fast project when you want visible results in one or two evenings.
Gradient Stripe on a Canvas Tote

A wide horizontal band of blended thread colors sits across the upper front of a canvas tote just below the handles. Threads move from pale orange into coral and then deep pink, building a continuous color shift with visible texture from the dense stitching. This placement keeps the design visible when the bag is in use and avoids interfering with the handles or base. The approach suits tote bags, zip pouches, or any flat-sided fabric accessory where a single accent strip adds color without extra motifs.
What makes this idea useful is how the horizontal band relies on color changes rather than a detailed pattern, so it works on different bag sizes. You could shorten the band to the center only or stretch it edge to edge for more impact. Shifting the colors to cooler tones or earth shades would change the feel while keeping the same layout. The simple stripe also photographs cleanly, which helps when sharing finished projects online.
Mixed Shape Patches with Botanical Motifs
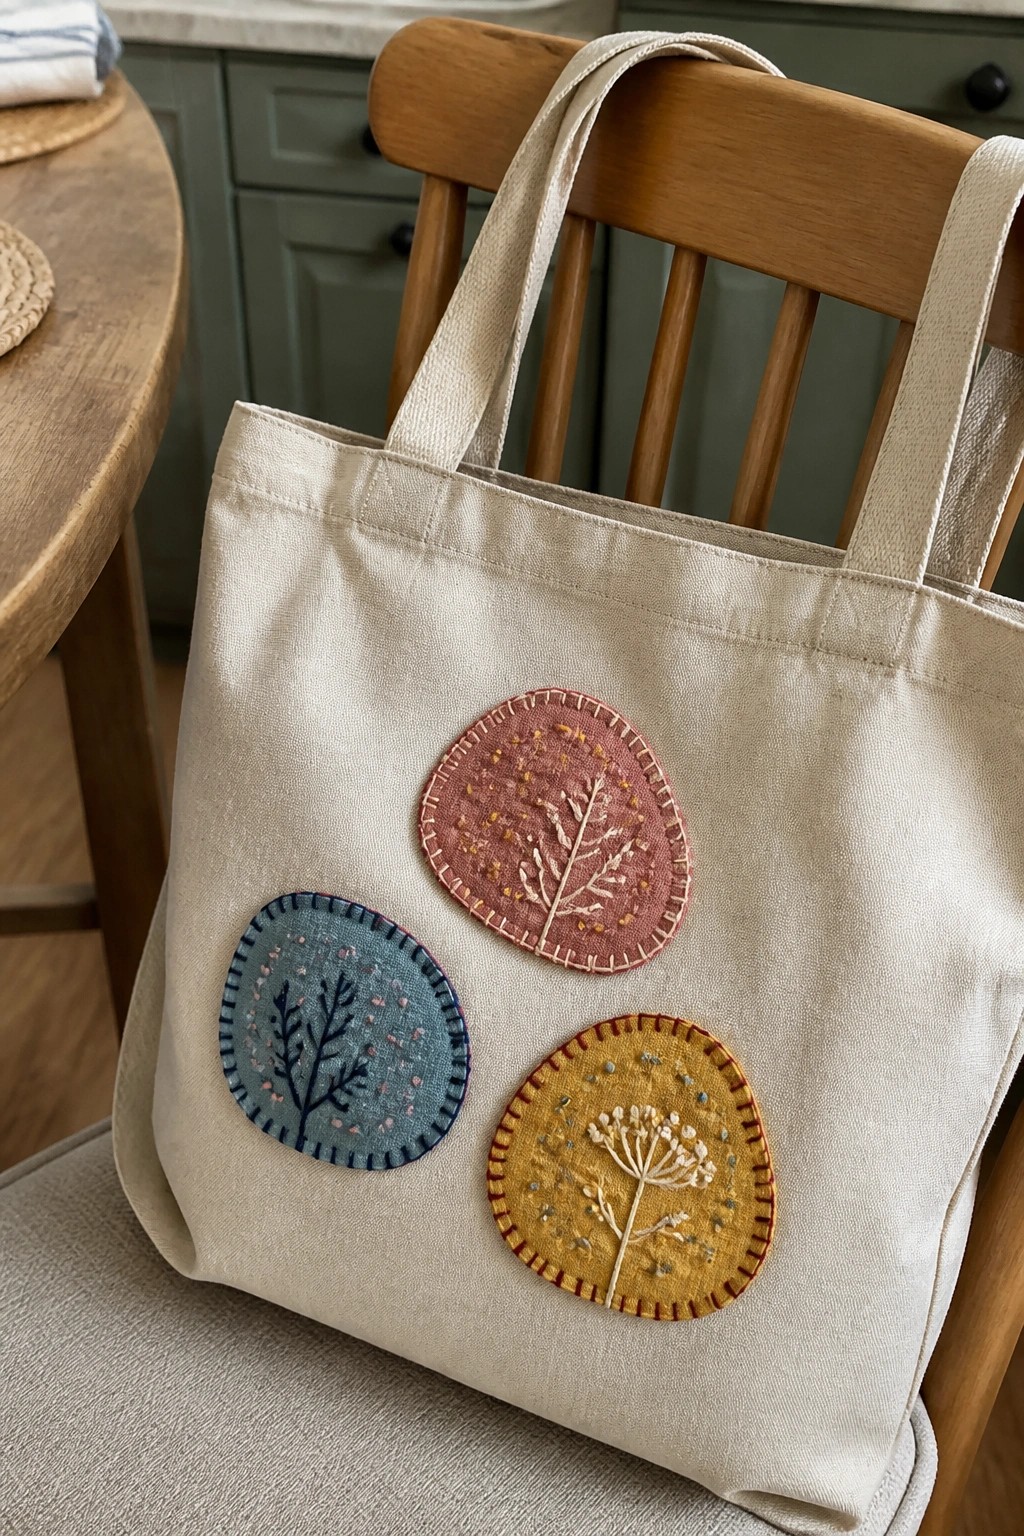
Three fabric patches in round and oval shapes carry simple plant outlines stitched in contrasting thread colors. The patches sit in a loose grouping across the front of a natural canvas tote, leaving most of the bag plain. Using separate patches lets the maker vary shape, color, and density without covering a large area at once. This layout suits tote bags, market bags, or any accessory where you want quick visual impact with limited stitching time.
The placement does a lot of the work here because the patches can be arranged or rearranged before final sewing. You could shift them to one side of the bag or line them up vertically for a different effect. Changing the patch fabric colors or thread shades would let the same motifs work on darker or brighter bags without starting over. The small scale also makes it simple to try the idea first on a scrap before moving to the finished tote.
Circular Motifs in Colored Borders on a Tote Bag

A ring of nine small embroidered circles, each holding a different nature motif like an acorn, bee, daisy, strawberry, or mushroom, creates the main design on this canvas tote. Each circle uses its own thread color for the border, which keeps the individual motifs distinct while forming one larger pattern. The compact size and even spacing let the design sit neatly in the center without crowding the bag surface. This approach suits accessories that get carried around, since the repeated round format reads clearly from a distance.
The placement does a lot of the work here because centering the ring on the bag face keeps it visible in use. Swapping the motifs for other small shapes or shifting the border colors to a single palette makes the same layout work on a smaller pouch or jacket pocket. The idea stands out on Pinterest because the tidy grid of circles gives an instant sense of order that photographs cleanly against plain fabric.
Sunflower Motif Centered on a Tote Bag
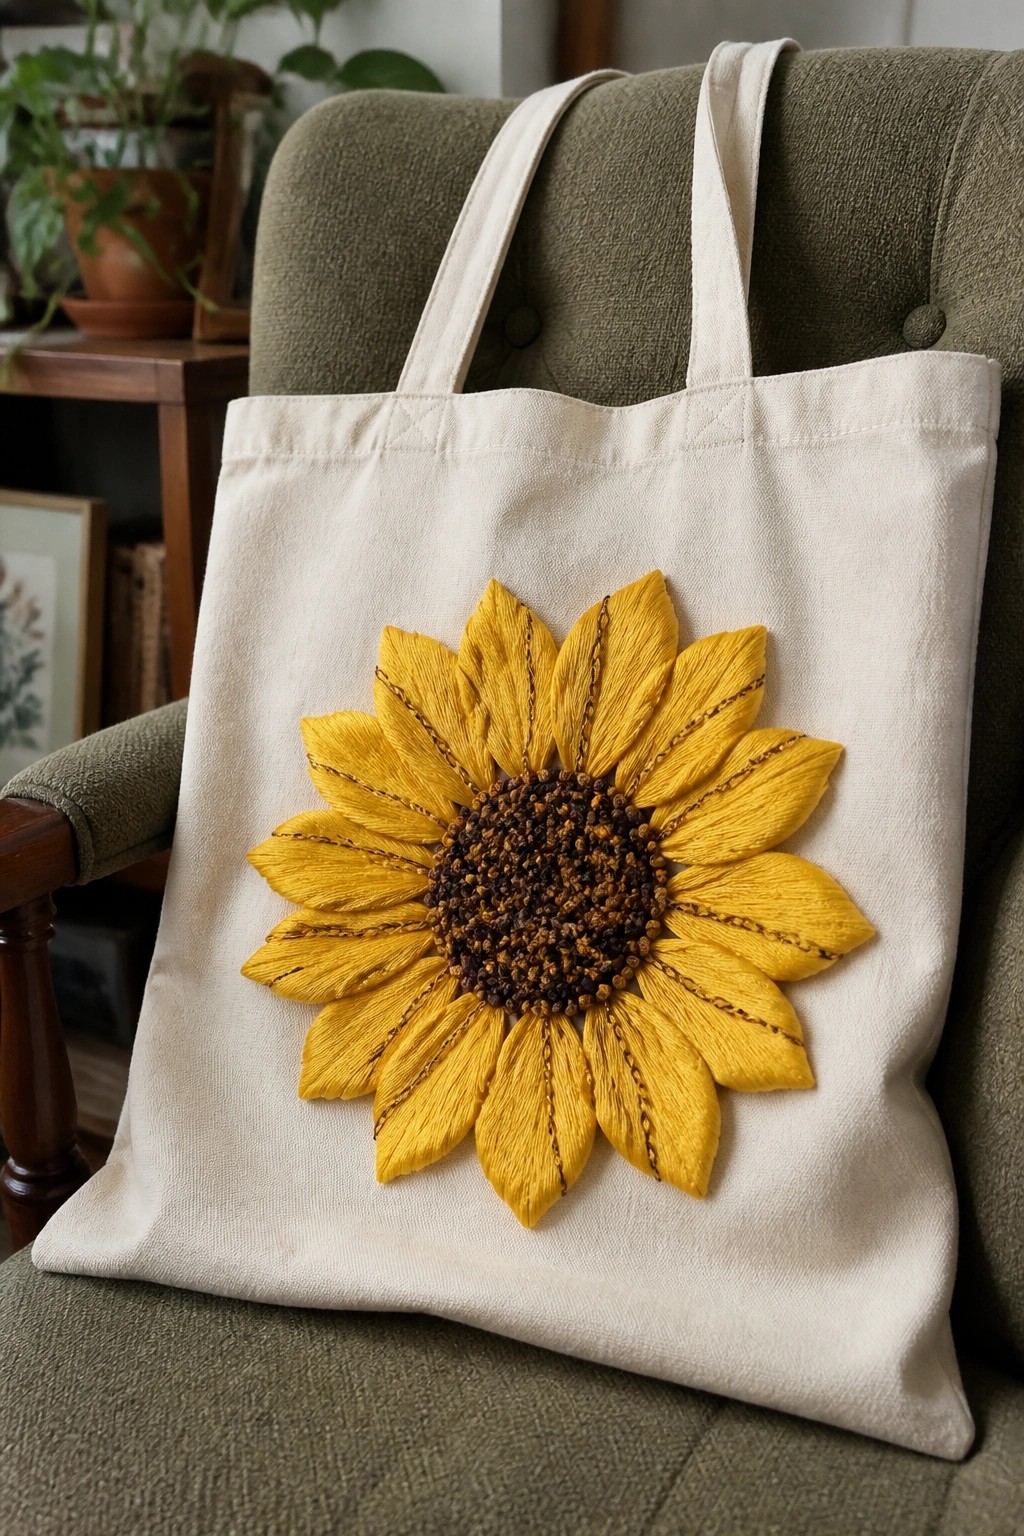
A large sunflower makes an effective focal point when stitched directly onto the front of a plain canvas tote. The yellow petals radiate outward with visible texture while the darker center creates strong contrast against the light fabric. This central placement keeps the bag usable for everyday carry without interfering with the handles or opening.
What makes this idea useful is how easily the motif adapts to different bag sizes. You can shrink the scale for a smaller pouch or swap the yellow for other bright tones if you want it to match a specific season or outfit. The design also translates well to similar flat surfaces like a zippered pouch or market bag since the open center and radiating shape stay readable from a distance.
Corner Fox Motif on a Canvas Tote
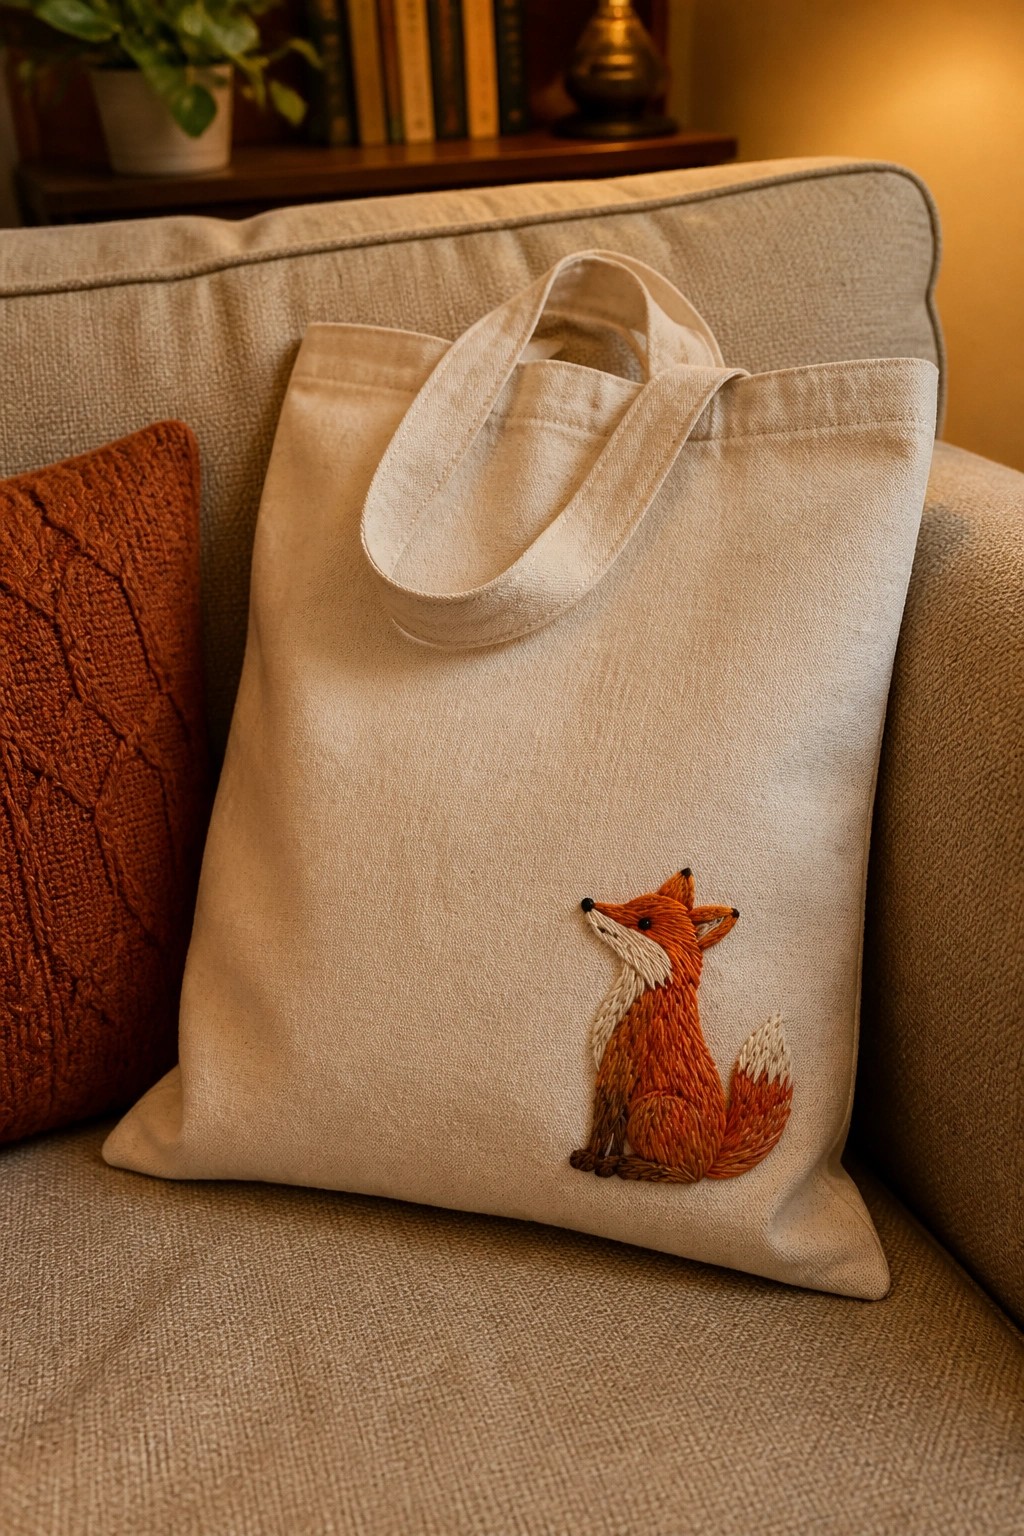
A small fox worked in orange, rust, and cream threads sits in the lower right corner of a plain canvas tote. The design stays compact so it does not interfere with the bag’s main carrying area. Layered thread builds the animal’s shape and tail without dense filling, which keeps the fabric flexible. This layout works well on any reusable tote or market bag that needs a single, clear accent.
What makes this idea useful is how the off-center placement leaves the rest of the bag open for daily use. The same small scale transfers easily to a lunch bag, a pencil case, or the pocket of a jacket. Swapping the fox for another simple animal silhouette keeps the corner layout while changing the theme. On Pinterest this kind of contained motif shows up clearly in search results without needing extra props.
Scalloped Wave Border Along the Tote Rim

A scalloped wave border stitched right below the top edge of a tote bag adds a narrow decorative band without covering much fabric. The design runs a continuous wavy line in several earth tones, then adds small round accents in different sizes and shades along both sides of the line. This placement keeps the embroidery visible whether the bag hangs or sits open, and the dots break up the line so the pattern reads as texture instead of a solid stripe. The same idea suits any flat tote or market bag where you want a finished look near the opening.
What makes this idea useful is how the narrow band leaves the rest of the bag usable for daily wear. You could shift the border lower on a taller tote or run a shorter version across one side panel only. Changing the dot colors to match a different fabric or stretching the wave wider would adjust the look without changing the basic layout. The contained scale also makes it simple to finish quickly on a single afternoon project.
Abstract Geometric Blocks on a Canvas Tote
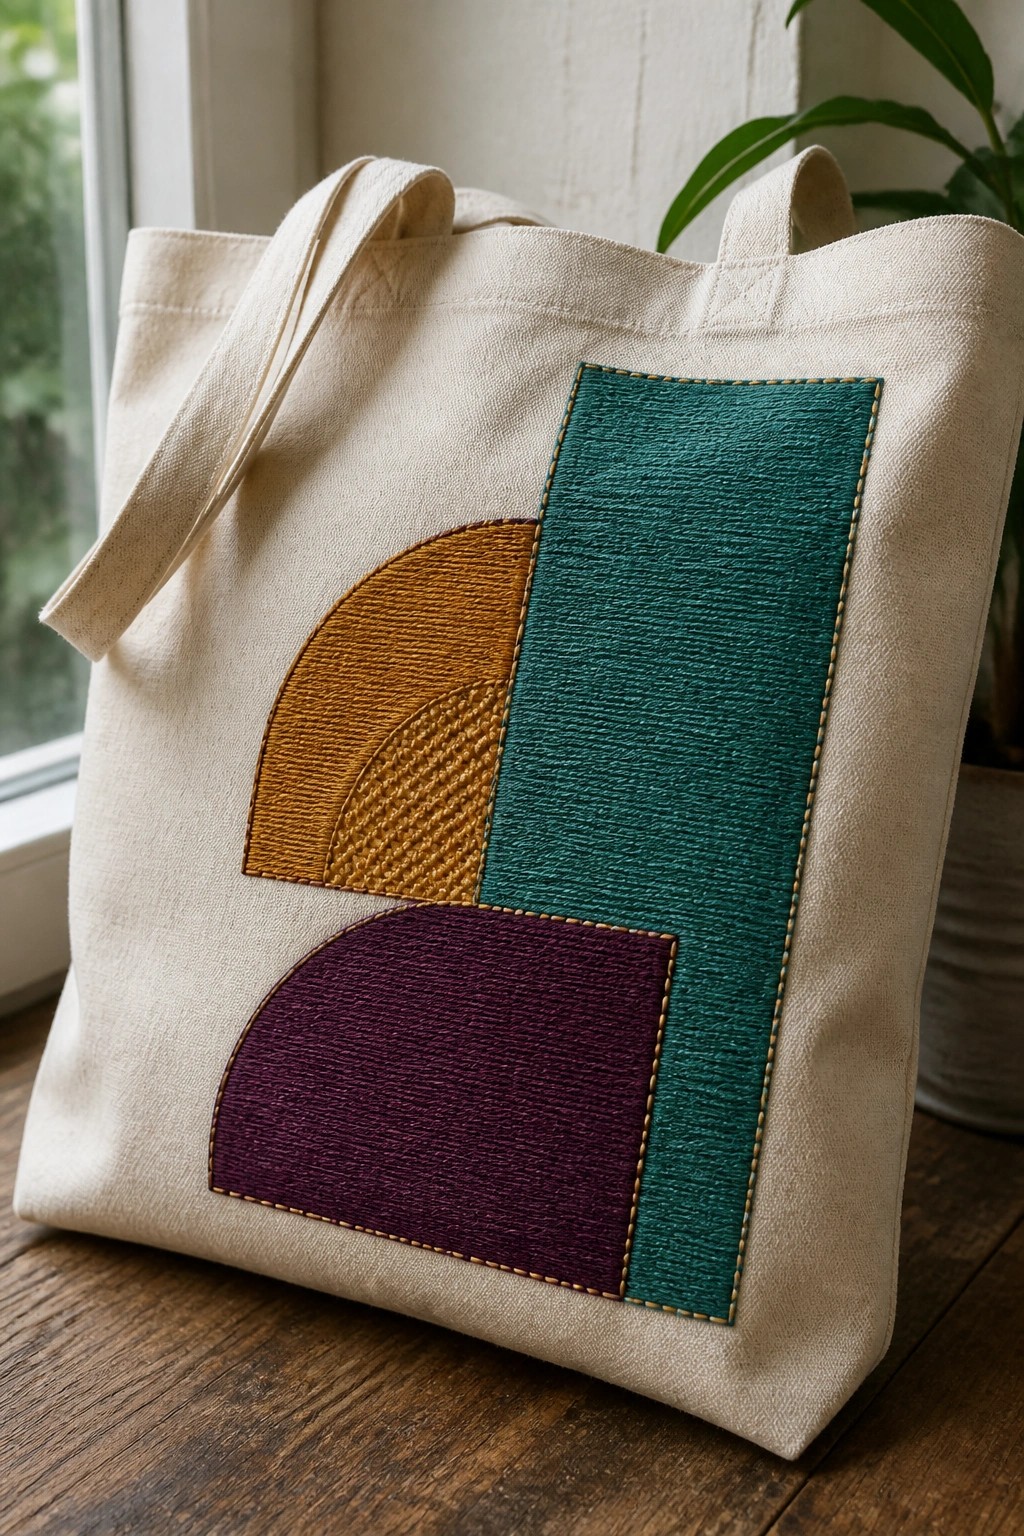
Three bold shapes form the core of this design: a tall rectangle paired with two curved forms that sit side by side on the front of a tote bag. The shapes are filled with dense stitching and edged in a lighter thread that defines each block against the natural canvas. Placing the design slightly off-center leaves room for the bag to carry items without covering the embroidery. This layout works especially well on flat surfaces like totes, market bags, or zip pouches where the fabric stays smooth.
The placement does a lot of the work here because the large scale lets the color blocks read clearly even when the bag is in motion. You can adapt the same shapes by shrinking them for a smaller pouch or stretching the rectangle taller to fit a taller tote. Changing the three colors to a different trio keeps the structure intact while shifting the overall look for different seasons or recipients. Designs built from simple overlapping forms like these tend to photograph cleanly, which helps them perform well when shared online.
Herb Rows on a Tote Pocket

A straight row of small embroidered herbs and leaves sits across the center of a tote bag pocket. The design mixes narrow upright shapes with a few fuller ones in muted greens and browns, keeping the pattern narrow enough to fit the pocket width without crowding. The even spacing and slight color shifts give the row a natural but orderly look that reads clearly from a distance. This approach suits reusable shopping bags or market totes where the embroidery needs to stay practical and visible during daily use.
What makes this idea useful is how the pocket placement keeps the stitching protected from wear while still showing it off. You could swap the herbs for other simple repeats like wheat or ferns, or shift the whole row lower on the pocket if you want room for a monogram above it. The narrow scale also makes it easy to try on a smaller crossbody bag or the side panel of a larger tote. Color changes would stand out more on a darker fabric, while keeping the same muted palette works best on natural canvas.
Layered Waves Across the Base of a Canvas Tote

Horizontal rows of flowing stitches in shades of blue create a wave motif that runs along the bottom half of the tote. White looped accents sit on top of the blue lines to suggest foam, while the stitching stays low enough to leave the upper canvas clear for handles and daily use. The design works because the horizontal movement matches the shape of a tote without interfering with the opening or straps.
What makes this idea useful is how easily the wave rows can be shortened or lengthened to fit different bag widths. The same layout translates well to smaller pouches or the lower edge of a jacket, and swapping the blues for greens or grays keeps the texture while changing the mood. On Pinterest the strong color contrast and clear horizontal band help the image read quickly in a grid of other tote projects.
Scattered Star Motifs on a Canvas Tote
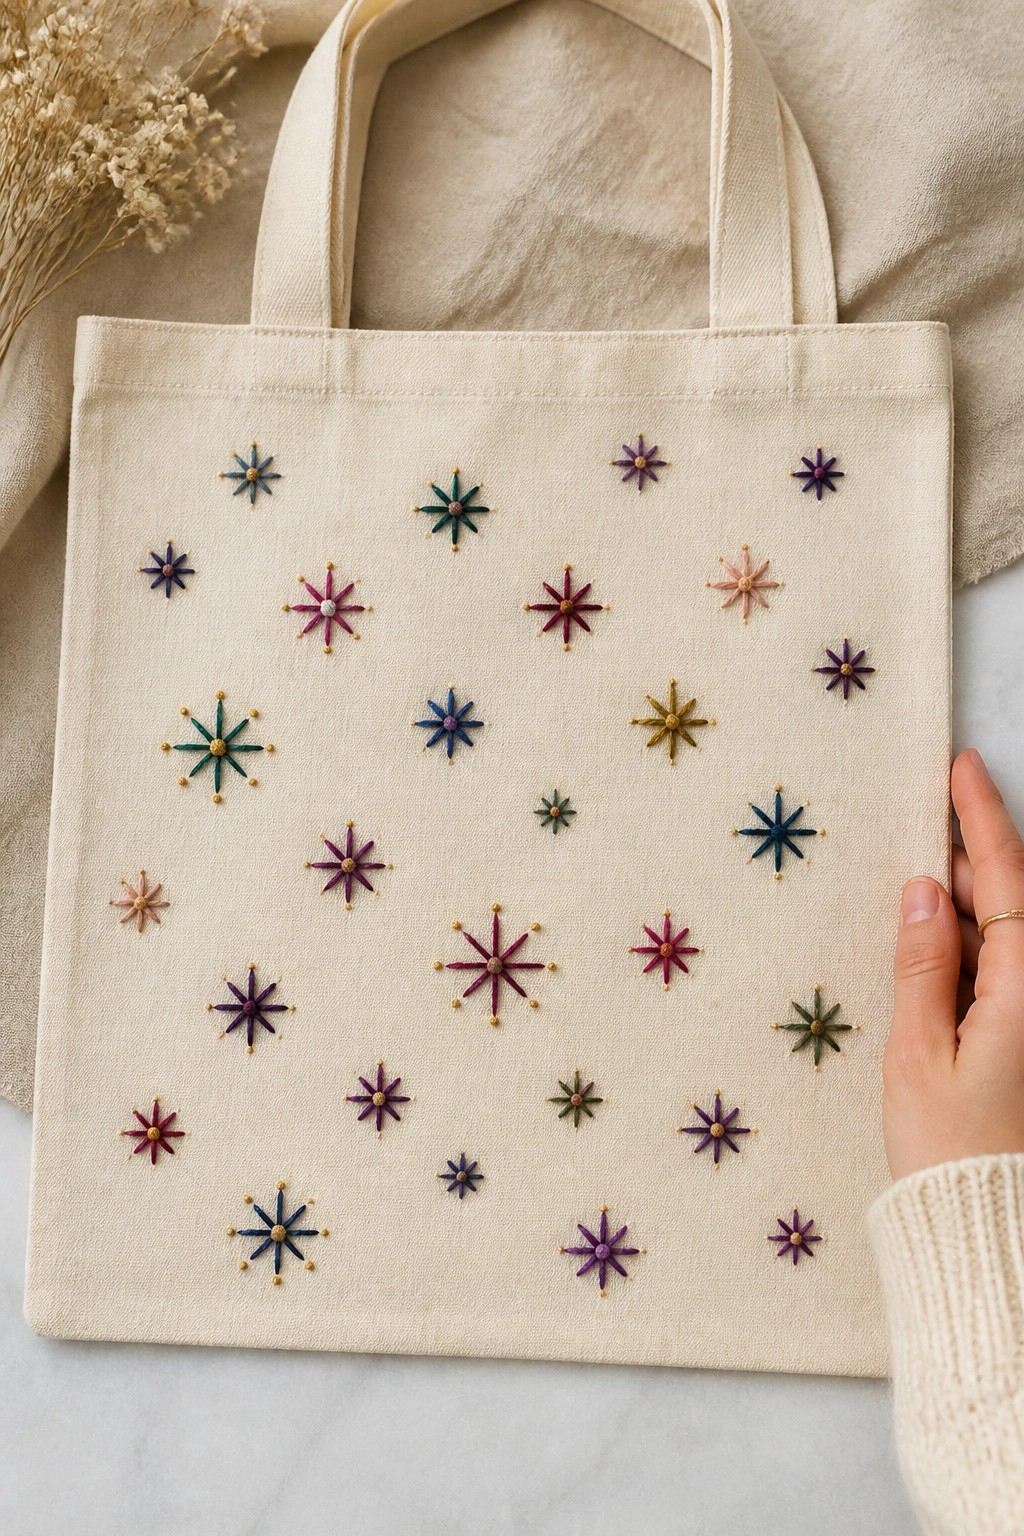
Small star-shaped motifs worked in different colors and sizes sit loosely across the front of a tote bag. The random spacing avoids a rigid grid while still filling the surface evenly. This layout suits flat accessories because the design stays flexible when the bag is carried or folded.
What makes this idea useful is how simple it is to add or remove stars if the bag size changes. You could limit the palette to three colors for faster stitching or cluster more motifs in one corner for a different balance. The same scattered approach transfers easily to a makeup bag or the front of an apron without needing major adjustments.
Concentric Mandala Circle Centered on a Tote Bag
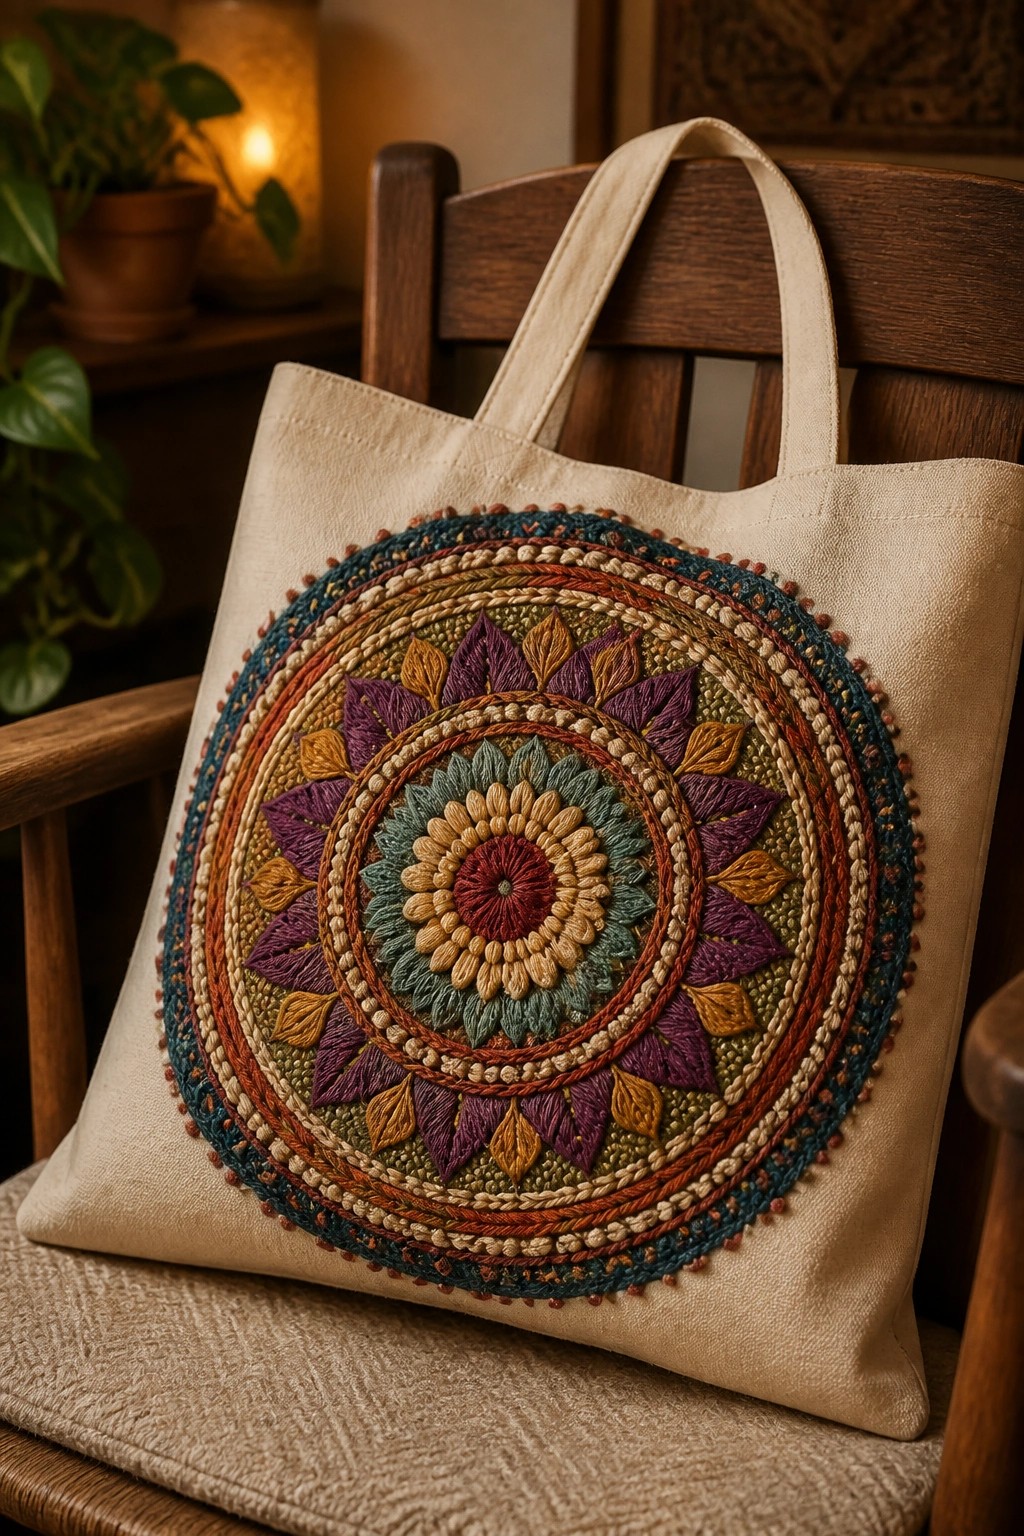
A mandala built from stacked rings and leaf shapes sits directly in the middle of the tote front. The rings graduate in color from the center outward, which keeps the large circle from looking flat. Leaf details between the rings add just enough variation to hold interest across the full width. This placement works best on bags or flat accessories where one strong motif can take up most of the surface.
What makes this idea useful is how the round layout automatically centers itself on a rectangular bag without extra measuring. You could drop the same rings onto a smaller pouch by trimming the outer two circles or stretch the full design across a larger market tote. Switching the outer ring to one solid color would cut stitching time while the inner layers still carry the detail. The balanced circle also photographs cleanly for pattern shares or project roundups.
Square Cross-Stitch Panel Centered on a Tote
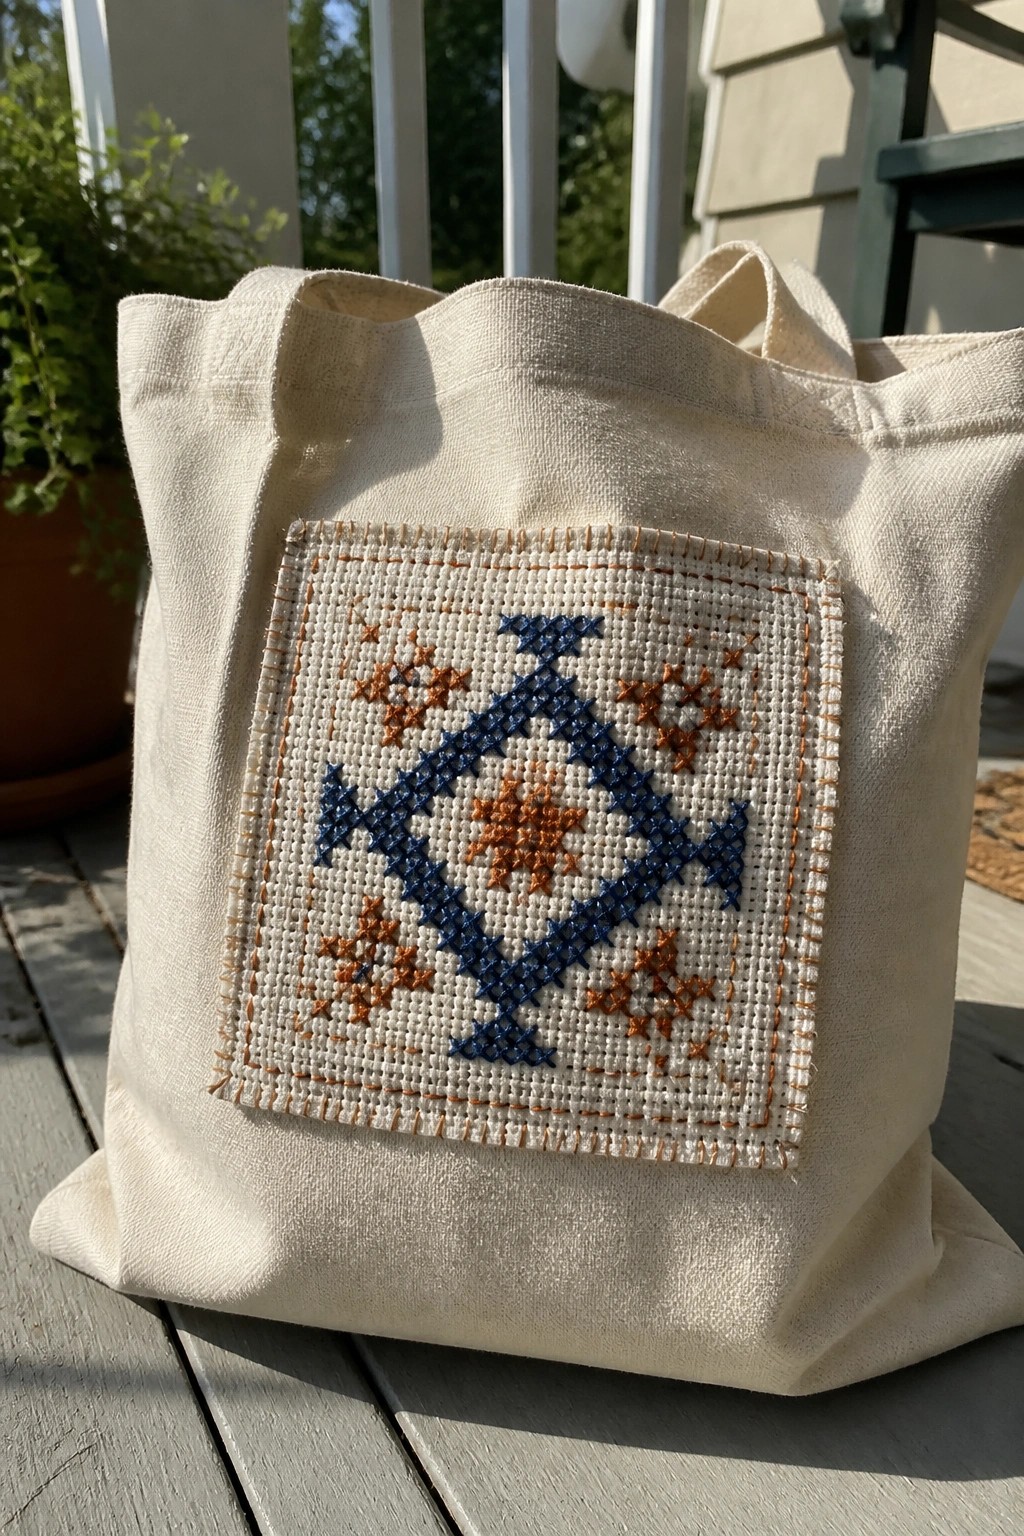
A diamond-shaped geometric motif worked in blue thread forms the center of a square cross-stitch panel, with smaller orange star shapes placed evenly around it. The finished square is stitched straight onto the front of a canvas tote bag and finished with an orange running stitch border. This approach keeps the embroidery contained in one defined area, which works well for bags or other accessories that need a clear focal point without covering the whole surface.
What makes this idea useful is how the square panel functions like a built-in patch that can be moved to other items later. The same motif could be resized smaller for a zipper pouch or notebook cover, and swapping the thread colors would change the look without altering the layout. Central placement on a tote keeps the design visible during everyday use while leaving the rest of the bag plain for carrying.
Beaded Wildflower Bouquet on a Canvas Tote

A loose cluster of small flowers with beaded centers works as a simple motif for a tote bag. The design spreads across the front with green stems that trail toward the bottom edge. Pastel beads on each flower create texture and catch light against the plain canvas. This placement suits bags that get carried often since the stitches stay flat enough for daily use.
What makes this idea useful is how the trailing stems let you stretch or tighten the layout without redrawing it. You can drop the same flower shapes onto a smaller pouch or shift them higher on a larger tote to leave room for a name or date. Changing the bead colors to brighter shades keeps the scale the same but changes the mood for gifts. The mix of beads and basic stem stitches also photographs clearly for sharing.
Leaf Branches Along Tote Bag Edges

Leaf branches stitched in layered greens and browns sit along the top edges of a canvas tote, one cluster on each side just below the handle attachments. The branches angle downward at different lengths to follow the bag’s shape without overlapping the main body. This keeps the embroidery visible during use while leaving the center open for other items or additional stitching. The idea suits reusable shopping bags or project totes where you want a simple natural accent.
What makes this idea useful is how the edge placement avoids the center wear zone on a tote. You could shrink the same branch layout for a smaller pouch or stretch it longer on a larger market bag. Swapping the browns for more greens would shift it toward a summer look, while adding a few extra leaves on one side only would break up the symmetry. The design stands out because it shows a quick way to dress up plain canvas with minimal thread coverage.
Hedgehog and Snail Motifs Spaced Across a Tote Front

Two small animal shapes placed on opposite sides of a tote bag give the design balance without crowding the center. The hedgehog sits lower left with dense, raised stitching that creates a rounded form, while the snail rests lower right with tighter coils in the shell to add contrast in texture. Neutral thread colors keep both motifs from competing with the bag fabric, making the layout practical for an item carried daily.
What makes this idea useful is how the wide spacing leaves room to add a name, date, or small initial in the middle later. You could swap the animals for other simple shapes like a mushroom and leaf or shift both motifs upward to sit just below the handles. Changing the thread to brighter colors would make the same placement pop on a darker bag fabric without needing to enlarge the designs.
Vertical Stack of Framed Motifs on a Tote Bag
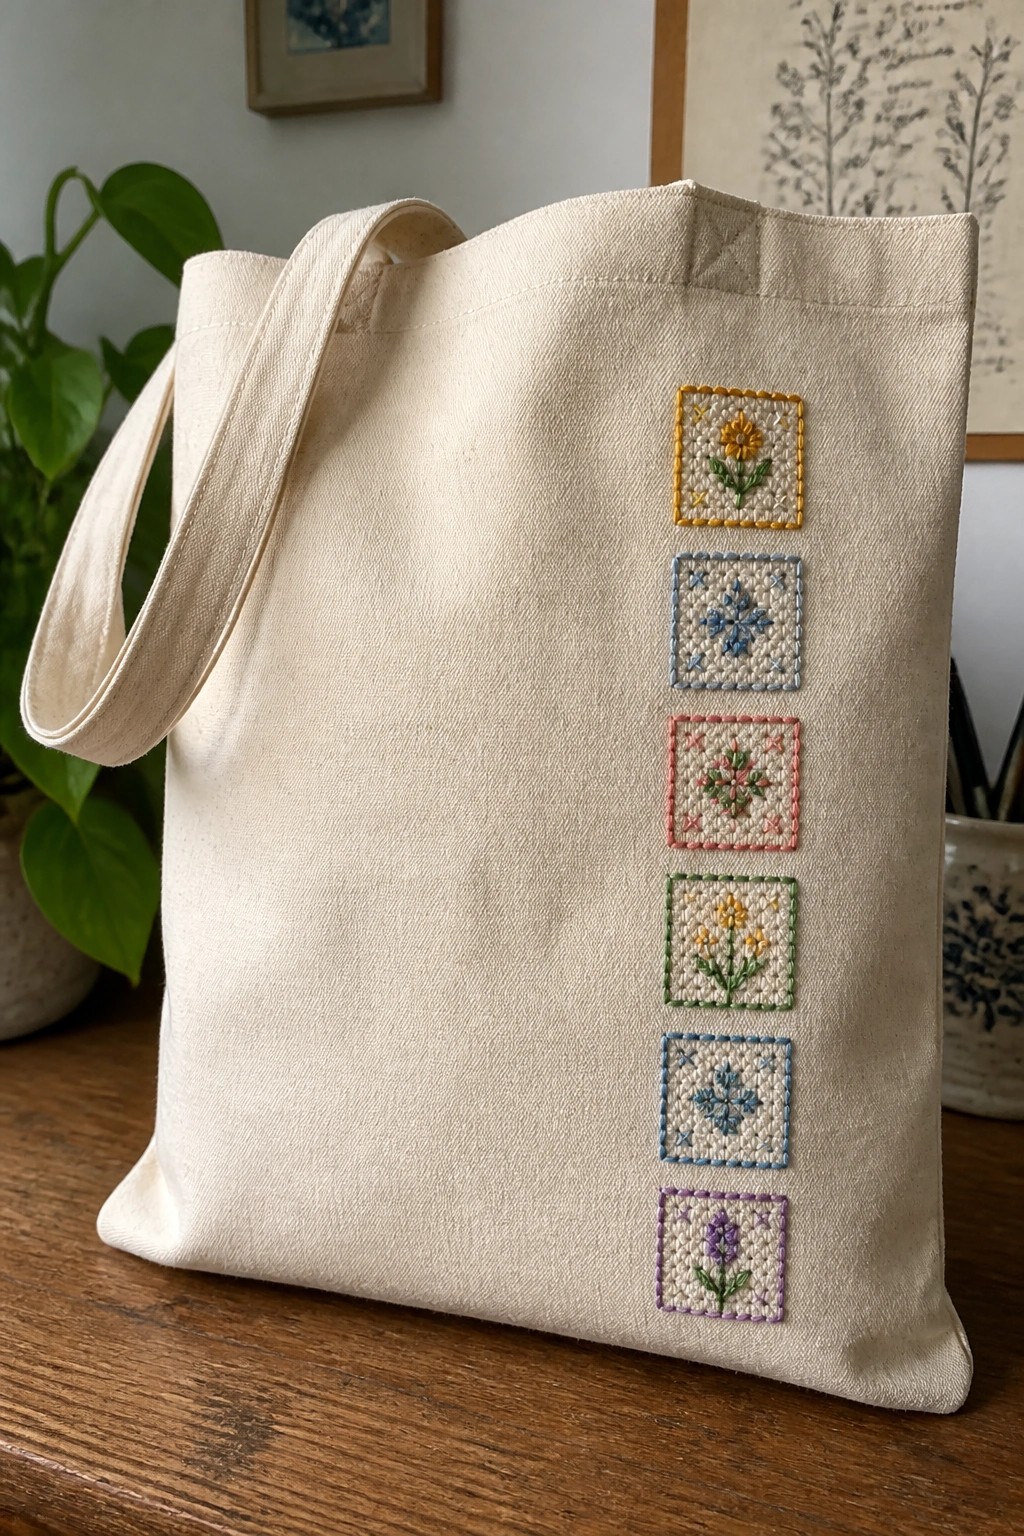
A column of small square motifs runs down one side of a canvas tote, each motif kept inside its own border and worked in a different color thread. The squares sit evenly spaced with simple cross or straight-stitch edges that frame the flowers and geometric patterns inside. This layout keeps several designs visible at once while leaving most of the bag surface plain, so the embroidery stays secondary rather than covering the whole front. The approach works especially well on tote bags or flat fabric pieces that get carried around daily.
What makes this idea useful is that each square can be swapped for a different motif or color without changing the overall layout. You could repeat just two or three squares across a smaller pouch or space them farther apart on a larger market tote. The bordered format also makes it simple to test new thread combinations or patterns in short sessions. On Pinterest the clean vertical line stands out in search results because it reads as both organized and easy to copy at any scale.
Frequently Asked Questions
What types of stitches help create texture on tote bag embroidery designs? Use raised stitches such as French knots, bullion knots, or padded satin stitch to add dimension that catches the light and feels interesting to the touch. These techniques work especially well with the texture-focused ideas in the article because they turn flat motifs like flowers or geometric shapes into elements that stand out both visually and physically on the sturdy canvas of a tote bag.
How should I choose embroidery placement to keep the tote bag functional? Position designs at least two inches from the top edge and handles so the embroidery does not interfere with carrying comfort or get worn down quickly. For the unique placement ideas mentioned, try offsetting a motif toward one lower corner or running a border along the bottom seam to maintain balance while leaving the center area free for everyday use.
Which color strategies make embroidery pop on both light and dark tote bags? On light bags, select deep jewel tones or high-contrast shades such as navy against cream. On dark bags, opt for bright metallics, pastels, or variegated threads that reflect light. Layering two or three shades within the same motif, as suggested in several of the 25 ideas, creates depth without overwhelming the overall look.
What fabric and stabilizer choices support successful embroidery on tote bags? Select tightly woven cotton canvas or linen for the bag itself because these materials hold stitches securely. Use a medium-weight tear-away stabilizer behind the design area to prevent puckering, then remove it gently after stitching. This preparation ensures the placement, color, and texture elements remain crisp even after repeated use and washing.
How do I maintain an embroidered tote bag so the details last? Turn the bag inside out before machine washing on a gentle cycle with cold water, or spot clean by hand when possible. Air dry flat to avoid heat damage to threads. Avoid overloading the bag, which can stretch the fabric and loosen stitches, helping preserve the visual impact of your chosen colors and textures over time.