
I often grab a tote bag when I need something quick to carry because they hold up well and are easy to work on.
Adding a simple animal design through embroidery can make them feel a bit more personal without taking too much time.
I’ve tried a few patterns with cats and rabbits and found they stitch up nicely on most fabrics.
These 18 ideas include different styles and animals that might suit what you are looking for.
Fox Family Trio Centered on a Tote Bag
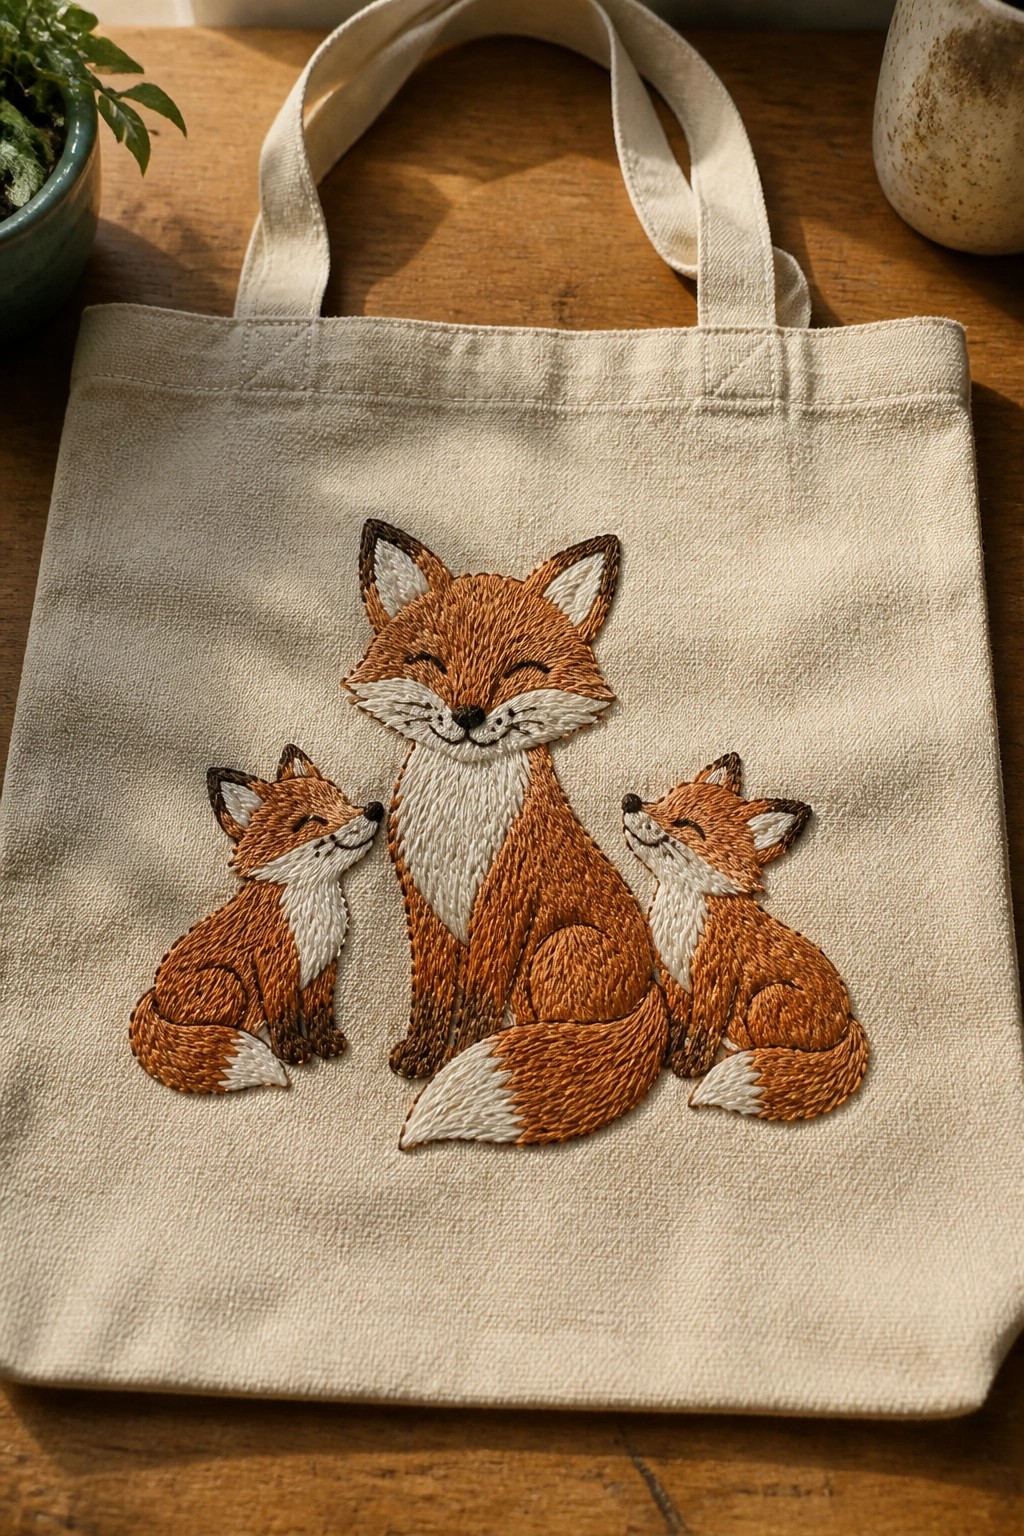
Three seated foxes form the main motif here, with one larger fox placed between two smaller ones on the front panel of a canvas tote. The foxes sit close together in a row, all in similar poses with heads tilted slightly upward. This arrangement fills the space evenly without crowding the bag’s usable area and keeps the stitching contained to one clear focal point. The design suits tote bags, market bags, or any flat fabric item where a simple animal scene can be viewed straight on.
What makes this idea useful is how the three-figure layout can be stretched or compressed to match different bag widths. You could drop one fox to make a two-animal version for narrower surfaces or repeat the smaller foxes along the bottom edge for a border effect. The centered placement works on both light and dark fabrics since the thread colors stay in the brown and cream range. For gifts, the same foxes could shift to a zip pouch or the corner of a tea towel with only minor size adjustments.
Pocket Panda for Denim Totes
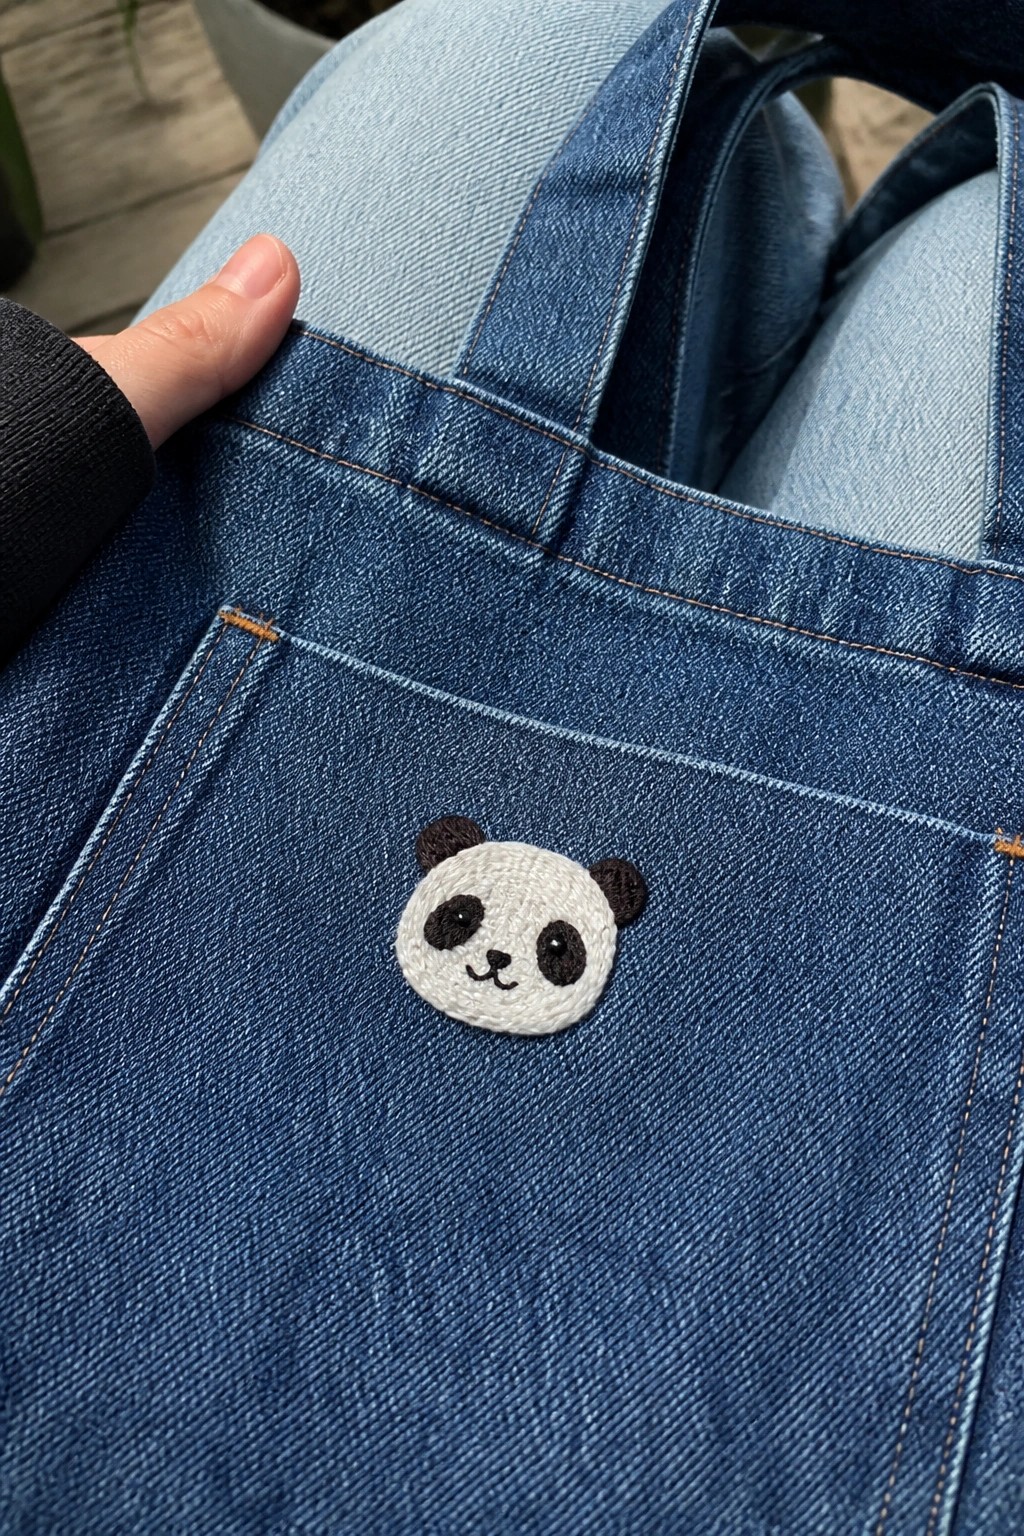
A compact panda face makes a strong focal point when stitched directly onto the front pocket of a denim tote bag. The round white center stands out against the blue fabric, while the small black ears and eye patches keep the whole motif balanced and easy to read at a glance. This placement works because the pocket already creates a natural frame, so the embroidery stays contained without needing extra borders or fabric layers. The idea fits tote bags, lunch sacks, or any sturdy fabric accessory that gets carried around.
What makes this idea useful is how simple it is to shift the same panda onto a bag flap, corner panel, or even a smaller crossbody pouch. You can shrink the scale further to fit multiple pockets on one bag or enlarge it slightly for a bigger tote without changing the basic layout. Switching the black details to a different color lets the design match other bag fabrics while keeping the same contrast that photographs clearly. A design like this works especially well on Pinterest because the round shape and limited color palette stay legible even in small preview images.
Sloth Dangling from a Branch
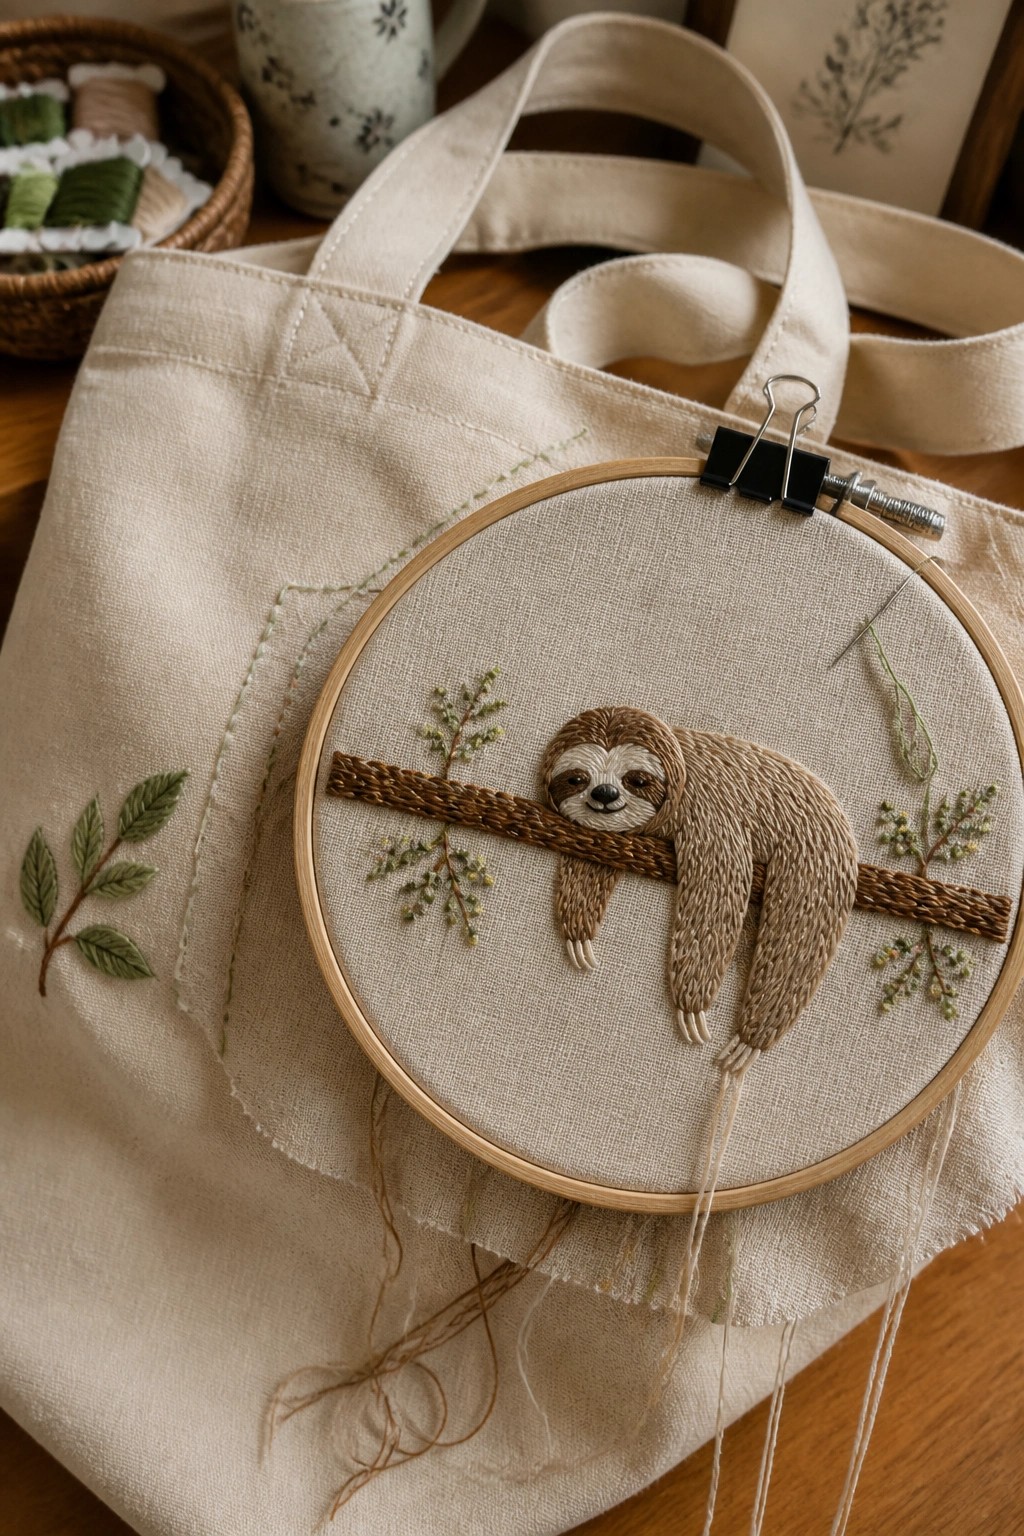
A sloth hanging from a horizontal branch creates a compact motif that fits neatly on the front of a canvas tote bag. Place the branch across the middle section so the sloth body drops downward and the feet stay clear of the bag’s lower edge. Add a few small leafy sprigs on either side of the branch to fill empty space without extending the overall width. This arrangement keeps the design centered and easy to view when the bag is carried.
The branch acts as a built-in guide for placement, so the same pattern can shift to a smaller pouch or a larger market tote with only a change in scale. Switching the thread colors on the leaves gives you a quick way to match different bag fabrics. The compact size also makes it simple to stitch just the sloth and branch on a jacket pocket if a full tote feels too large. What makes this idea useful is how the hanging pose fills the area without extra background work.
Three Chicks Lined Up on a Small Tote Bag

Embroider three small yellow chicks in a straight row across the front of a compact canvas tote. The repeated motif fills the space evenly while keeping the overall design simple and balanced. Yellow thread provides enough contrast on the light fabric so the shapes read clearly from a distance. This layout suits small bags, pouches, or zippered cases where a single line of detail works better than a scattered pattern.
What makes this idea useful is how the row format adapts quickly to different widths. You can move the chicks closer together on a narrower bag or stretch the spacing on a wider one without redesigning the motif. Changing the thread color to soft gray or pale blue shifts the look for different seasons while the same placement stays effective. The small scale also leaves room for a zipper or handle hardware without crowding the embroidery.
Whales Stitched Down a Tote Bag Strap

A repeating row of small whales creates a clean pattern along the full length of a tote bag strap. Each whale is worked in two shades of blue with a white underbelly, and the spouts add a simple vertical element above each one. The narrow scale keeps everything centered on the strap without overwhelming the fabric width. This approach suits bag straps, handles, or any long narrow surface where a single motif can be repeated.
The placement does a lot of the work here because the strap already provides a straight vertical path. You can easily change the number of whales or the spacing to fit shorter or longer straps. The same motif would also transfer well to a bookmark or a fabric belt if you keep the size consistent. Swapping the blue tones for other colors lets the design match different bag fabrics without needing new stitches.
Toucan on a Branch for Canvas Tote Bags

A toucan perched on a short branch with scattered leaves and berry clusters makes a strong motif for a tote bag. The bird sits slightly off-center on the front panel so it remains visible even when the bag is in use. Multiple thread colors on the beak create clear contrast against the black body, which helps the shape stand out on the light fabric without needing extra outlining.
What makes this idea useful is how the branch acts as a built-in base that can be lengthened or trimmed to fit bags of different widths. You could replace the toucan with a similar-sized bird and reuse the berry and leaf layout with minimal changes. The design also works on smaller crossbody bags if you drop the scale by about half, or you can shift the whole motif toward one corner to leave room for a monogram on the opposite side.
Squirrel with Acorn on a Tote Bag
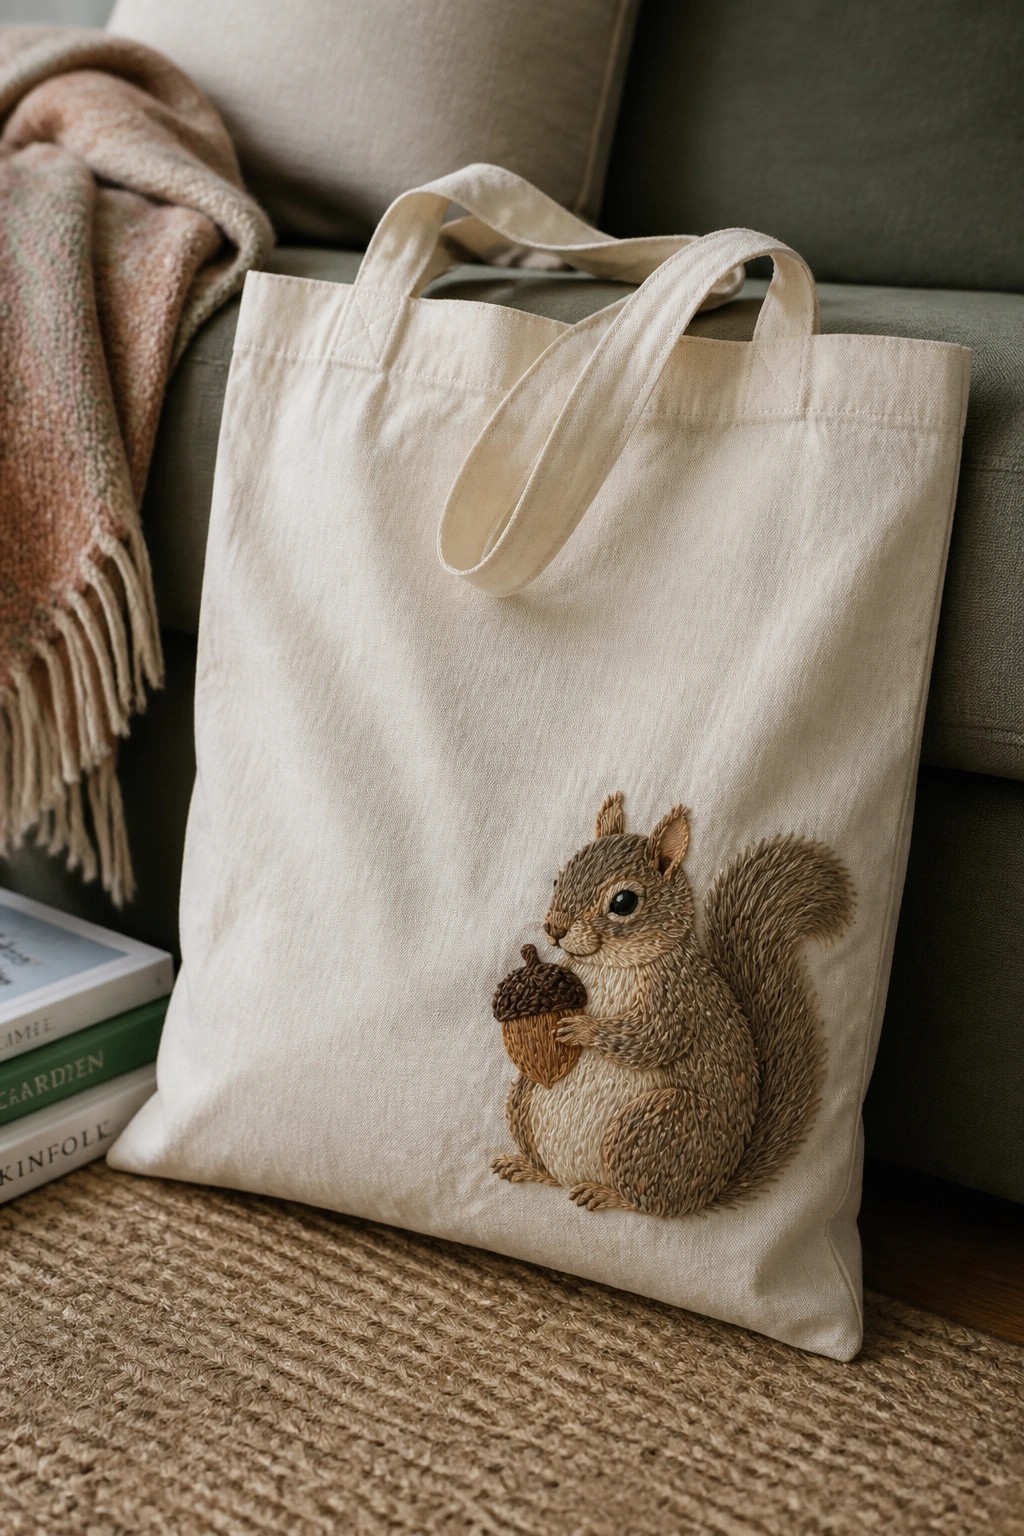
A squirrel clutching an acorn works well as a single motif placed low and off-center on the front of a canvas tote. The design uses layered stitching in brown and gray tones to create texture on the body and tail while keeping the acorn as a clear focal point. This keeps the embroidery compact enough to leave most of the bag surface free for daily use. The placement suits fabric accessories like totes, pouches, or market bags where the motif sits below the main carrying area.
The small scale makes this easy to adapt by shifting the squirrel higher or lower depending on bag size. Changing the thread colors to grays and taupes lets the same design fit cooler-toned fabrics while keeping the acorn in a contrasting brown. It stands out on Pinterest because the single animal fills the space without needing extra elements or borders. This approach also transfers directly to smaller items like zip pouches if you reduce the overall size by about half.
Whale Design on a Striped Tote
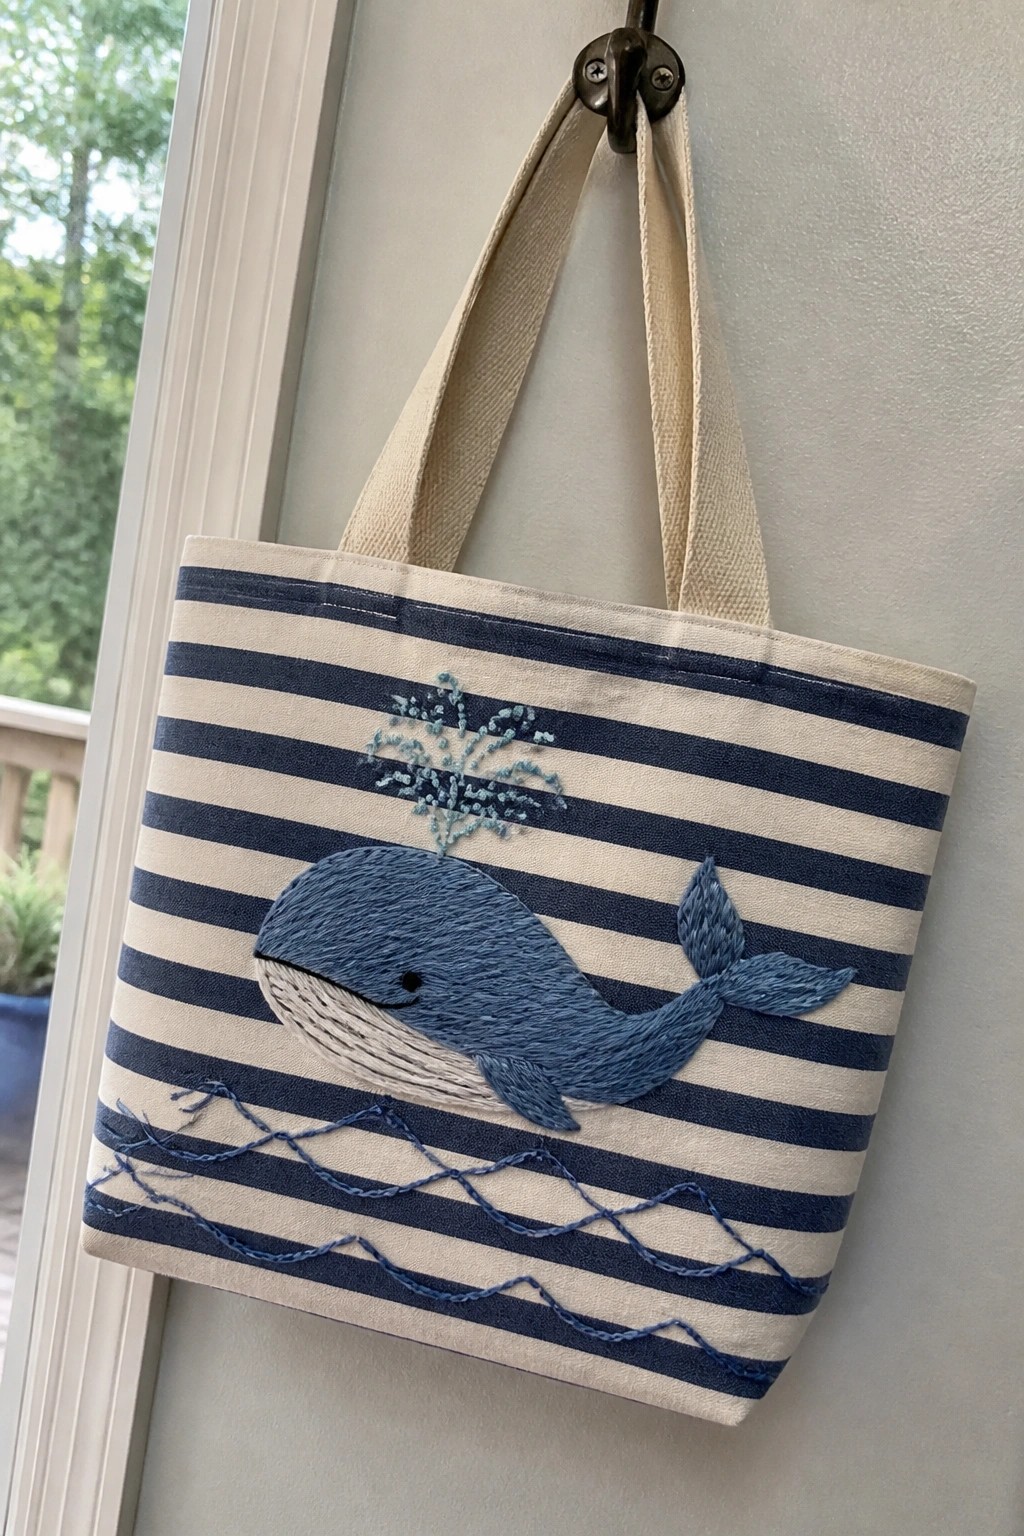
A blue whale worked in solid fill stitching sits across the center of a canvas tote made from navy and cream striped fabric. Simple wavy lines run along the bottom edge to suggest water, while a small cluster of stitches above the whale adds a bit of surface detail without crowding the space. The design uses the bag’s existing stripes as a built-in background, so the whale stands out through color contrast rather than extra outlining. This layout fits tote bags, market bags, or any flat-sided fabric accessory that gets carried around.
The placement does a lot of the work here because the whale sits at eye level when the bag is in use. You can shift the same motif onto a smaller pouch by reducing the scale and keeping only the whale and one wave line. Changing the thread color to match a different stripe palette keeps the idea fresh without redrawing anything. The design also translates easily to a solid-color bag if you want the stripes to become part of the stitching instead of the background.
Llama with Striped Blanket on a Burlap Tote
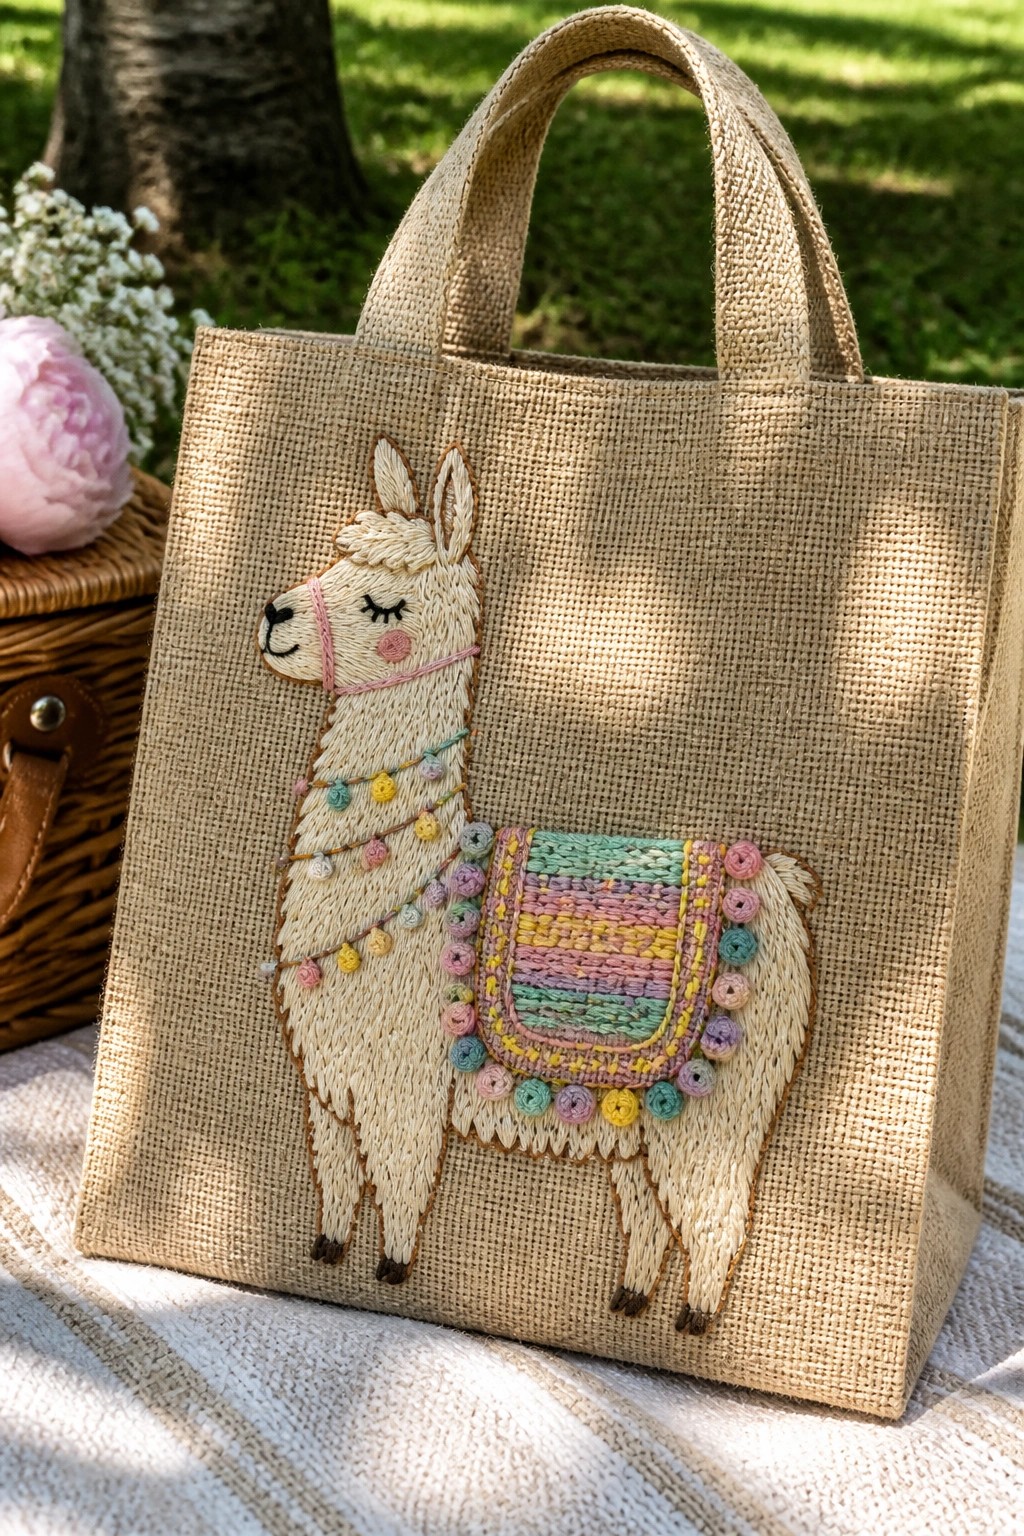
A full-body llama makes a strong motif for a tote bag when the body is outlined in matching thread and filled with straight stitches to suggest texture. The design sits on the front panel with a small striped blanket across the back and two rows of circular stitches forming garlands along the side. The neutral burlap lets the pastel threads in the blanket and trim show clearly while the llama’s legs and head reach toward the edges of the space.
What makes this idea useful is how the blanket gives you an easy spot to change colors without redrawing the animal. You could move the same llama to a smaller pouch or lunch bag by dropping the garlands and keeping just the blanket. The off-center placement also leaves room on the right side for a short name or date if you want to mark the bag for a specific person.
Row of Three Dancing Cats on a Tote Bag
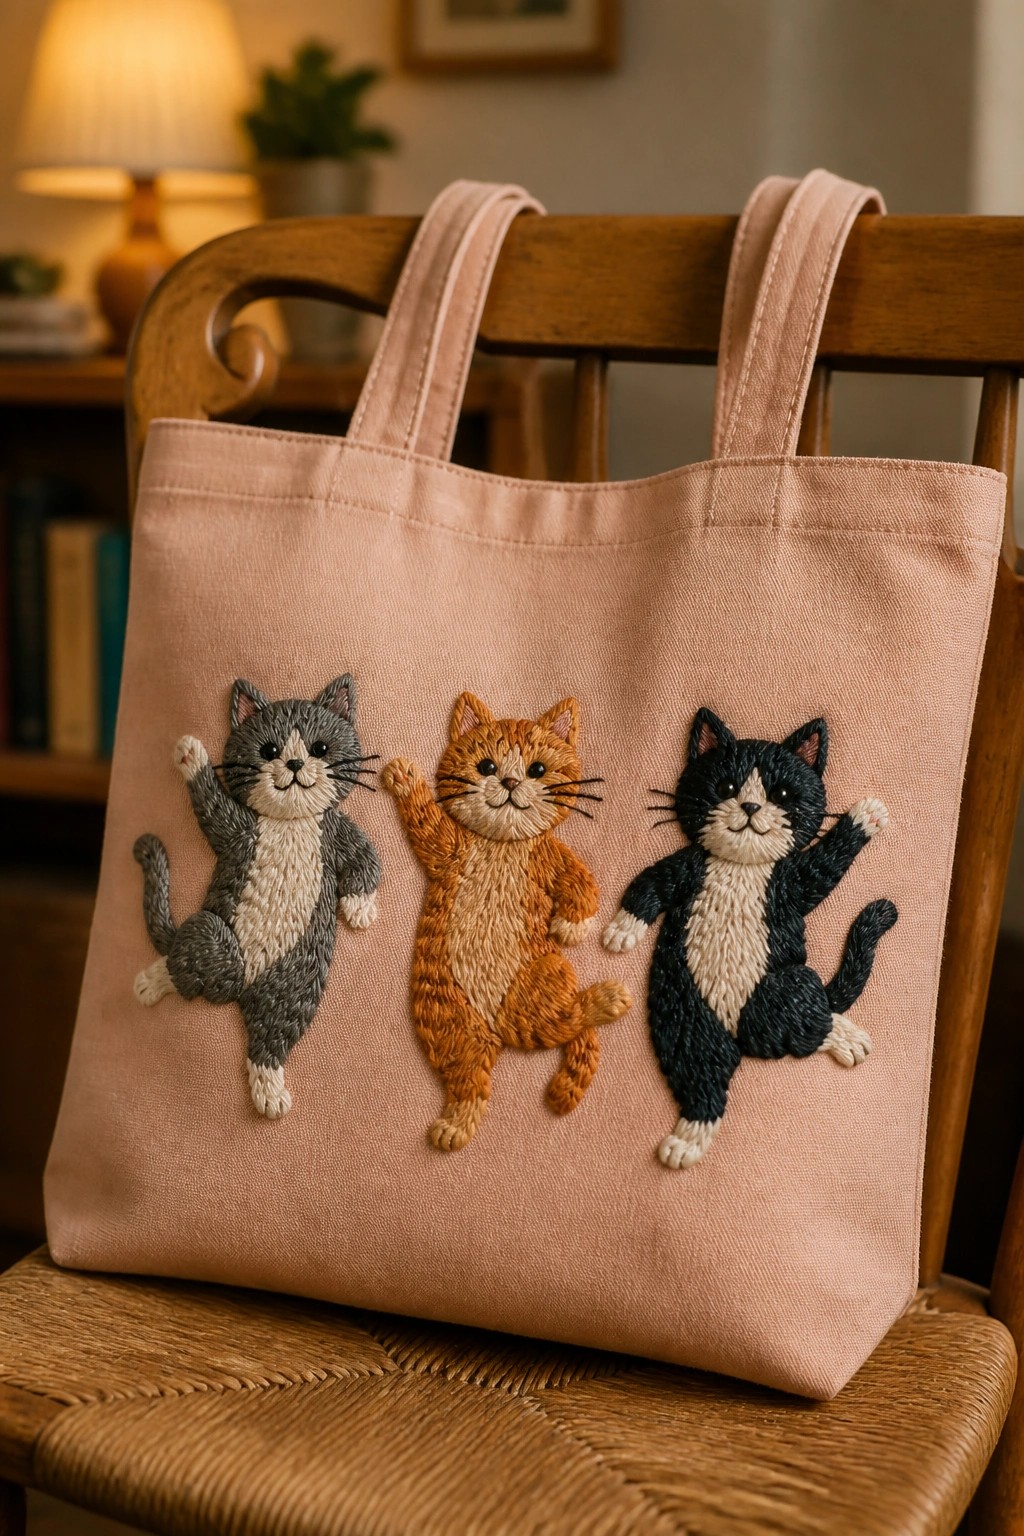
Three cats in gray, orange, and black-and-white sit side by side across the front of a canvas tote. Each cat is shown with one paw raised and the other supporting its weight, creating a repeating dancing pose. The horizontal line of figures fills the bag surface evenly and uses color changes to separate each cat without extra borders or frames. This layout works well on flat accessories where the design needs to read clearly from a distance.
The placement does a lot of the work here because the wide tote front gives the row room to breathe. You could adapt the idea by stitching just two cats on a smaller pouch or switching the thread colors to match a different bag fabric. Keeping the poses similar while varying the colors helps the design stay balanced if you change the scale. A row like this photographs cleanly for project shares because the figures line up neatly without overlapping edges.
Penguin Holding a Balloon on a Tote
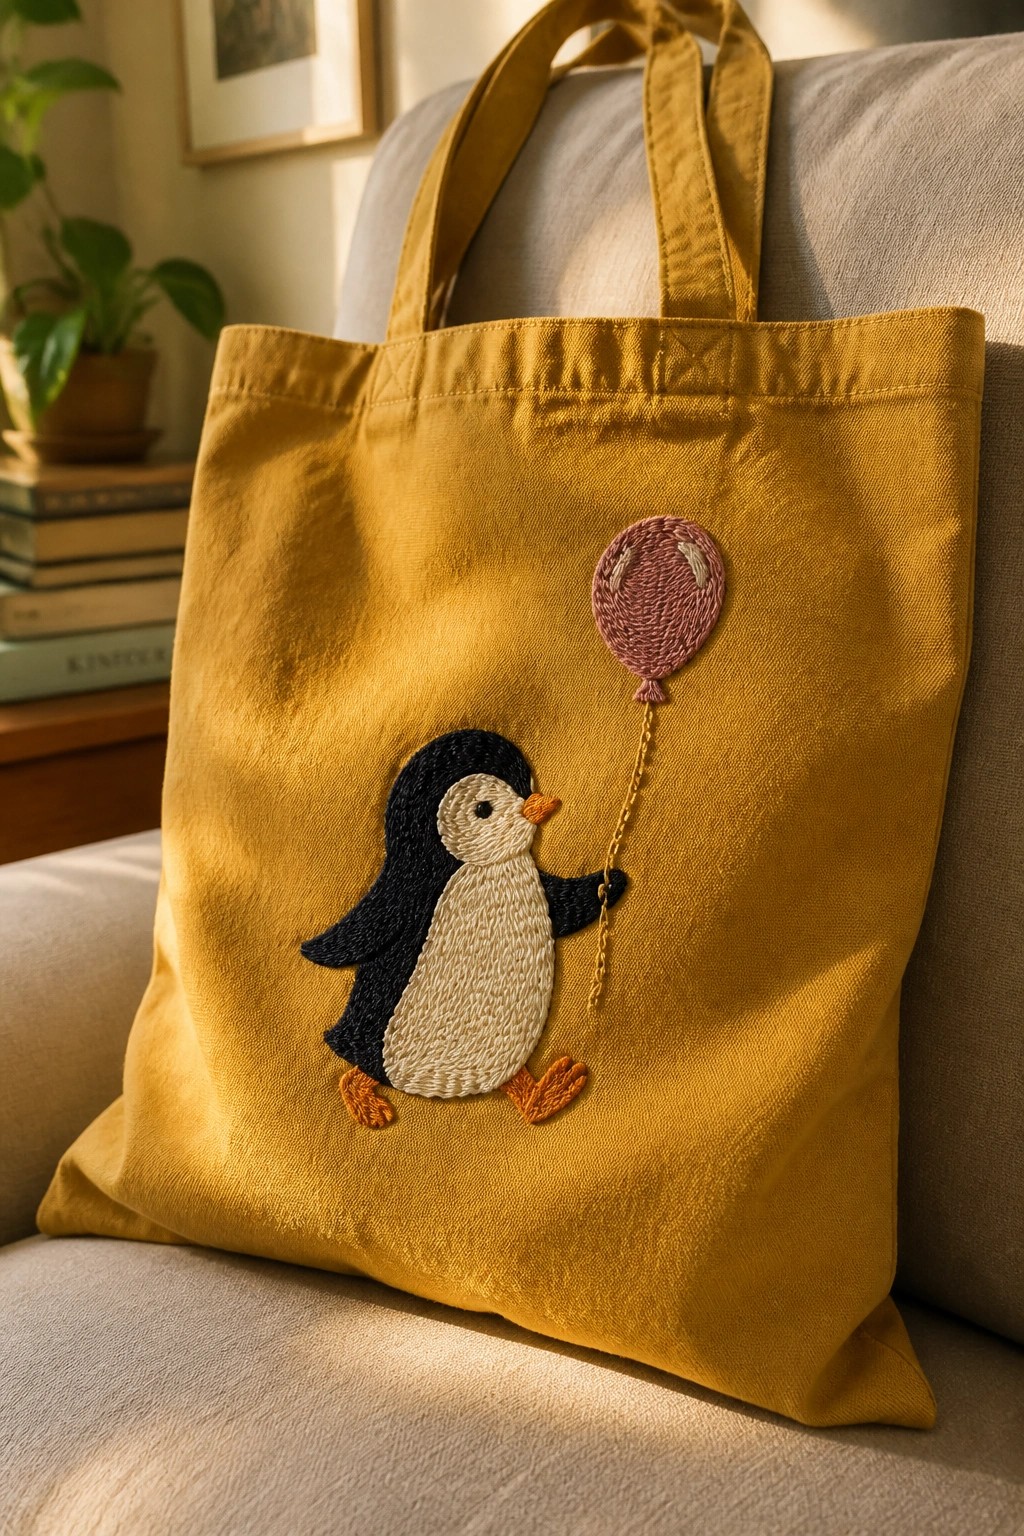
A simple penguin motif works well centered on the front of a tote bag, with the balloon floating above and the string connecting the two elements. The design uses a compact layout that leaves plenty of empty fabric around it, which keeps the look balanced on a larger surface like canvas. This kind of single-character scene suits tote bags because it stays visible when the bag is carried or set down.
What makes this idea useful is how easily the scale can shift. You could shrink the whole thing for a smaller pouch or move it toward one corner if you want room for a name or initial. Changing the balloon color or swapping the tote fabric gives quick variations without redrawing the penguin. A design like this also photographs cleanly for project shares, which helps it stand out in feeds.
Hedgehog with Mushroom and Daisy Border on Tote

A hedgehog design placed front and center on a canvas tote uses the animal facing left with its spines built up in dense stitches for texture. A curved row of mushrooms, daisies, and scattered leaves sits below to frame the lower edge without crowding the main shape. The mix of smooth face stitches and raised spines keeps the motif readable from a distance on the pale fabric. This layout fits tote bags, market bags, or similar flat accessories where the embroidery needs to stay clear during daily use.
What makes this idea useful is how the bottom border anchors the hedgehog without requiring extra outlining. You could drop the whole motif onto a smaller crossbody bag or raise it higher on a backpack front panel. Swapping the mushrooms to orange and brown tones would shift it toward fall while the same placement still works. The contained scale also transfers easily to apron pockets or zip pouches if a full tote feels too large.
Applique Elephant on a Canvas Tote
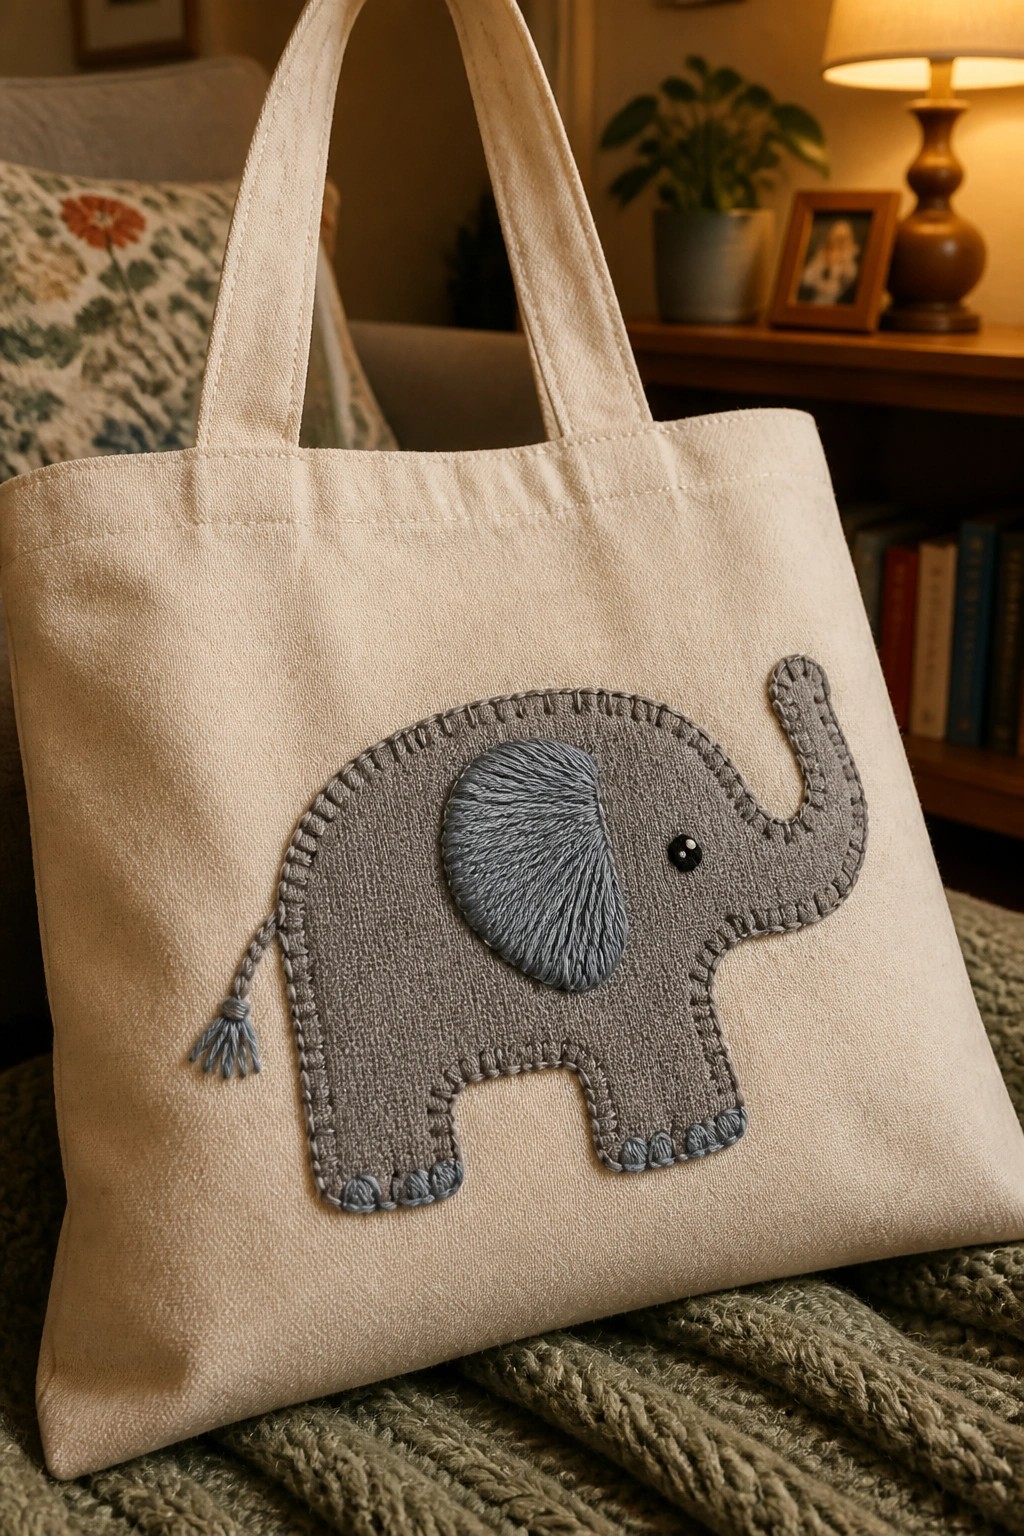
An elephant shape cut from gray fabric and stitched onto a light tote bag with outline stitches gives a clean animal motif without much filling. The ear sits as a separate layer with lines radiating from the center, while the tail ends in a small knotted tassel that adds movement. This layout works best on flat surfaces like tote bags or book bags where the design needs to stay visible during use.
The placement does a lot of the work here because centering the elephant leaves room on the sides for handles and daily items. You could shrink the whole shape to fit a pocket or swap the gray fabric for a brighter color if the bag is dark. The simple outline and single layered piece keep stitching time short, which makes it easy to repeat on several bags as gifts.
Striped Tote with Bee and Wildflower Cluster
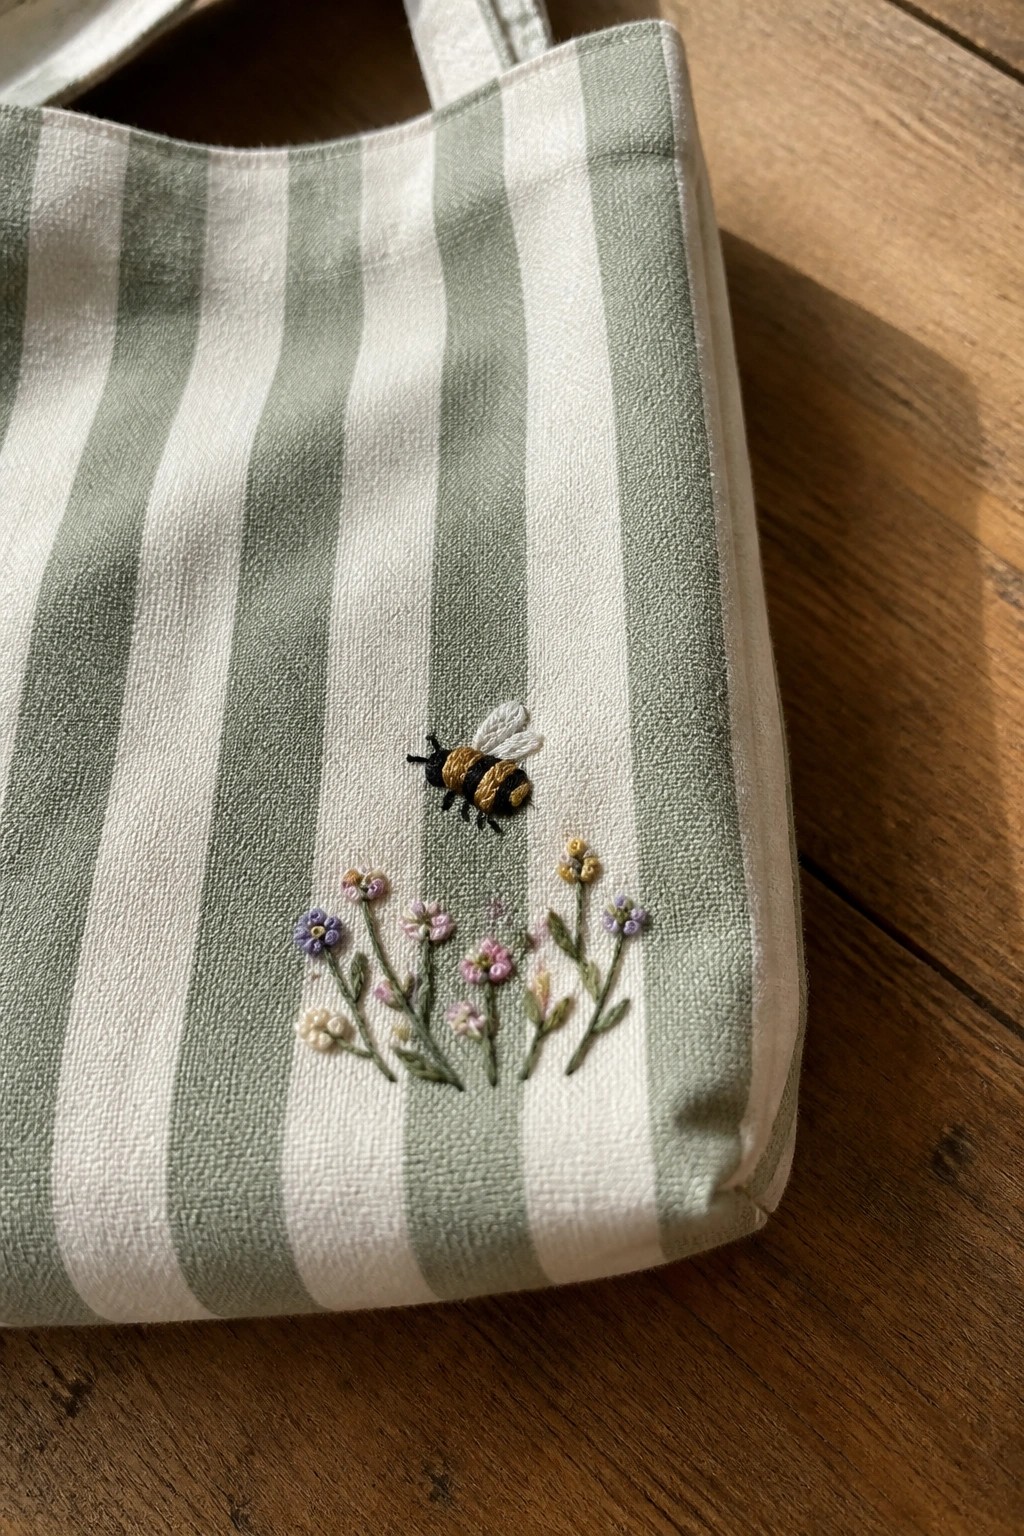
A single bee motif placed above a loose row of small wildflowers creates a compact accent on a striped tote bag. The bee sits centered on one stripe while the flowers spread across the stripe below, using the existing lines as spacing guides. This keeps the whole design small and balanced so the stripes remain visible rather than covered. The idea works best on bags or pouches where you want a light seasonal detail without filling large areas of fabric.
The placement does a lot of the work here because the bee sits high enough to stay visible when the bag is carried. You could shift the same layout to the front pocket of a canvas backpack or shrink the flowers further for a smaller pouch. Swapping the flower colors to match the bag fabric would let the bee stand out more while the rest blends in. The limited height of the design also makes it simple to add to other striped items like tea towels or aprons.
Octopus Body and Tentacles Split Across a Tote Seam
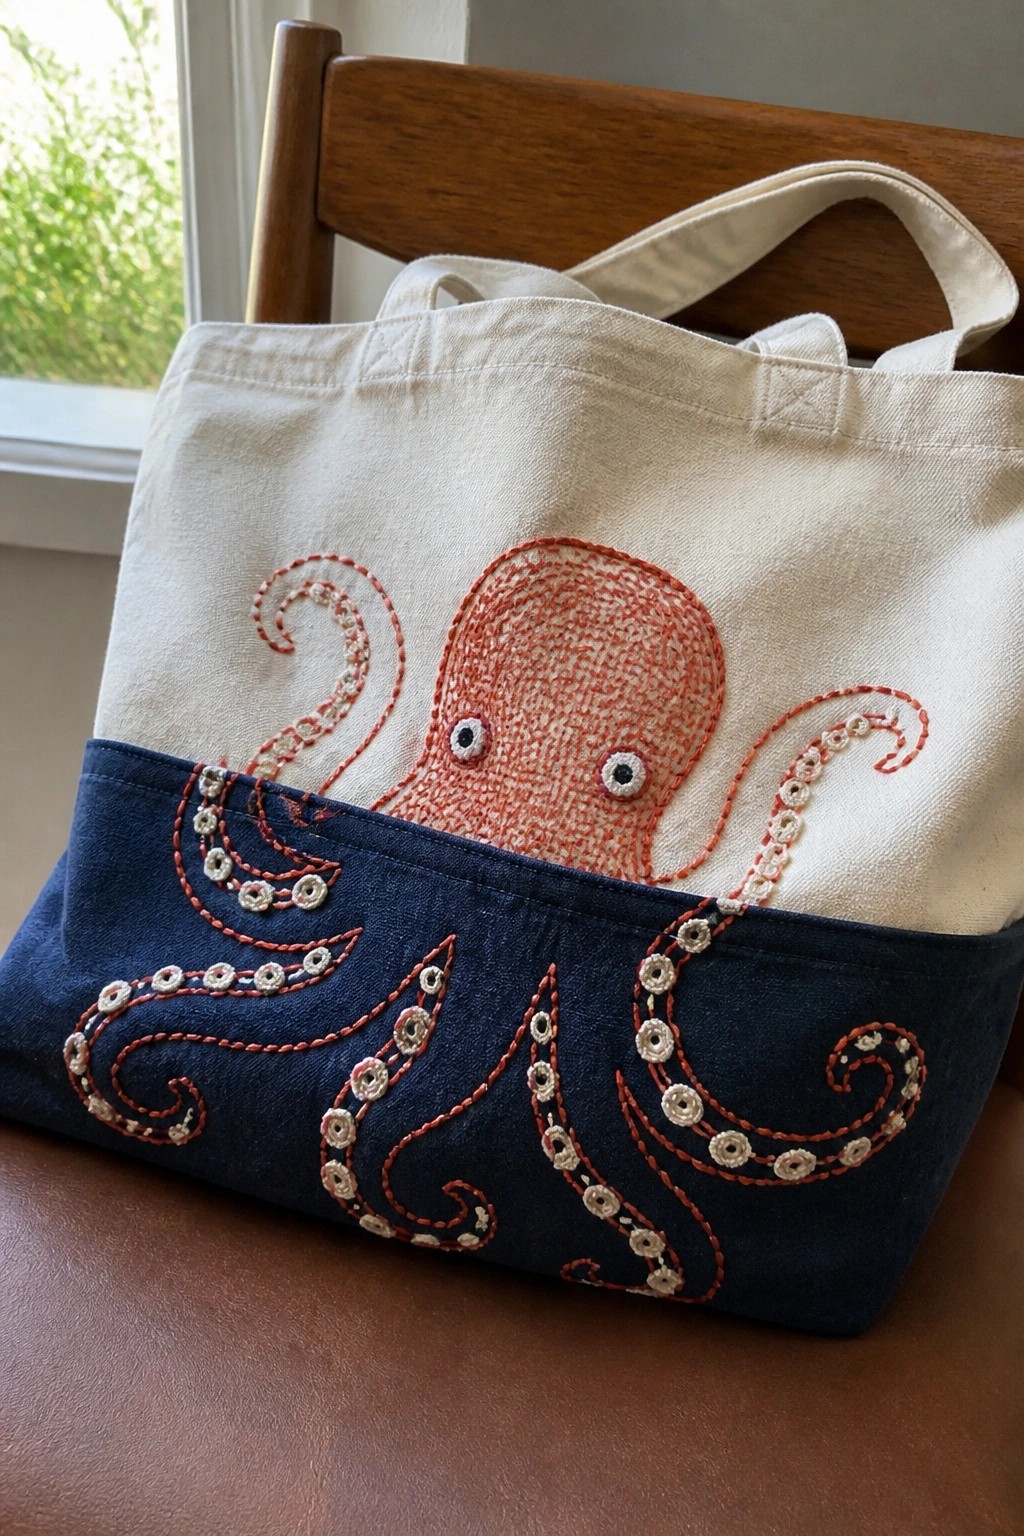
An octopus motif placed with the head on the upper light section of a tote and the tentacles crossing onto the darker lower panel uses the color change as a natural divider. The arms curve around the horizontal seam so the design feels connected without needing extra background stitching. White rings along the tentacles create contrast on both fabric colors and keep the limbs readable from a distance. This layout works best on bags that already have two fabric sections or a front pocket line.
What makes this idea useful is how the seam helps separate the main body from the limbs so the design stays balanced without extra planning. You can move the same split placement to other long-limbed animals like squid or eels on similar two-tone bags. Switching the lower fabric to a brighter color or using different shades for the rings would change the look while keeping the same structure. The design also scales down easily if you want to try it on a smaller pouch or lunch bag.
Koala on a Eucalyptus Branch Tote

A koala clinging to a diagonal branch creates a clear focal point when placed on the front of a canvas tote bag. Dense stitching builds up the animal’s body while lighter work on the leaves and small flower clusters adds texture contrast. The branch placement fills negative space and gives the design direction without needing extra elements. This layout works well on totes or other fabric bags that get carried often.
What makes this idea useful is how the branch connects the koala to the edges of the bag so the motif feels grounded. You could move the branch lower for a taller bag or reduce the whole design to fit a smaller pouch. Switching the leaf colors to cooler greens or adding a few extra buds changes the season without redrawing the pattern. The interaction between the animal and the branch helps the design read clearly even from a distance.
Sea Turtles Lined Up Along a Tote Bag

A row of five small sea turtles stitched across the lower section of a canvas tote creates a simple border effect without crowding the main space. The turtles are worked in shades of green and gray thread with compact filling stitches that keep each one distinct yet uniform in size. This placement leaves the upper bag area clear for carrying items while still showing the design when the bag is in use. The idea suits tote bags or similar flat fabric accessories where a repeated motif can run horizontally without interfering with function.
What makes this idea useful is the even spacing that turns a basic tote into something more finished without needing extra fabric or patches. You could adapt it by using fewer turtles for a smaller bag or switching the thread colors to match different canvas shades. The small scale means the design works on ready-made totes without much prep time. A single row like this also photographs cleanly for project shares since the repetition gives it a clear structure.
Peeking Raccoon Along the Tote Seam
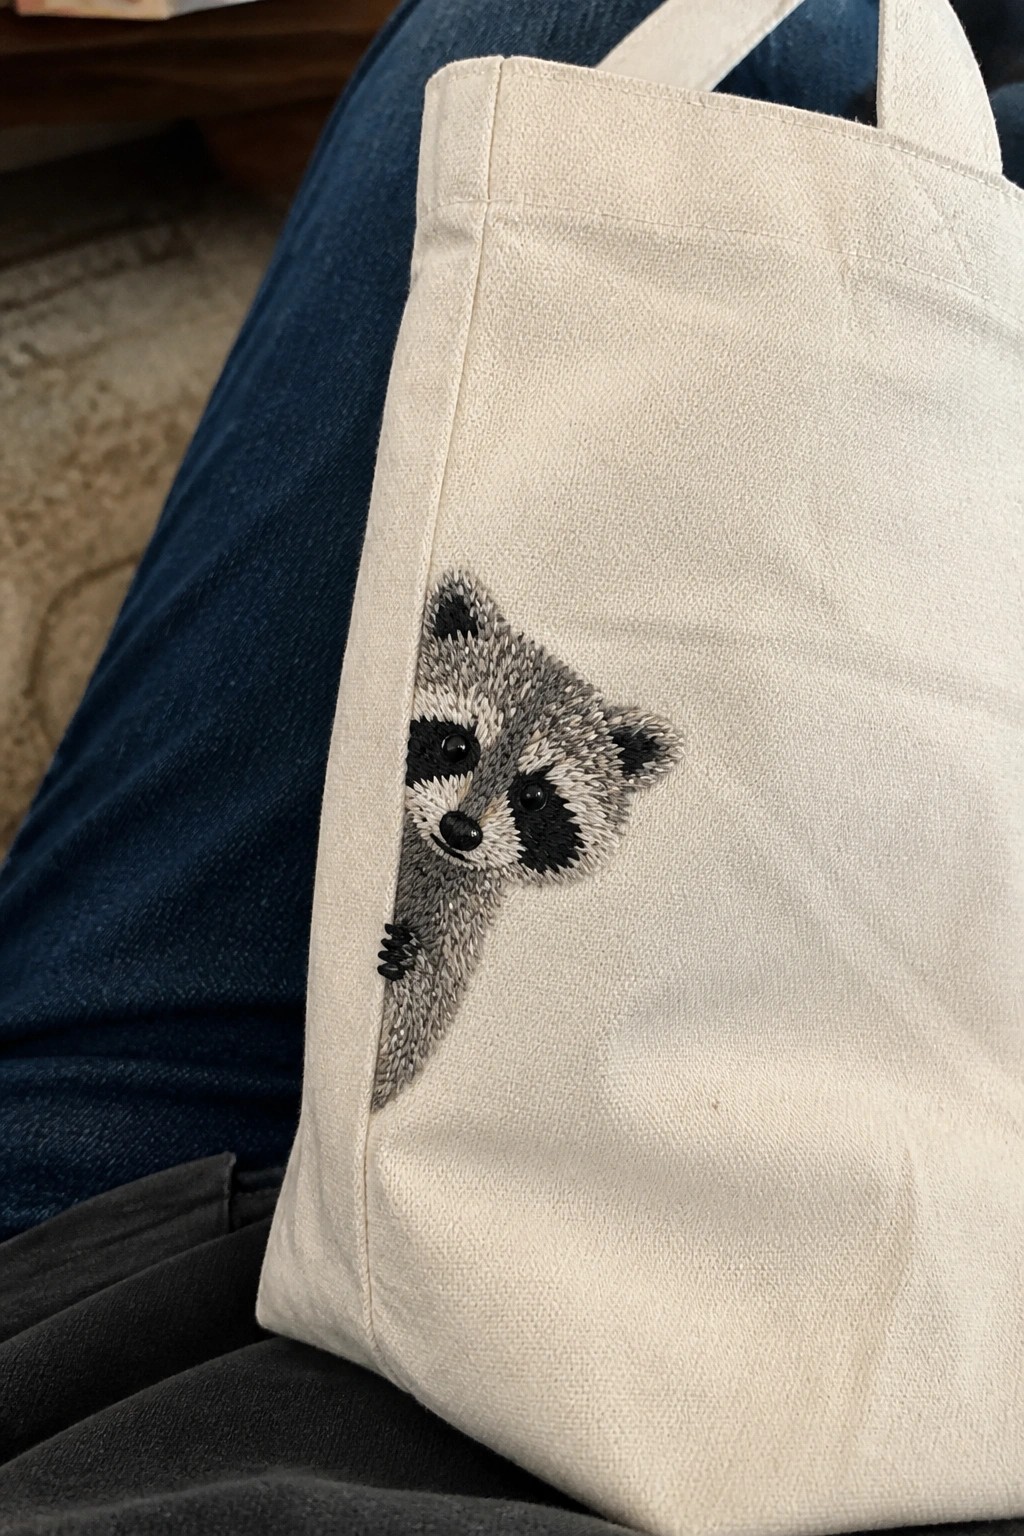
A raccoon design placed right at the side seam of a tote bag lets the animal appear to climb out from the edge. Only the head, one ear, and a single paw are stitched on the front while the rest stays hidden behind the fabric fold. This placement turns the bag’s own structure into part of the design and keeps the stitched area small. The idea works best on canvas totes or similar flat-sided bags where the seam can act as a natural border.
The placement does a lot of the work here since the seam already creates the hiding effect. You can swap the raccoon for other animals by adjusting ear shape and face markings while keeping the same half-hidden layout. Moving the design up or down the seam changes how much shows and helps it fit both small and large bags. The limited color range also makes it quick to stitch and easy to transfer to other light-colored accessories.
Frequently Asked Questions
What basic supplies do I need to embroider playful animal designs on tote bags?
Cotton or linen tote bags work best as they hold stitches securely. Gather embroidery floss in various colors, an embroidery hoop, needles sized 7 to 10, fabric scissors, and a water-soluble stabilizer to transfer your chosen animal patterns. Start with simple outlines like cats or rabbits from the 18 ideas to build confidence before adding details such as whiskers or spots.
How can I make sure the embroidery stays durable through regular use and washing?
Secure all stitches with small knots on the back side and consider using a backing fabric fused inside the tote for extra support. Wash the finished bag inside out in cold water on a gentle cycle and air dry to preserve colors and prevent fraying. This approach keeps cute animal characters looking fresh even after multiple outings.
What techniques help beginners add cute character to animal faces on tote bags?
Focus on expressive eyes using French knots or satin stitches in contrasting colors. Layer short straight stitches for fur texture on animals like hedgehogs or owls. Practice on scrap fabric first to perfect proportions, then scale up to full designs that match the 18 playful ideas for maximum charm.
How do I transfer animal embroidery patterns accurately onto a tote bag?
Print or draw your design on paper and use a light box or window to trace it onto the fabric with a water-erasable pen. Position the pattern centrally on the tote panel to avoid seams. For curved shapes like tails or ears, mark key points first to maintain symmetry and ensure the final result looks balanced and fun.
Which stitches create the best texture for features like tails and ears in these designs?
Backstitch works well for clean outlines on legs and bodies. Fill larger areas with satin stitch for smooth finishes on bellies, while French knots add dimension to fluffy tails or cheeks. Combine these with lazy daisy stitches for leaves or accents around the animals to enhance the overall cute appeal without overwhelming the tote surface.