
I started embroidering tote bags a few years ago when I got tired of the plain canvas ones I kept buying.
It felt good to add a few stitches that made them look a little more like mine.
I kept the designs simple because I was still learning and did not want anything too complicated.
Some of the ideas came from things I already had around the house like old patterns or bits of thread.
These are the ones that worked out well enough to share.
Wildflower Cluster on a Canvas Tote

A loose bouquet of mixed wildflowers makes an effective central design on a tote bag. The stems gather near the bottom of the front panel and spread upward, with larger blooms placed toward the middle and smaller ones filling the edges. Using a range of flower sizes and colors keeps the shape interesting while staying contained enough for daily use. This layout works especially well on bags because it leaves the top third of the fabric clear for the handles and opening.
What makes this idea useful is how the placement avoids the stress points near the handles. You can scale the bouquet down for a smaller bag or stretch it wider on a larger one by adding a few extra stems on the sides. Changing the thread colors to match a different bag shade keeps the same structure but shifts the overall look. The varied heights also photograph clearly, which helps when saving the idea for later reference.
Potted Plant Row on Tote Pocket
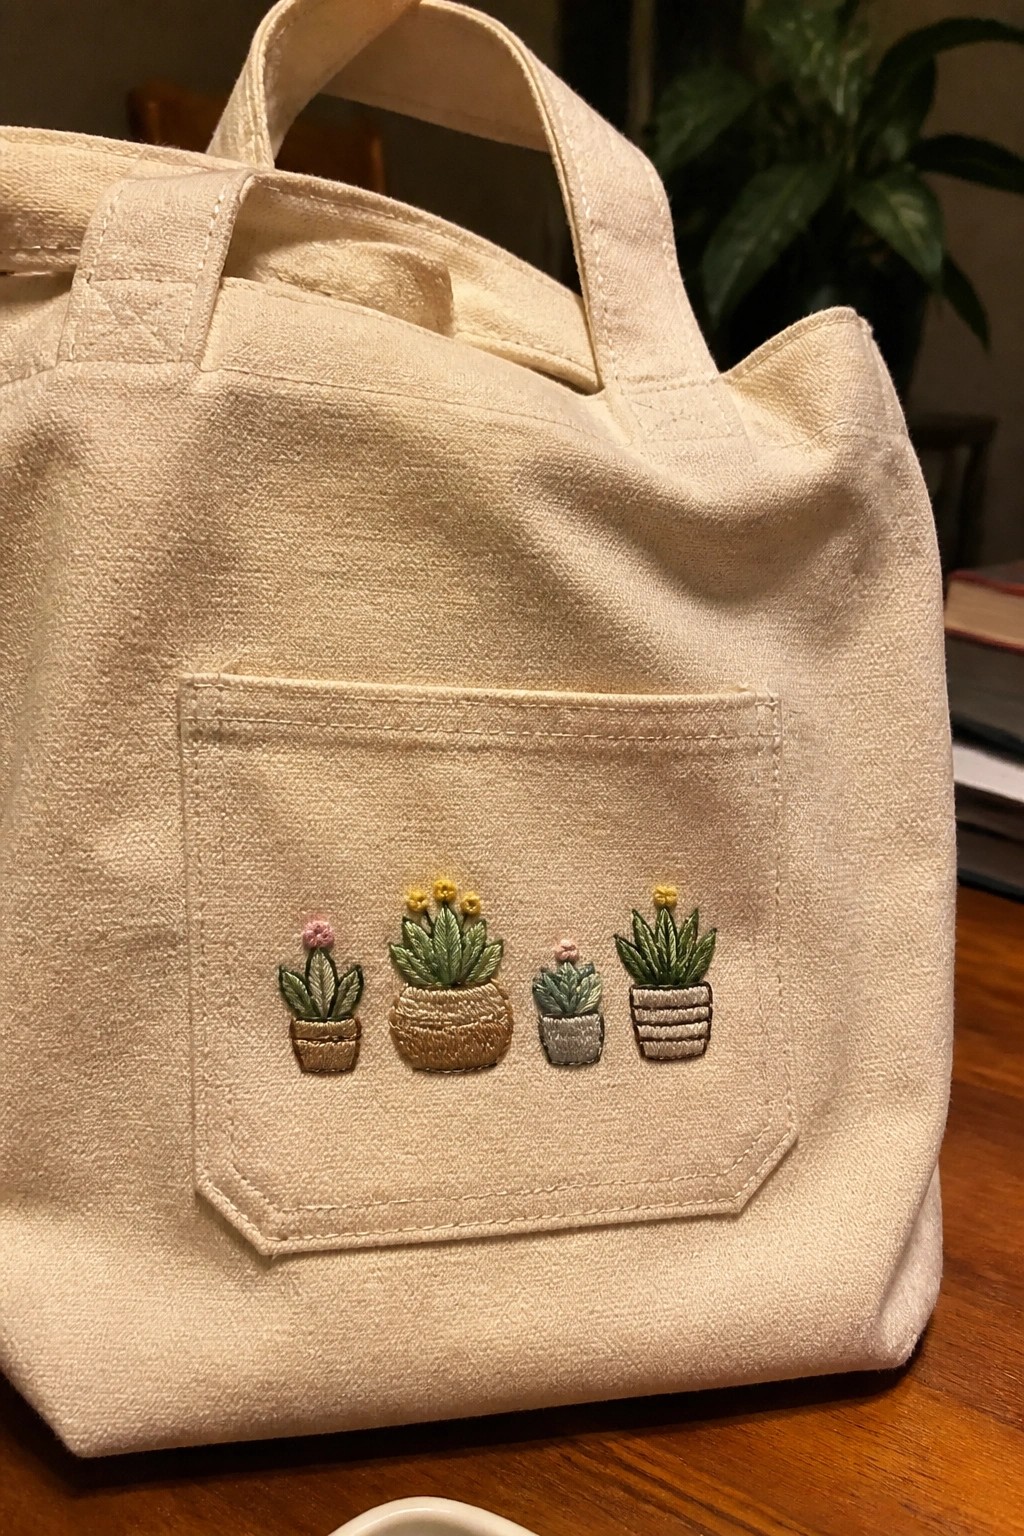
A simple row of four small potted plants makes an easy repeating motif for the front pocket of a canvas tote. Each plant sits in a different pot style, with short stems and a couple of flower details added in contrasting thread. The design stays low on the pocket so it does not interfere with the bag’s main opening or handles. This layout suits quick weekend projects on bags or similar flat fabric items where you want a light pattern without much coverage.
What makes this idea useful is how the pocket edge already frames the row, so you do not need extra outlining stitches. You can drop the number of plants to three if the pocket is narrower or stretch the spacing if you want a longer tote. Switching pot colors or skipping the flowers keeps the same structure while changing the look for different fabrics or seasons. The small scale also transfers easily to a pencil case or market bag front if you want to reuse the pattern.
Delicate Vine Along the Tote Handle
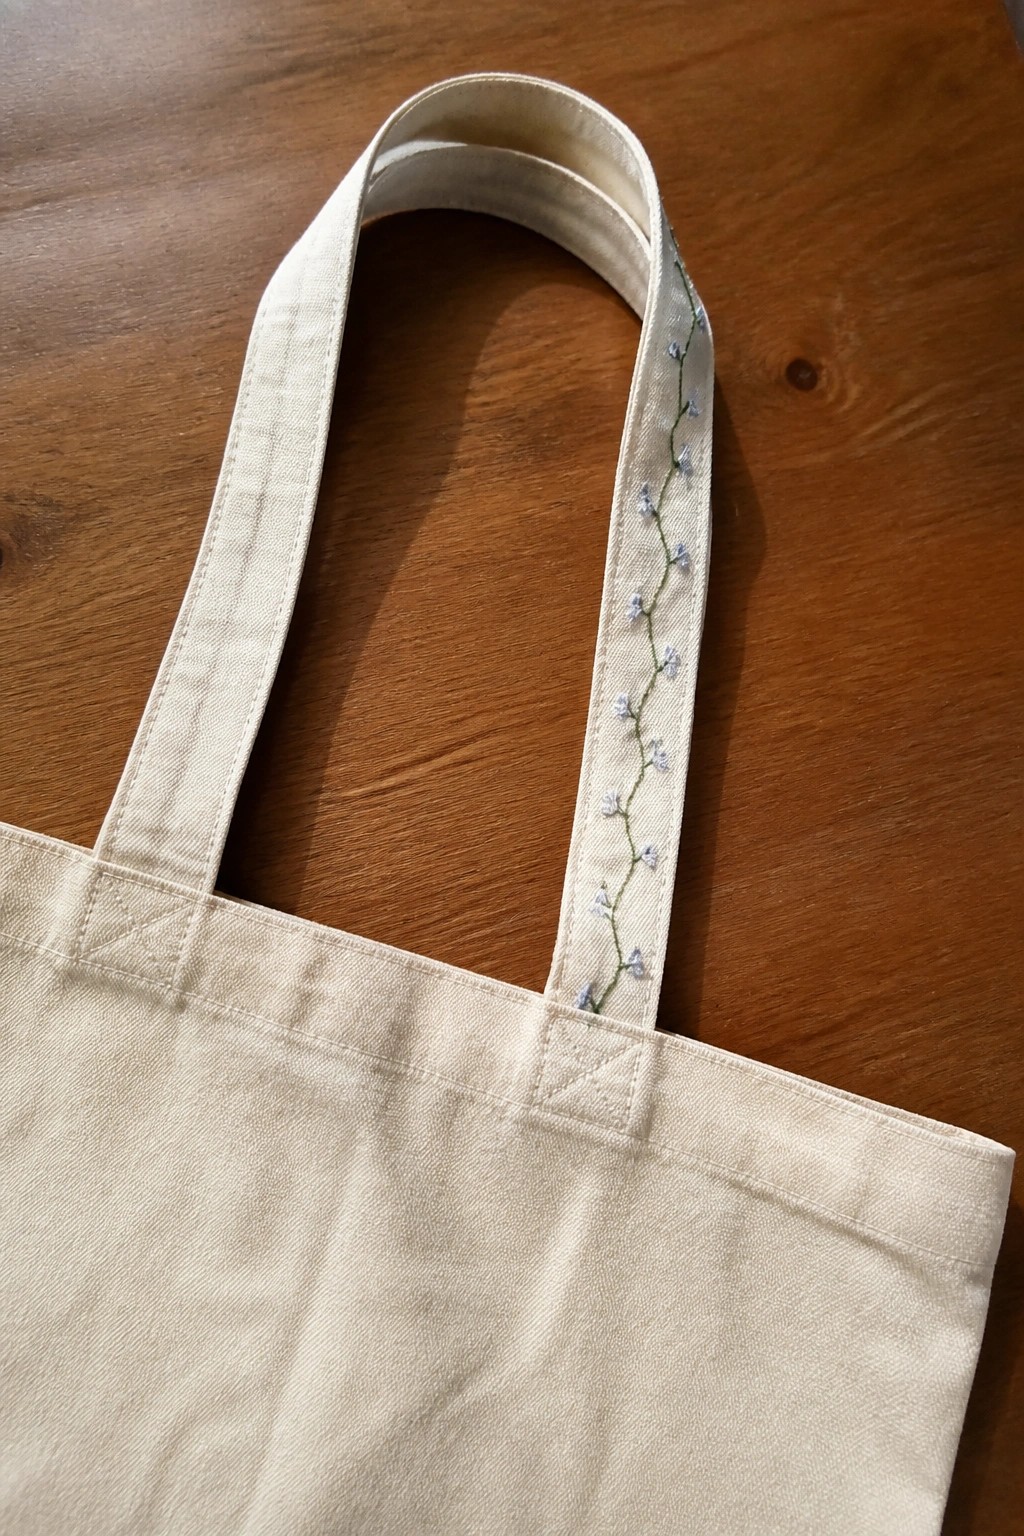
A thin green stem with tiny blue flowers runs down one edge of the canvas tote handle in a simple trailing line. The motif stays narrow so it does not interfere with the grip or the bag’s overall shape. This approach suits everyday carry items where you want a bit of detail without covering large areas of fabric. The scale keeps the stitching light and quick to finish on a single strap.
What makes this idea useful is how little fabric it requires while still adding visible interest to a high-wear part of the bag. You can shorten the vine to just the top half of the handle or extend it onto the seam where the handle meets the body. Switching the flower color to red or yellow changes the look without altering the layout. The same narrow vine also works on backpack straps or market bag handles if you want to repeat the design across different projects.
Circular Hummingbird Patch for Canvas Totes
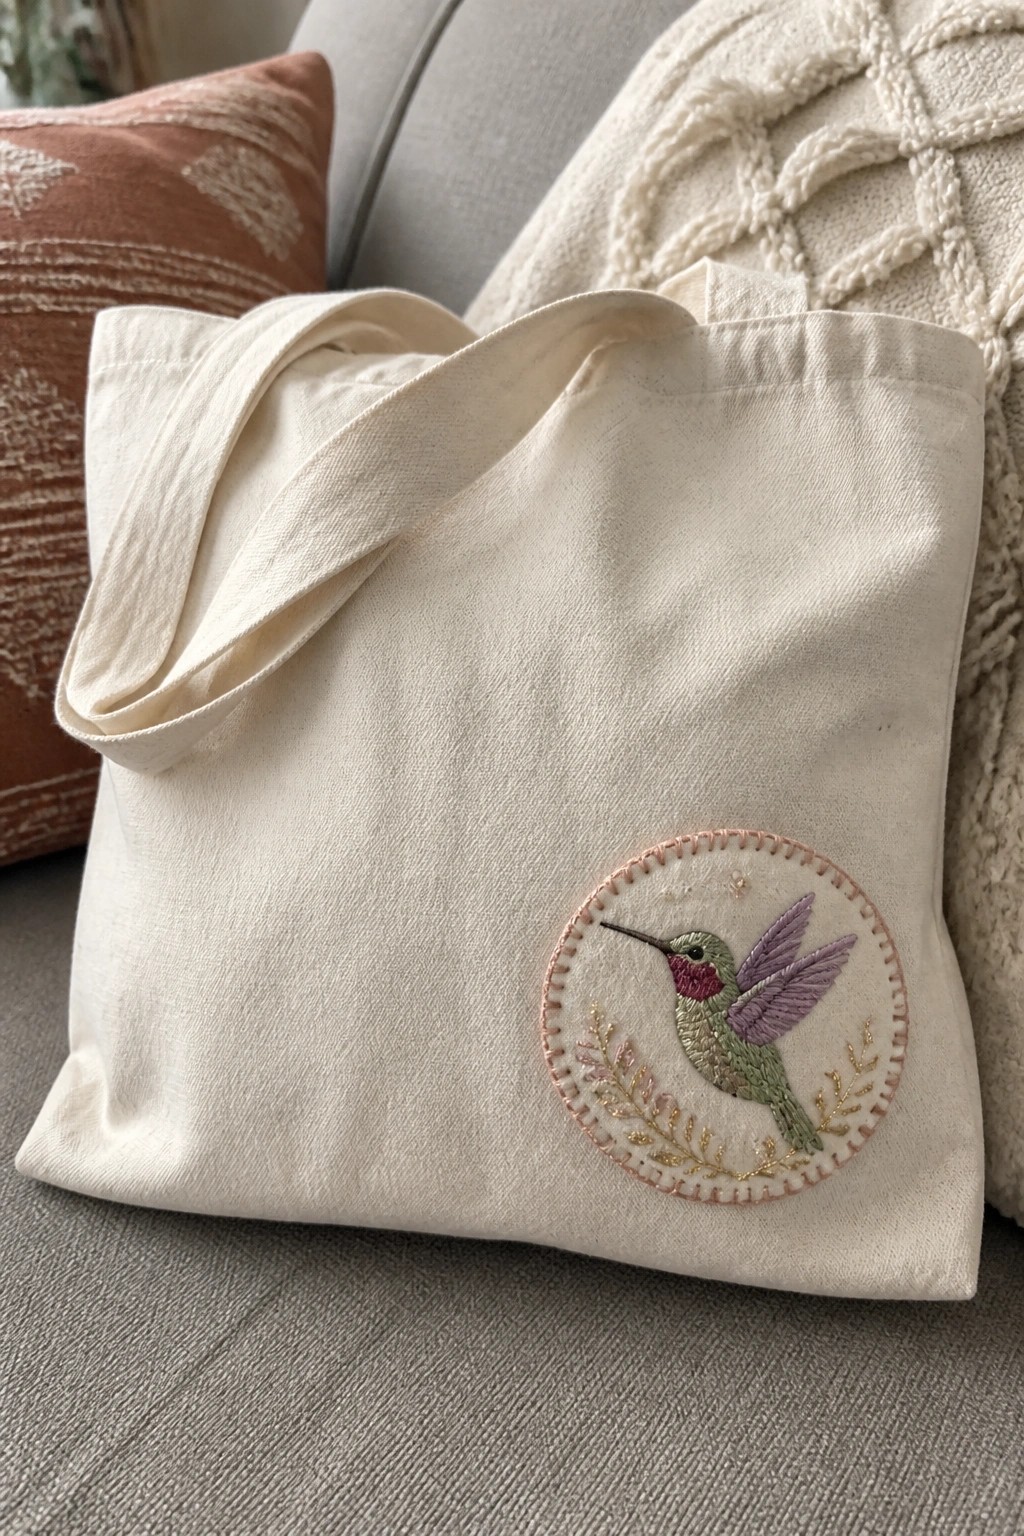
A small round motif of a hummingbird with leafy details sits low on the front of a plain canvas tote. The circle frames the bird and foliage tightly so the stitching stays compact and contained. This placement keeps the design visible when the bag is carried but leaves most of the surface plain for everyday use. The idea suits tote bags or other fabric accessories where a finished patch can be added without covering too much area.
What makes this idea useful is the round border, which makes the motif easy to move onto a different bag or even turn into a separate patch. You could shrink the whole circle for a smaller tote or swap the thread colors to match a different fabric without changing the layout. The contained shape also photographs well for pattern sharing, which helps it stand out in project roundups.
Minimal Seashell Design for Everyday Totes

A seashell worked in radiating peach and cream threads forms the main motif on a canvas tote, with simple blue lines suggesting waves above and a few scattered dots for sand below. The design sits centered on the bag panel so it stays visible whether the tote is carried by hand or over the shoulder. Loose wave stitches keep the upper area light while the shell’s denser stitching gives it weight without adding bulk.
What makes this idea useful is how the small scale lets you move the shell to a corner or side panel on the same bag without crowding the space. You could swap the peach tones for grays or greens to match different bag colors or shrink the whole layout to fit a pouch or pocket. The open placement also leaves room to add a name or date later if the tote is meant as a gift.
Citrus Slice Row on a Tote Bag
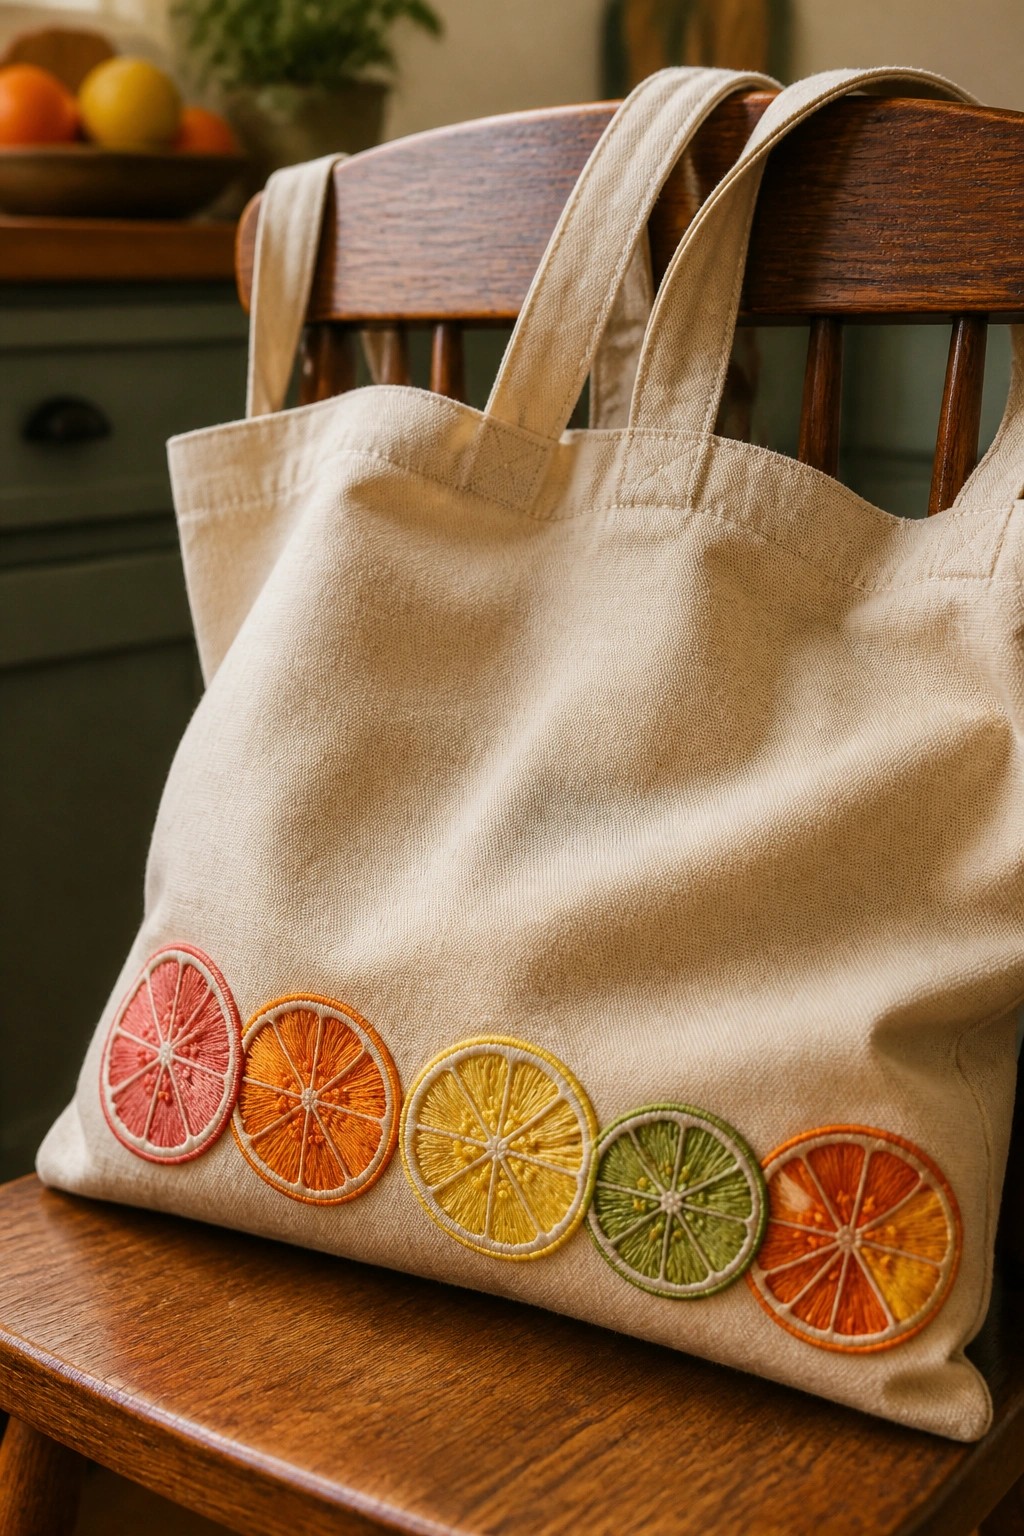
A straight row of citrus cross-sections embroidered along the lower edge of a canvas tote gives the bag a clear, graphic accent without covering much surface area. The slices run in color order from pink grapefruit through orange, lemon, and lime before ending with another orange, which creates a natural gradient that reads well from a distance. Keeping the line contained near the base leaves the rest of the bag open for keys, produce, or other items while still making the design visible when the bag is carried or set down. This layout suits tote bags, market bags, or any flat fabric item where a simple border motif is preferred over scattered or centered designs.
The placement does a lot of the work here because it follows the bag’s natural bottom seam and stays out of the way during regular use. You can easily shorten the row to three slices for a smaller bag or stretch it with extra lemons if the tote is wider. Swapping the thread colors to all one fruit or shifting the whole line higher up would change the look without needing a new pattern. A design like this also photographs cleanly for project sharing since the contrast against the light canvas stays consistent.
Scattered Fish School on a Canvas Tote
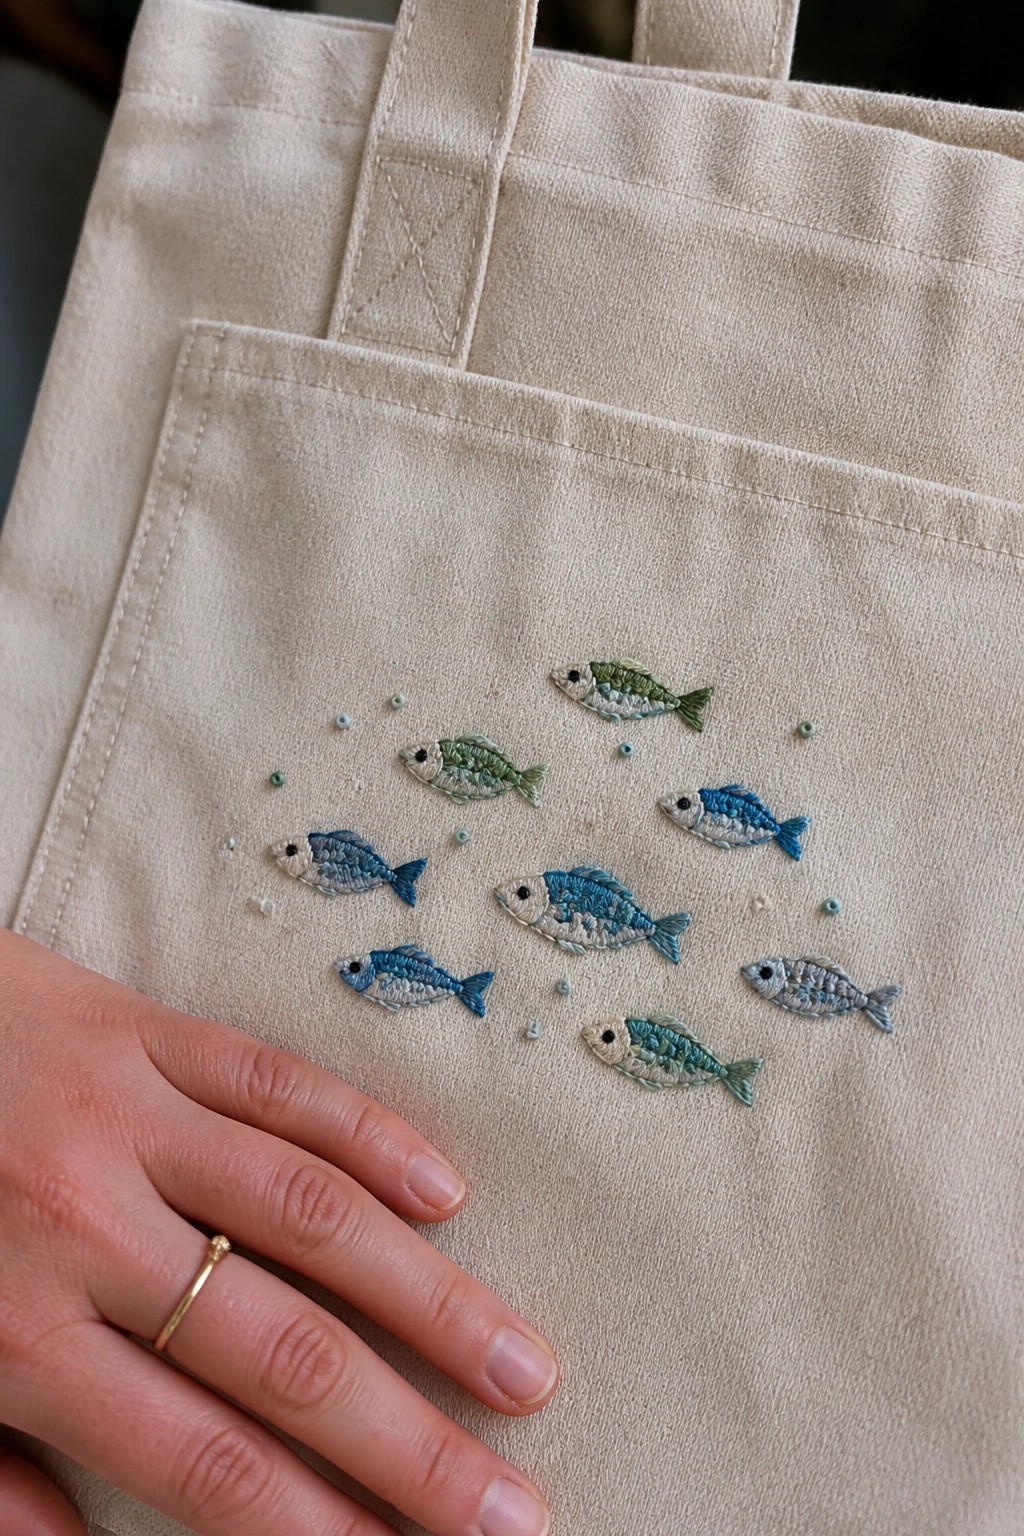
A loose arrangement of fish worked in shifting blues and greens creates movement across the front of a plain tote bag. The fish vary slightly in size and angle, placed in a diagonal drift with small dots around them to suggest bubbles or water. This keeps the design open and light instead of filling the whole surface. The idea suits tote bags or similar flat fabric items that benefit from a bit of pattern without heavy coverage.
What makes this idea useful is how the scattered layout adapts to different bag shapes without needing a full repeat. You can drop in fewer fish for a smaller pouch or add more to stretch across a larger tote. Switching the thread colors to warmer tones or cooler ones changes the look while keeping the same placement. The small scale also means the stitching stays visible from a distance on light canvas.
Crescent Moon and Stars on a Canvas Tote

A crescent moon and three small stars form a compact celestial motif that sits on the front panel of a plain canvas tote. The moon uses a dense white fill inside a gold outline while the stars combine gold outlines with white centers. This placement leaves most of the bag surface clear and keeps the design visible when the tote is carried or set down.
The small scale makes the motif easy to finish in one sitting and simple to repeat on other bags. You can shift the same layout higher or lower on the bag or stretch it across the bottom edge for a different look. Changing the gold thread to navy or black lets the design match darker fabrics without losing contrast. This style works especially well on totes because the open space around the motif keeps the bag practical for daily use.
Vintage Camera Embroidery on a Tote Bag

A camera motif works well as a single focal point on a plain canvas tote. The design uses separate color blocks for the body, lens, and top plate, with the lens built from tight concentric circles that create depth. Placement low on the front keeps the bag balanced when it’s filled and carried. The approach suits everyday bags that need a clear, recognizable shape rather than scattered details.
What makes this idea useful is the compact scale that leaves most of the bag surface free for actual use. You can change the body color to match a specific camera model or simplify the lens to fewer rings if you want faster stitching. The same layout transfers easily to smaller items like zip pouches or book sleeves. On social media the clean outline and limited palette help the finished bag photograph clearly without extra props.
Large Sunflower Motif for Canvas Totes

A sunflower placed dead center on a tote bag creates a single strong focal point. The petals spread out in layered yellows around a dense brown center, while the stem and leaves drop down to fill the lower space and keep the shape balanced. This approach works because the design stays bold without crowding the bag’s usable area. It fits well on everyday carry bags where you want one clear image rather than scattered details.
What makes this idea useful is how the central placement leaves the sides and bottom free for actual use. You can scale the whole flower down for a smaller pouch or swap the yellow threads for softer tones if you want it to read more neutral. The layout also photographs cleanly, which helps when sharing finished projects online. Try moving the same motif lower on the bag if you prefer a subtler look when the tote is carried.
Vegetable Border Along the Top Edge of a Tote
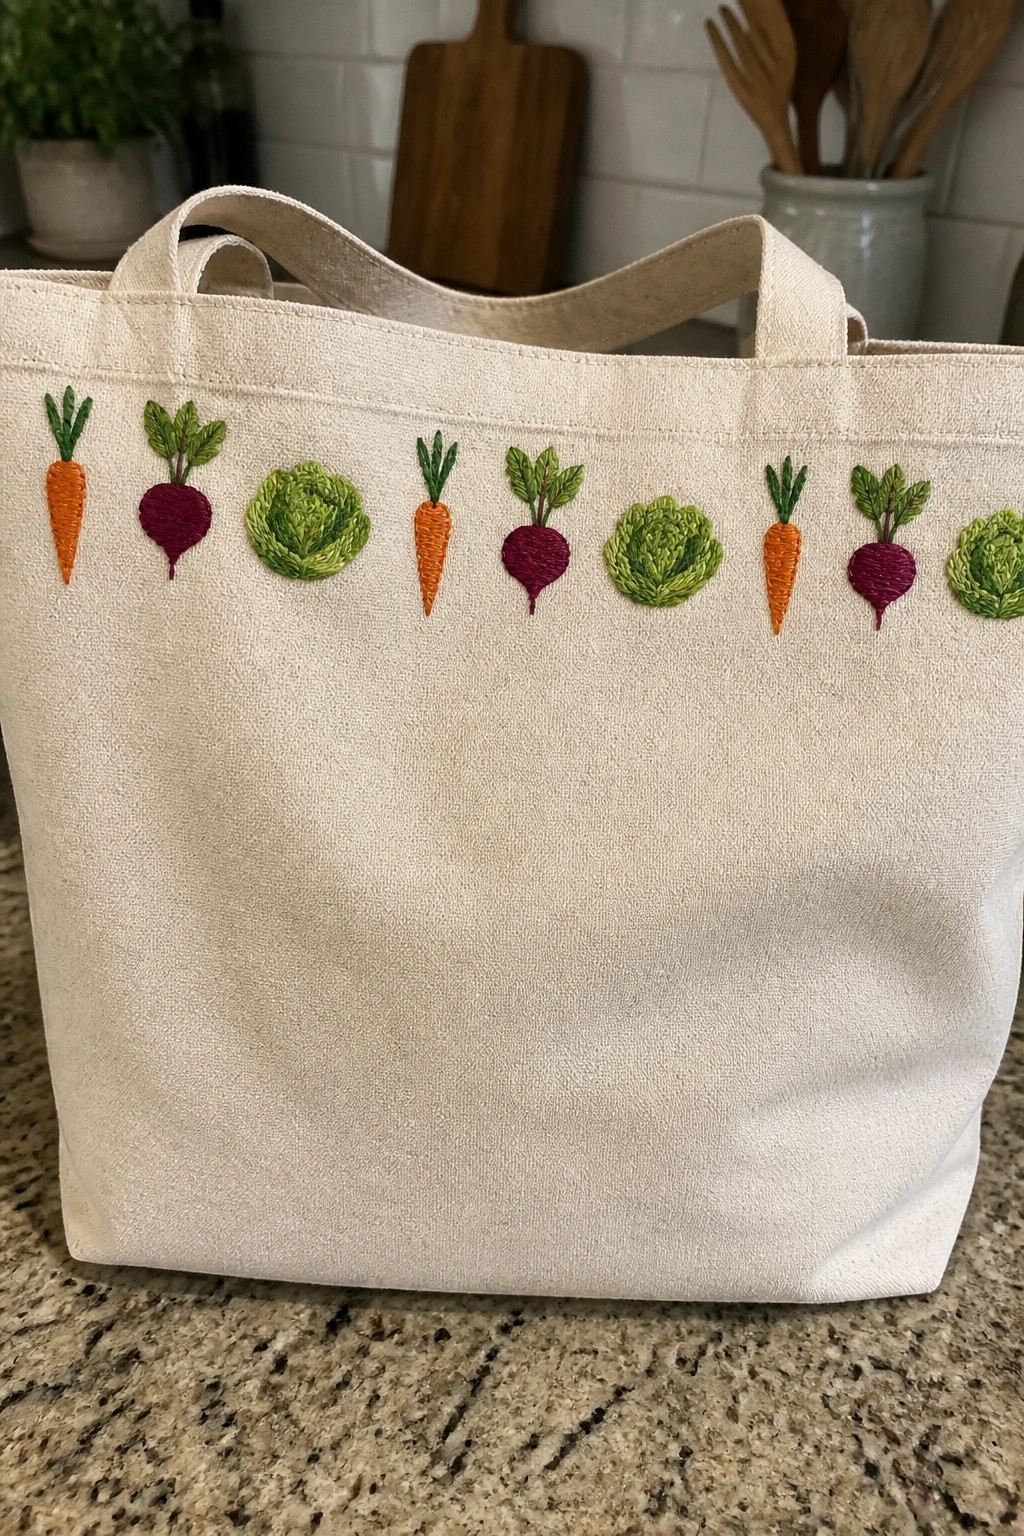
A row of small embroidered vegetables sits across the upper front of a canvas tote. Carrots, beets, and cabbages repeat in a straight line to create a simple border just below the handles. The compact scale keeps the stitching from crowding the rest of the bag while still showing clearly when the tote is carried. This layout works well for market bags or everyday carryalls where you want a quick seasonal accent.
The placement does a lot of the work here because the design stays visible even when the bag holds bulky items. You could shorten the row to fit a smaller tote or swap the vegetables for whatever produce you actually buy. Shifting the colors to match your own kitchen towels or garden makes the same pattern feel less generic. A border like this stands out on Pinterest because it reads as useful rather than purely decorative.
Vintage Camper Van on a Canvas Tote

A vintage VW-style camper van makes a strong central motif when stitched directly onto the front panel of a plain canvas tote. The design uses several thread colors to separate the body, windows, wheels, and roof luggage, keeping the shape readable even from a short distance. Placement in the middle of the bag leaves the top and sides clear for everyday use while still showing the full vehicle.
What makes this idea useful is how simply the same van outline can be scaled down for a smaller pouch or moved to a lower corner to leave more room for text. Switching the body color to match a different bag or adding a short route name on the side gives fast variations without redrawing the whole pattern. The subject reads clearly in photos, which helps it perform well when shared online.
Circular Wreath of Mixed Flowers and Leaves
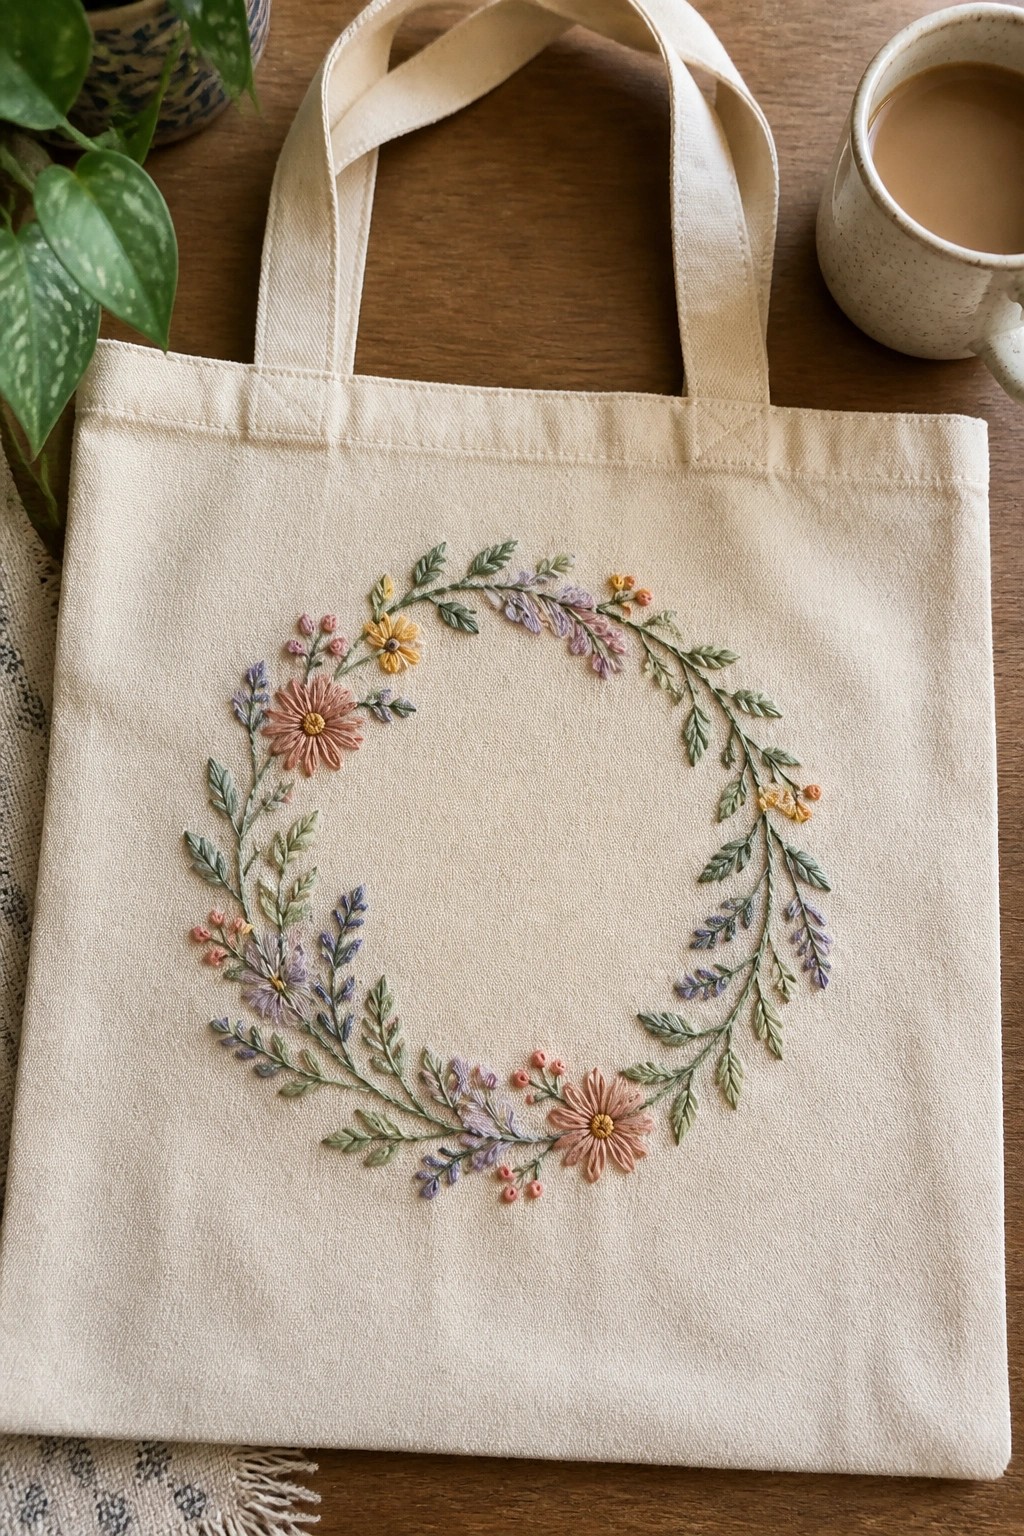
A circular wreath made from assorted small flowers and leafy stems forms the main design on this tote bag. The embroidery sits centered on the front panel with an open middle that leaves plenty of blank canvas around it. Different bloom shapes and soft color shifts keep the circle from looking flat while the loose arrangement avoids a rigid border. This layout suits tote bags or similar flat fabric items where the design needs to stay contained but still visible when carried.
The placement does a lot of the work here because the wreath shape naturally follows the bag’s rectangular front without crowding the edges. You could repeat the same wreath on a smaller scale for a zip pouch or adjust the flower mix to use only two colors for a simpler look. On a tote this size the open center also means the bag stays practical for everyday use. A design like this stands out in searches because the circular format reads clearly even in small preview images.
Stacked Macaron Trio on a Tote Front

Three macarons stacked vertically create a compact motif that sits centered on the front of a canvas tote. The design uses soft pastel threads with small speckled accents and keeps the overall height modest so it does not overwhelm the bag surface. Placement low on the flap leaves the upper area open for a name, date, or second small motif if desired. The idea suits quick personalization of plain totes used for groceries, gifts, or market runs.
The small vertical format transfers easily to a zip pouch, apron pocket, or notebook cover with almost no resizing. Swapping the thread colors to match a specific bakery palette or holiday theme changes the look without new stitches. On a tote the centered placement works at any scale, so you can enlarge it slightly for a bigger bag or shrink it for a child-size version. This type of tidy, recognizable stack tends to perform well in search results because the shape stays clear even when the image is cropped small.
Alternating Triangle and Diamond Border

A row of filled triangles and outlined diamonds stitched in two colors creates a clean repeating border along the lower edge of a tote. The shapes sit close together in a straight line so the pattern reads as one continuous band rather than scattered motifs. Keeping the design low on the bag leaves the rest of the canvas plain and makes the embroidery visible even when the tote is full or slung over a shoulder. This approach works well on any canvas bag where you want a simple, structured accent instead of a large central design.
The placement does a lot of the work here by anchoring the pattern where fabric tends to stay flat and visible. You can stretch or shorten the repeat to fit different bag widths or swap the solid and outlined shapes for a different rhythm. The same border scales easily to a smaller pouch or a lunch bag without looking cramped. Using just two thread colors also keeps stitching time short while still giving enough contrast to stand out in photos.
Fox Face Low on a Canvas Tote Bag

A fox face motif works well when stitched directly onto the lower front panel of a plain canvas tote. The compact size and central placement keep the design visible while the bag is in use, and the layered thread colors create enough contrast to stand out against the light fabric. This approach suits accessories that get carried often, since the motif stays clear even when the tote is packed full.
What makes this idea useful is how the small scale leaves room for other elements like pockets or text if you want to expand later. You could shift the same motif higher or repeat a simpler version on the back without crowding the bag. Color changes also let you match the fox to different tote shades or swap in seasonal tones. On flat items like pouches or book bags, the same low placement keeps the design practical and easy to stitch.
Line of Potted Plants Across an Interior Pocket

A straight row of five small potted plants works as a repeating motif across the front of an interior pocket on a canvas tote. Each plant uses its own basket shape and a short stack of different leaf and flower colors to keep the line from looking identical. The compact scale lets the full set fit on a single pocket without using much fabric space. This layout suits tote bags because the embroidery stays visible only when the bag is open.
The placement on an interior pocket protects the stitches from daily wear while still showing when you reach inside. You could swap the plants for herbs or vegetables if you want a garden theme or shorten the row to three if the pocket is smaller. Changing the thread colors to match a specific bag lining would make the same pattern feel new without redrawing it. The contained format also transfers easily to a zip pouch or the front of a smaller market bag.
City Skyline Outline on a Tote Bag
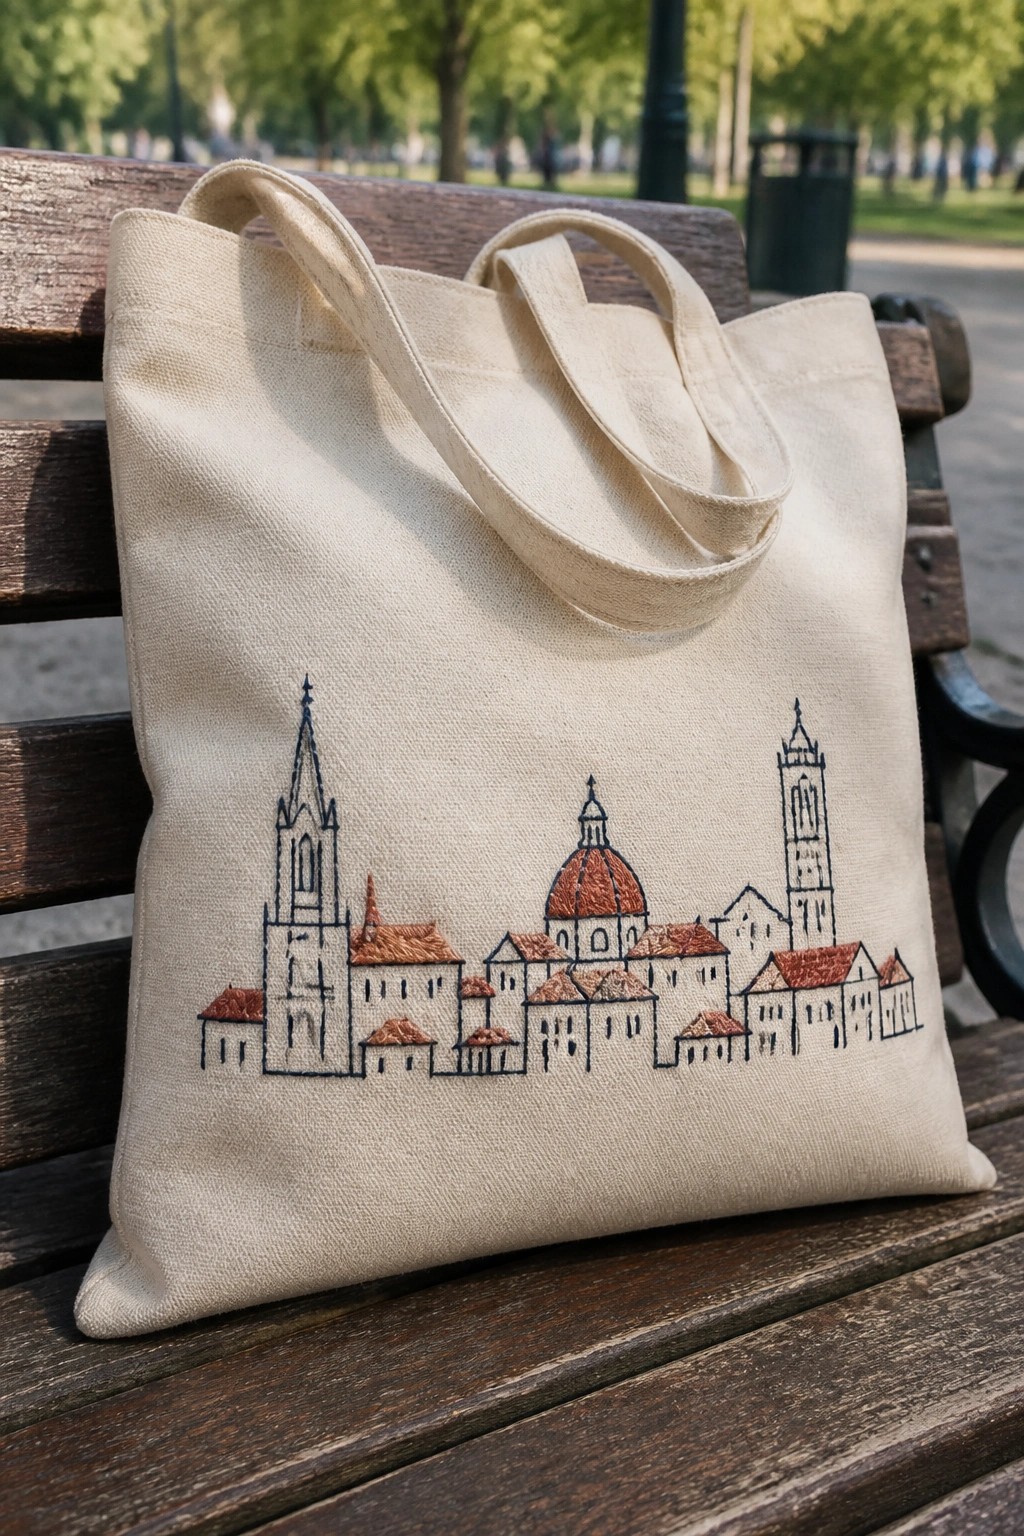
An embroidered row of buildings with two towers and a central dome runs across the front of a canvas tote. Black outlines form the structures while a few roofs and the dome get filled in a rusty red-brown thread. The design sits low enough to leave the top half of the bag clear for daily use. This layout works well on any flat fabric item that gets carried or folded.
The placement does a lot of the work here because the wide horizontal shape matches the tote surface without needing extra borders. You could shrink the same skyline to fit a smaller pouch or stretch it across a larger market bag by adding one more building. Swapping the roof color for a different shade keeps the look fresh while the black linework stays the same. The idea also translates easily to a zippered pouch or the back of a jacket if you want the motif on something besides a bag.
Mushroom Cluster Embroidery on a Tote Bag Corner
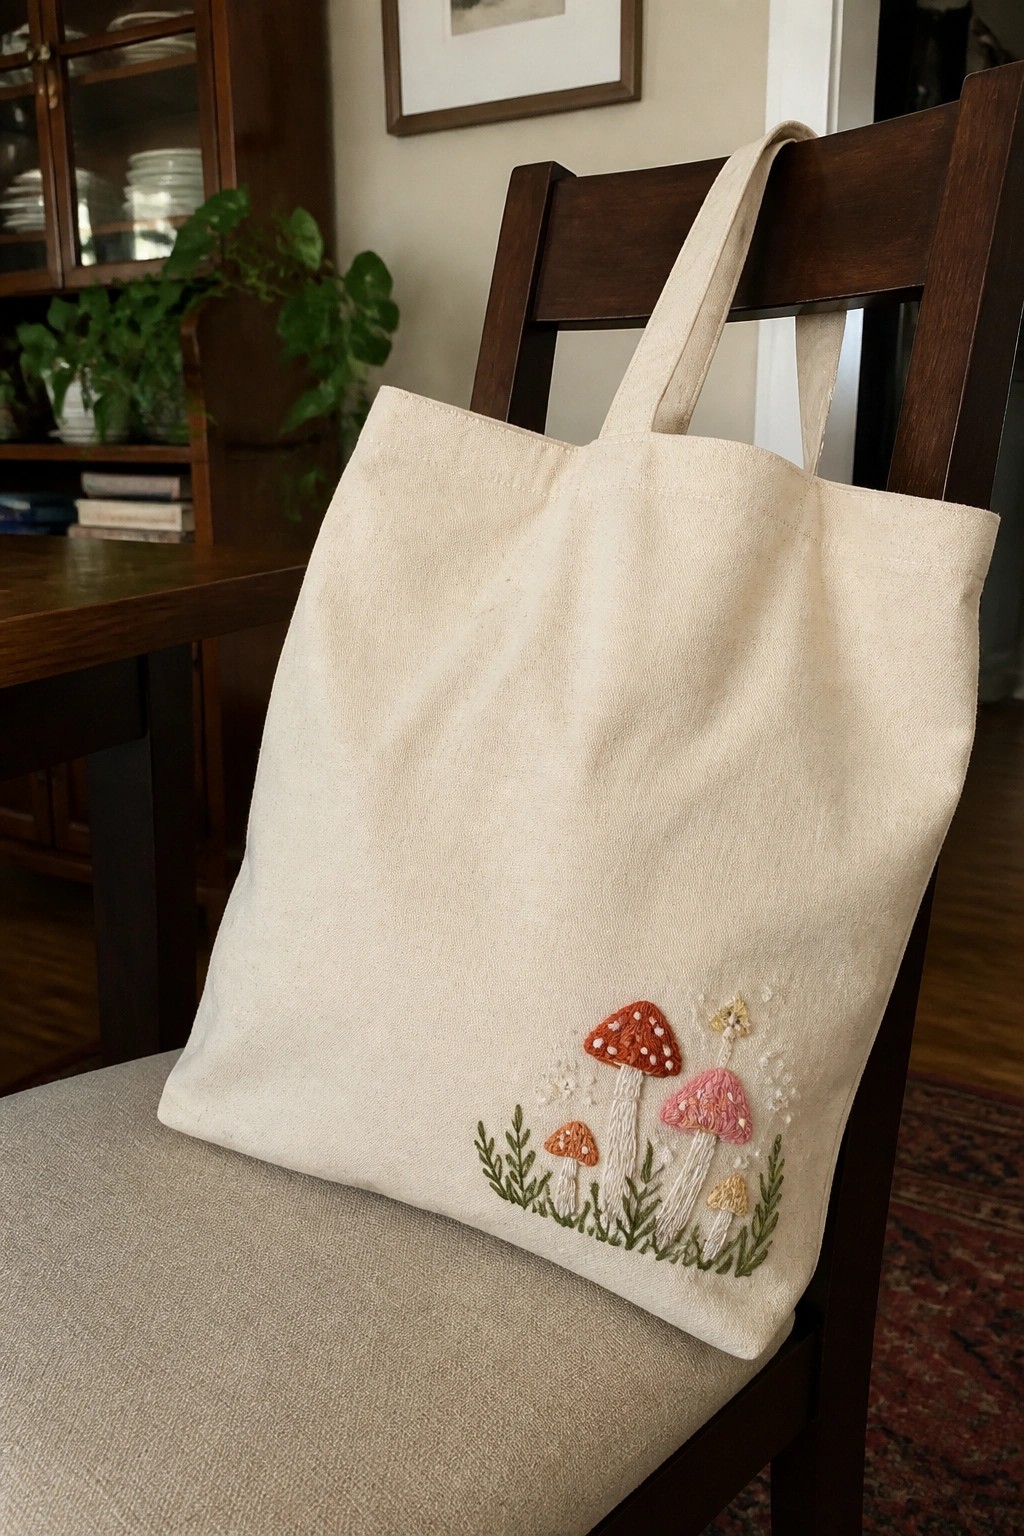
A small group of mushrooms in different sizes and colors sits in the lower corner of a plain canvas tote, with simple green leaves and stems filling the spaces between them. The design stays low on the bag so it remains visible whether the tote hangs from a shoulder or rests on a surface. Using a few shades for the caps and keeping the stems light helps the shapes stand out on the natural fabric without needing dense stitching.
What makes this idea useful is how the corner placement leaves the rest of the tote free for everyday use. You can shift the same cluster higher on the bag, repeat it on the opposite side, or shrink it to fit a smaller pouch or pocket. Changing the cap colors to one family of tones keeps the look cleaner while still giving contrast. The loose arrangement also makes it simple to add or remove a mushroom if you want to adjust the scale for a different project.
Frequently Asked Questions
Q: What supplies do I need to embroider designs on a plain canvas tote bag? A: Gather an embroidery hoop sized to fit your chosen design area, cotton embroidery floss in colors that match your vision, sharp needles designed for medium weight fabrics, a water soluble marker for tracing, and fabric scissors. Many of the 19 ideas work well with these basics so you can start without a large investment.
Q: How do I transfer the embroidery patterns onto my tote bag? A: Place the tote bag on a flat surface and use a water soluble pen to lightly draw the design directly onto the canvas. For more intricate patterns print the image and use transfer paper made for fabric or trace over the design with a light box if available. Always test your marker on a small hidden spot first to confirm it washes out cleanly.
Q: Which embroidery stitches work best for adding personality to canvas bags? A: Chain stitch creates bold outlines that stand out on canvas while satin stitch fills shapes smoothly for motifs like flowers or animals. Backstitch works well for lettering and fine details and French knots add texture to elements such as eyes or centers of blooms. Practice a few stitches on scrap canvas before committing to your tote.
Q: How do I ensure my embroidery lasts through regular use and washing? A: Knot all thread ends securely on the inside of the bag and consider adding a layer of lightweight fusible interfacing to the back for extra stability. When the project is complete wash the tote by hand in cold water with mild detergent then lay it flat to air dry. This approach keeps stitches intact even with frequent carrying.
Q: Can beginners try these creative tote bag embroidery ideas? A: Absolutely. Start with simpler designs from the list such as single word phrases or basic shapes using one or two colors. Work in a hoop to maintain even tension and take your time with each stitch. As your skills grow you can layer additional elements from the other ideas to build more complex looks.