

Embroidering something you’ll wear raises questions a hoop never does. How do you get a design onto dark denim? Which stitches survive the washing machine? How do you hoop a sleeve? Seeing how other people solved those problems is often more useful than any list of rules.
These are eight projects by other makers, not by me, each linked to the maker’s own post. Some are a weekend’s work, like a stitched collar, and one jacket back took dozens of hours, and I’ve noted the practical lesson in each one.
Every project below was made and photographed by the maker named under its photo. The photos are theirs, shown with credit and a link to the original post, where you’ll find the full instructions.
1. Wildflowers across a denim jacket back
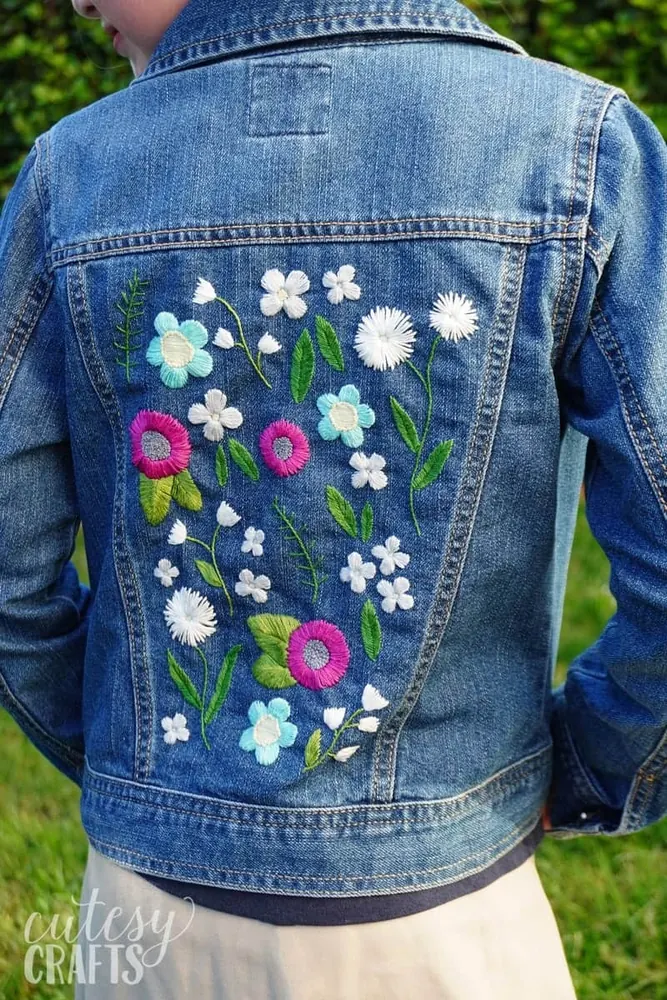
Jessica at Cutesy Crafts filled the back panel of a hand-me-down denim jacket with flowers, and the post is as much about making it last as making it pretty. She transferred the design with sticky water-soluble stabilizer, which is the method I’d use on denim too, and leaned heavily on satin stitch.
Her reasoning is worth remembering: raised, dimensional stitches like woven wheels don’t stand up well to repeated washing, so a jacket you’ll wear often is better with flatter stitches. She also secured the backs carefully and planned to iron interfacing over the inside. A free pattern is included.
See the project on Cutesy Crafts
2. A dahlia on a thrifted jacket
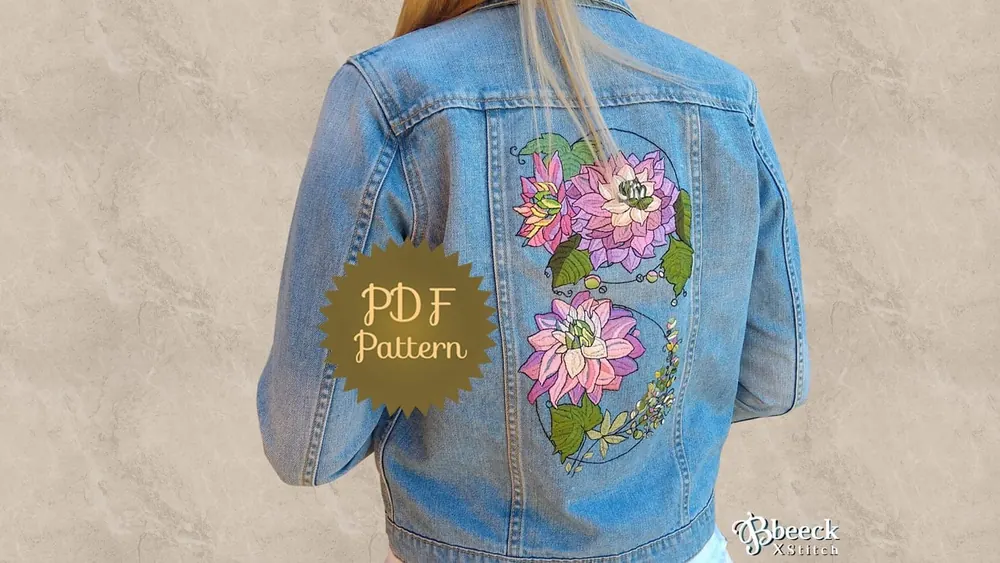
This dahlia started as one of several thrift-shop denim jackets waiting for a makeover. Denim isn’t see-through, so the design went on with carbon transfer paper, traced firmly with a pen on the back of the jacket.
The useful part is the satin stitch advice, because the flower is mostly filled. She used a single strand, kept stitches short and non-overlapping, pencilled in the stitch angle for each section, and split large areas into smaller ones. She also limited herself to four stitches in total, which keeps a big design manageable.
See the project on Mindful Cross Stitch
3. A mandala-style floral jacket stitched on a road trip
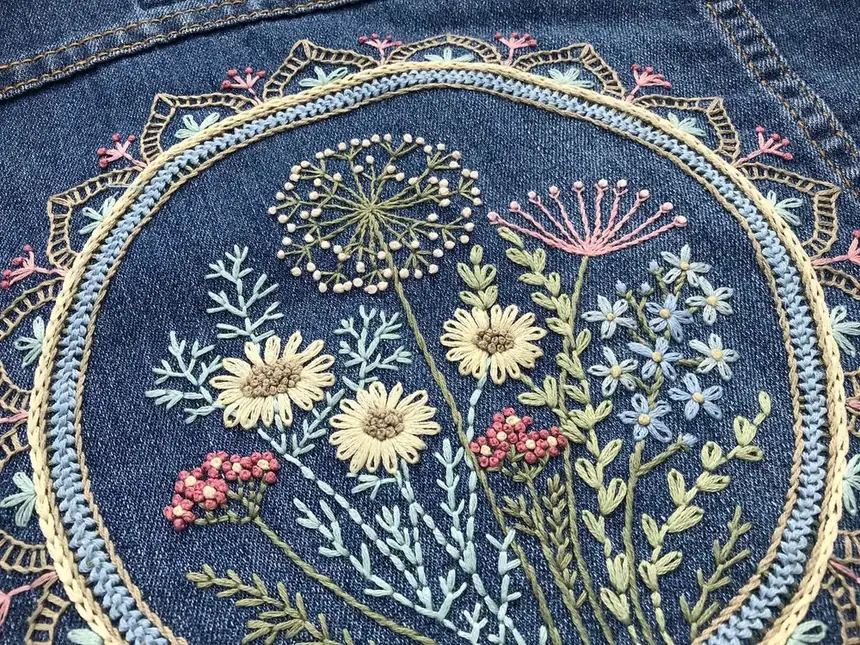
Leslie took this jacket on a long van trip and kept stitching for, by her estimate, 25 to 30 hours. Her design was ten and a half inches wide, wider than a letter-size sheet, so she printed it onto self-adhesive water-soluble stabilizer in two pieces and overlapped them on the jacket.
She basted the stabilizer down as well as relying on the adhesive, which is a sensible precaution on a project you’ll handle for weeks. The center of her design came from a purchased pattern that she adapted, which is a nice reminder that you don’t have to draw everything yourself to make something personal.
See the project on Leslie Fehling
4. Shortening sweatshirt sleeves with flowers
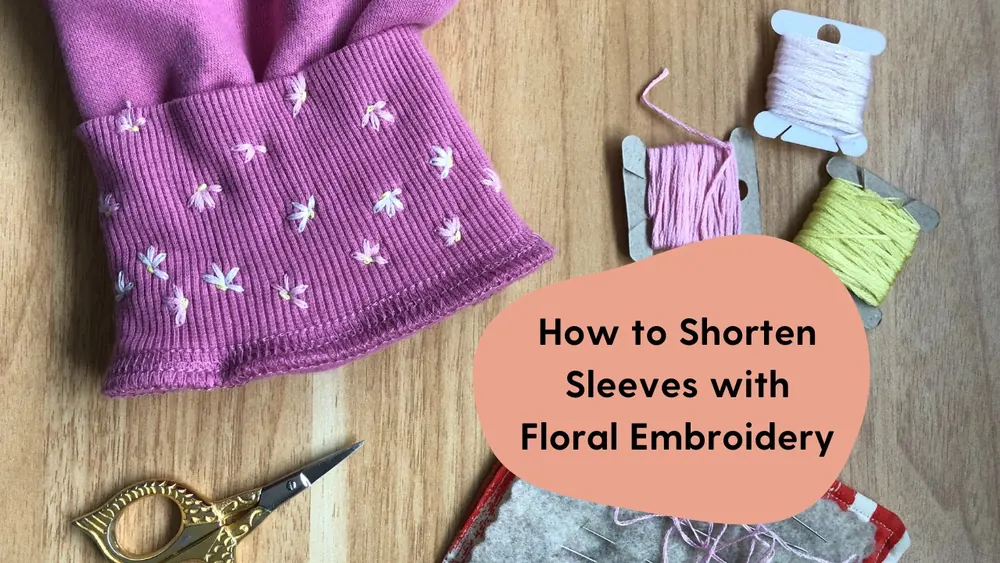
This is my favorite kind of clothing project: one that fixes a real problem. Melissa’s oversized sweatshirt had sleeves that were too long, and rather than cutting them she folded the cuffs to the length she wanted and stitched small flowers through the fold to hold it in place.
It’s quick, needs no sewing machine, and can be undone. She used a large needle (a DMC #1 or a darning needle) to get through the thick knit. If you try it, keep the stitches through the fold firm but not tight, so the cuff still stretches over your hand.
5. Flowers on a blouse yoke

Tilly embroidered the yoke of a blouse she’d made from her own sewing pattern, but the tutorial works on bought clothes too. It sticks to four beginner stitches: lazy daisy for petals, French knots for centers, fishbone for leaves and back stitch for stems.
She’s refreshingly honest that she isn’t the neatest or most patient stitcher and loves the result anyway, which is exactly the encouragement a first clothing project needs. The post also talks through which parts of a garment are easiest to embroider, which saves you starting somewhere awkward.
See the project on Tilly and the Buttons
6. A floral collar on a plain white top
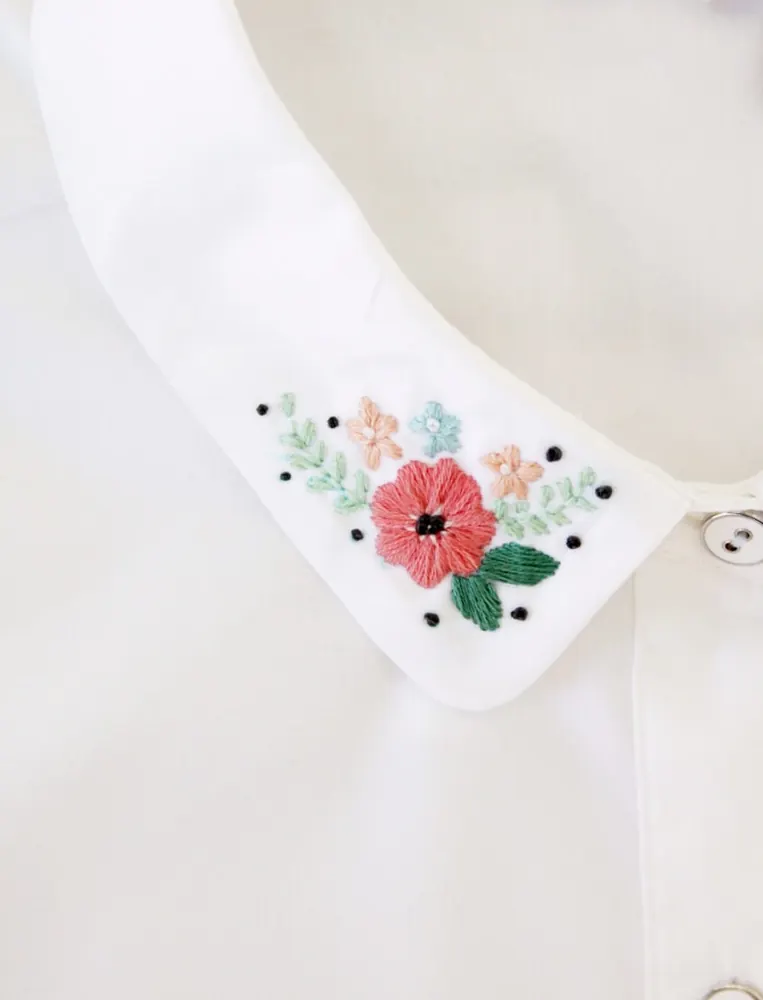
Bev turned a plain white top into something special with a scatter of flowers on the collar. The design uses only satin stitch and French knots, so it’s within reach if you’ve stitched a sampler or two.
Collars are a smart place to start: they’re small, flat and close to the face, so a little embroidery goes a long way. Bev suggests matching floss colors to a skirt you’ll wear the top with, or going softer with greys and creams. Her full DMC color list is in the post.
See the project on Flamingo Toes
7. Simple stitching on an old linen shirt
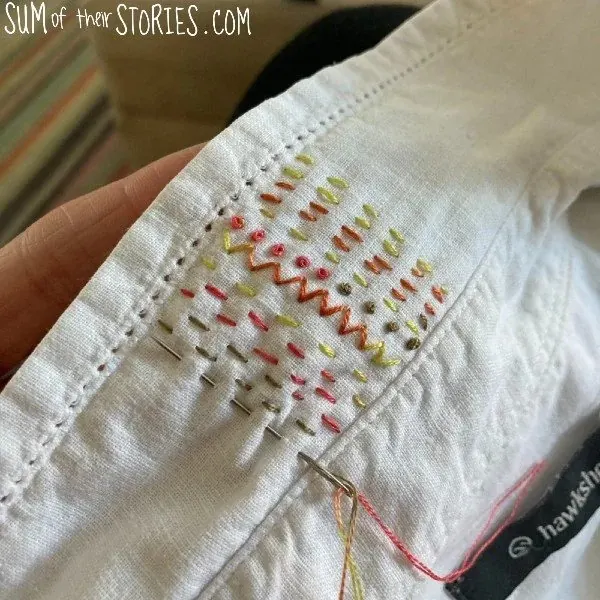
This shirt is proof that clothing embroidery doesn’t need a pattern. The blogger decorated a plain white linen shirt with rows of very simple hand stitches in variegated thread, inspired by slow stitching and visible mending groups.
Variegated thread does a lot of the work here: the color shifts along the length, so even straight running stitches look considered. If you’re nervous about committing to a drawn design on clothes, this is a low-pressure way to start, and it suits a shirt with a small stain or worn patch you’d like to cover.
See the project on Sum of their Stories
8. Flowers and vines on canvas sneakers
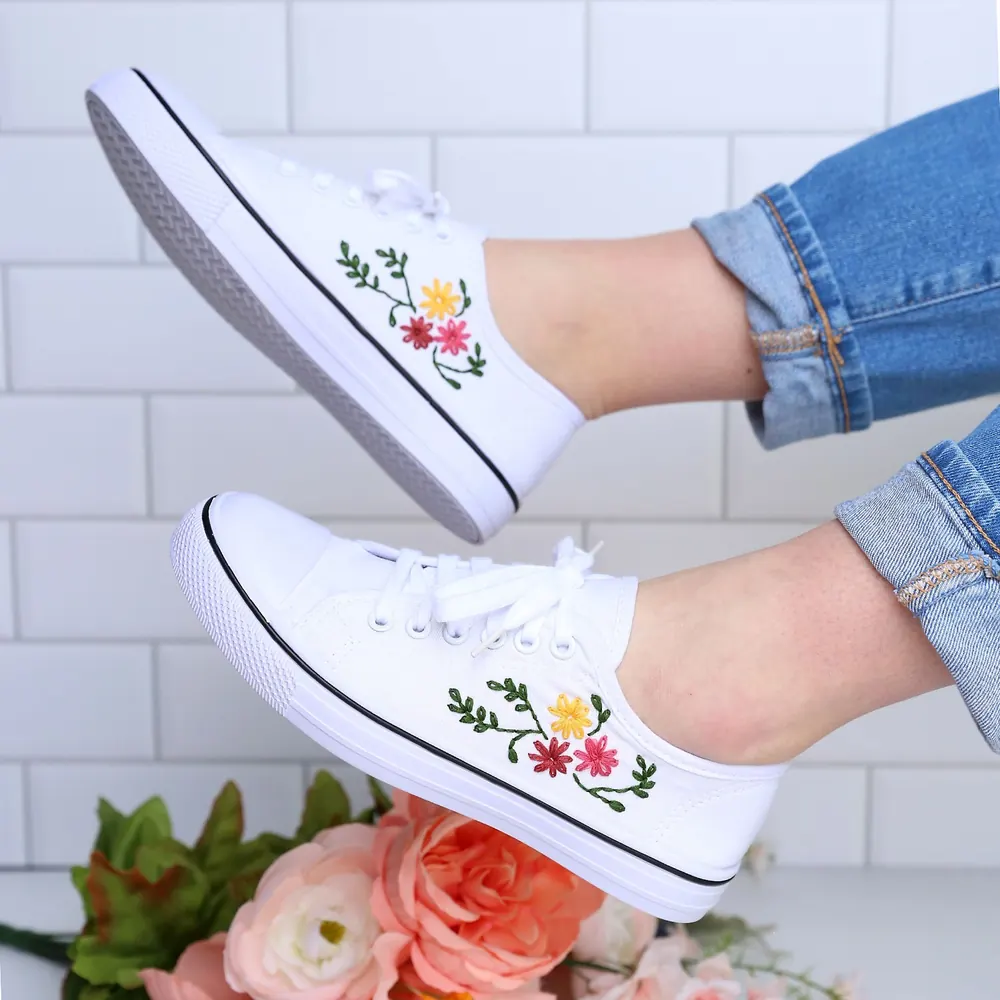
These sneakers were the blogger’s very first embroidery project, made on an inexpensive pair of canvas shoes. The flowers, leaves and vines use just two basic stitches, which keeps it realistic for a beginner.
The useful warning is about your hands: pushing a needle through canvas shoes is hard work, and she suggests a thimble and thread pullers or a grip tool. Choose the smallest needle eye your floss will pass through, since a smaller needle pierces canvas more easily.
See the project on It’s Always Autumn
Before you stitch on your own clothes
Most of these makers mention a transfer method, and my guide to transferring patterns compares them for light, dark and stretchy fabric. If your garment is a T-shirt or hoodie, read the stabilizer guide for stretchy fabric first, and when it’s finished, washing embroidered clothes explains how to keep it looking new.
