


Mending is one of those skills that makes more sense once you’ve seen a few real repairs up close. So instead of another set of my own tips, this is a collection of projects by other stitchers and menders whose work I keep going back to. None of these are mine. Each one links to the maker’s own post, and that’s where you’ll find their full instructions.
I picked them to cover the repairs people actually need: holes in jeans, moth damage on knitwear and the split seams that seem to happen to every pair of trousers eventually. For each one I’ve added a note on what I’d borrow from it.
Every project below was made and photographed by the maker named under its photo. The photos are theirs, shown with credit and a link to the original post, where you’ll find the full instructions.
1. A grid-stitched jean patch (koshi-zashi)
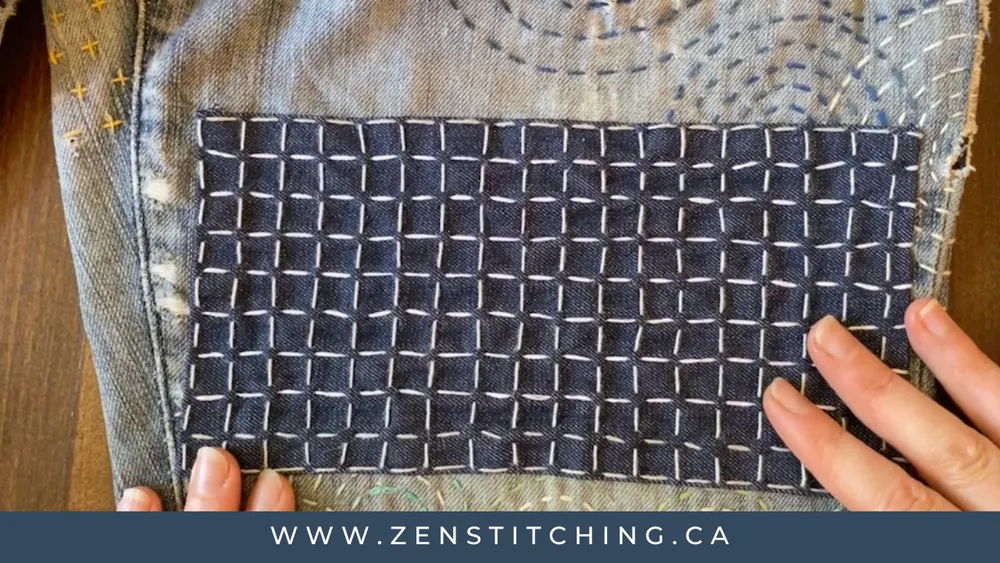
This tutorial from Zen Stitching uses a sashiko-inspired grid called koshi-zashi to hold a patch over a hole and reinforce the worn denim around it. The patch goes on at least an inch bigger than the hole on every side, a half-inch grid is marked on top with soap or chalk, and the stitching is done in two passes: vertical rows first, then horizontal ones.
What I like is how forgiving the method is. If you stop after the first pass, the jeans are already mended. The second pass turns it into the classic grid. The post also says plainly that you don’t need special supplies: #8 pearl cotton or four strands of floss work if you don’t have sashiko thread. There’s a video and a free PDF guide with the written steps.
See the project on Zen Stitching
2. Layered sashiko on a pair of badly worn jeans
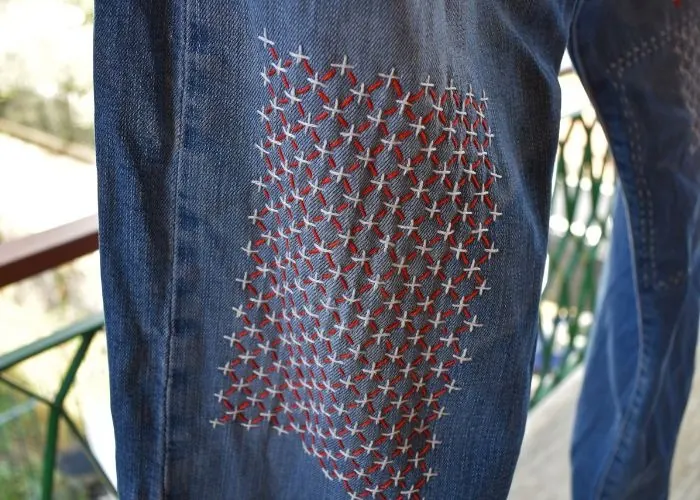
Tatjana’s jeans repair at Practical Embroidery is the one to read if your damage is bigger than a single neat hole. She sews an underside patch in first, folding the torn edges under and slip-stitching them down, then prints a dot grid onto water-soluble stabilizer and works the decorative layer straight through it.
The stitching builds up in layers: offset rows of running stitch, a second set at right angles, and a final layer in white pearl cotton that links the crossings diagonally. Splitting the patch area into two colors is a nice touch. She soaks the jeans afterwards to dissolve the stabilizer and hangs them to dry rather than tumble drying.
See the project on Practical Embroidery
3. Color-block darns on a cashmere sweater
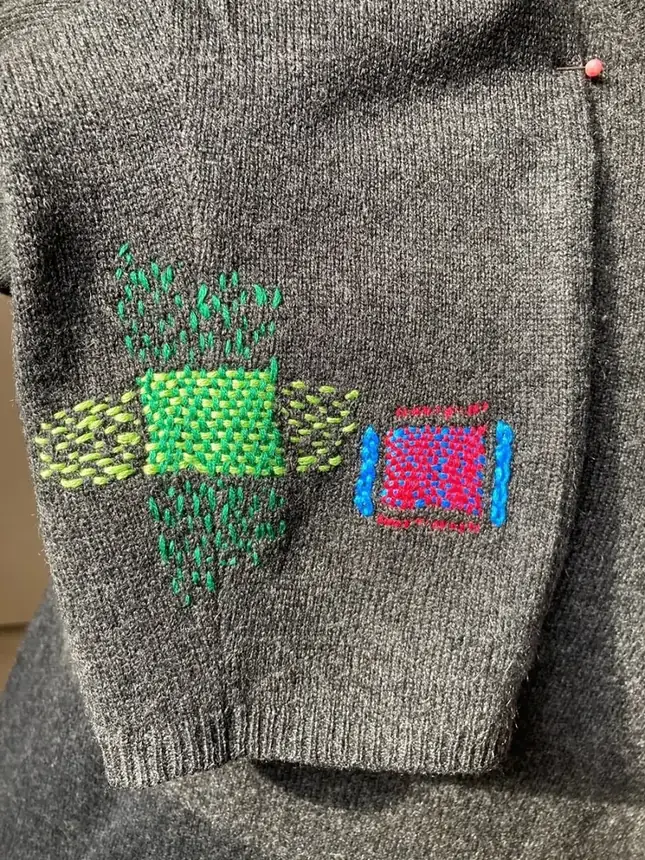
This cashmere pullover belonged to the blogger’s daughter, and the holes became small woven squares in bright cotton floss. It’s simple darning: a warp of threads laid across the hole, then a weft woven through it, done in contrasting colors so the repair is the point.
The tips are practical ones you only learn by doing it. Mark a generous border around the damage, cut a long enough thread that you don’t run out halfway through a square (she used almost a yard), and skip metallic thread, which drags through knitwear instead of gliding. She also wishes she’d used a darning egg from the start.
See the project on Sew Everything Blog
4. Dots of color on a much-loved navy sweater
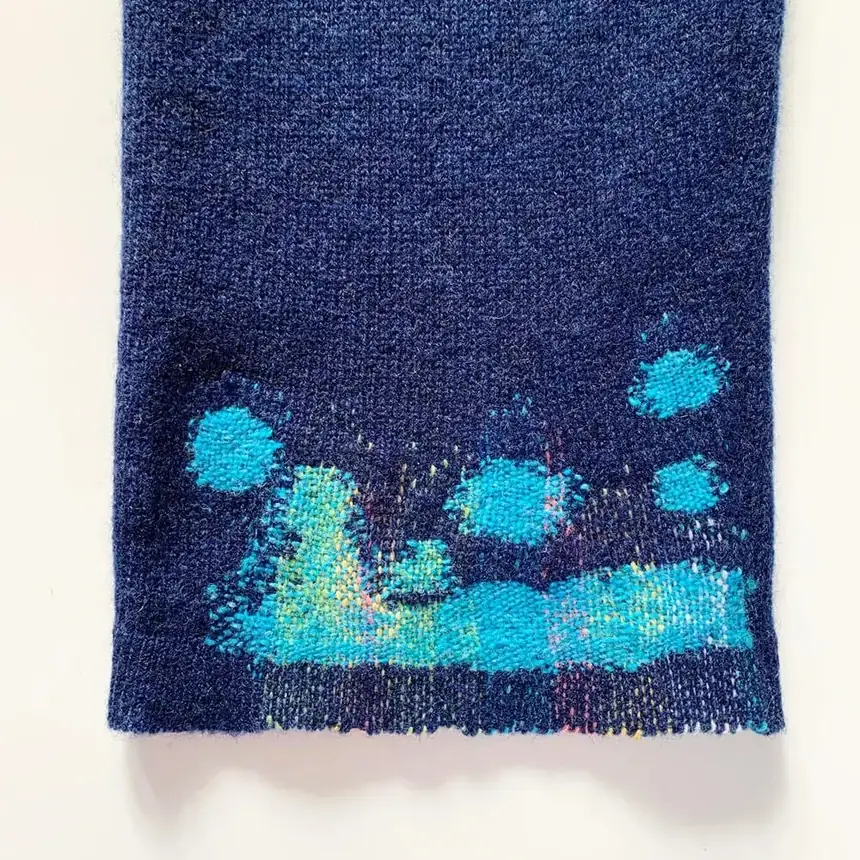
The sweaters in this post had been chewed by a puppy (named Stitch, of all things) and put away for years before they were finally repaired. Small holes became dots of color, worn elbows were reinforced with Swiss darning, and the bigger tears on the cuffs were kept simple so the shape of the repair carries it.
One idea I’d borrow: using several colors for the warp of a darn but only one for the weft, so the colors show through gently instead of shouting. There’s also a useful note on ribbed cuffs, where darning can pull the rib slightly out of shape and you have to decide how much stretch you want to keep.
See the project on Collingwood-Norris
5. Persimmon darns on a brown wrap sweater
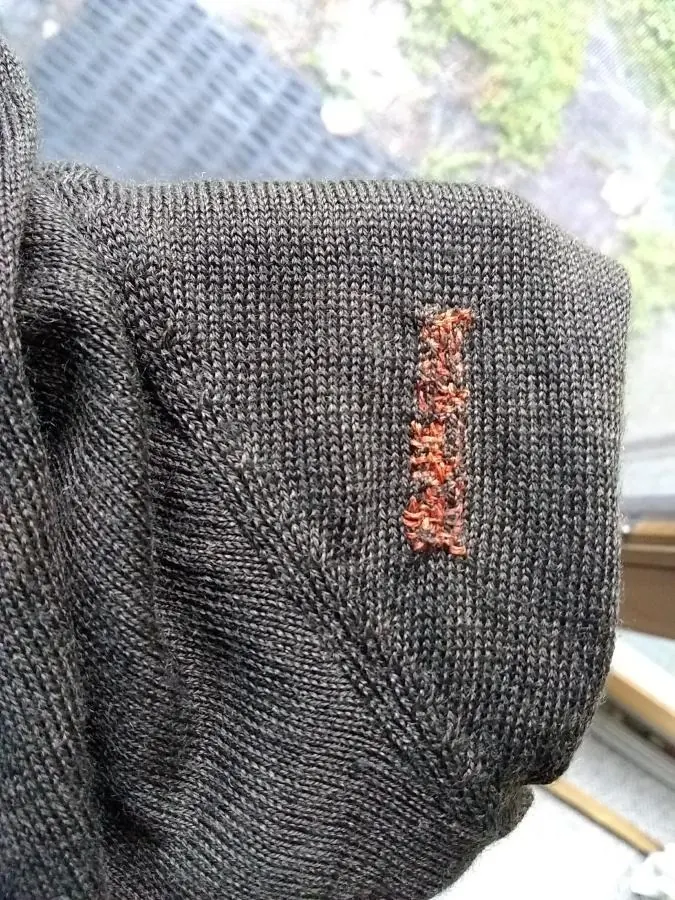
Marga mended this wrap sweater for a client who wanted the repairs to show. The holes were small and scattered, so she darned each one rather than patching, using a persimmon color that stands out against the brown knit without clashing with it.
The detail worth noticing is the thread choice. Because the sweater was a very fine knit, she used just two strands of embroidery floss instead of yarn, which keeps the darns flat and soft. If your sweater is thin, that’s a better match than chunky wool. The gallery also shows several before and after photos, which helps if you’re trying to judge how big a darn will look.
See the project on Marga Mends
6. Darning knits on a mending loom
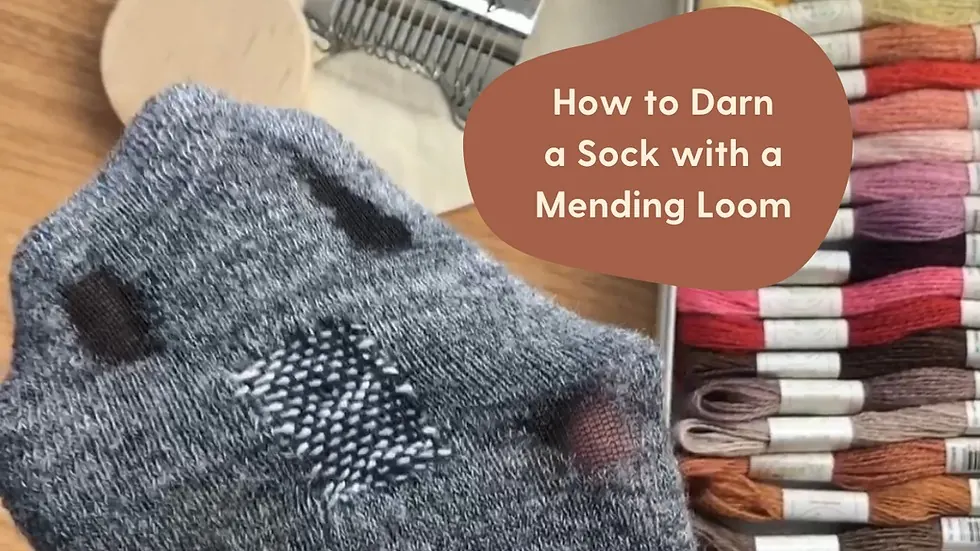
Melissa Galbraith tried a small mending loom for the first time here (the loom and thread were sent to her by DMC, which she says in the post), starting with a sock that took under half an hour before moving on to a sweater. The loom holds the vertical threads under tension so the weaving goes faster and more evenly.
It’s a clear walkthrough if you’re curious whether a loom is worth buying: vertical lines first, looped around the loom’s hooks, then horizontal rows woven over and under, and finally the loose tails woven in on the back. Her advice to choose two different colors for the two directions makes the weaving much easier to see while you work.
7. Almost invisible fixes for split seams
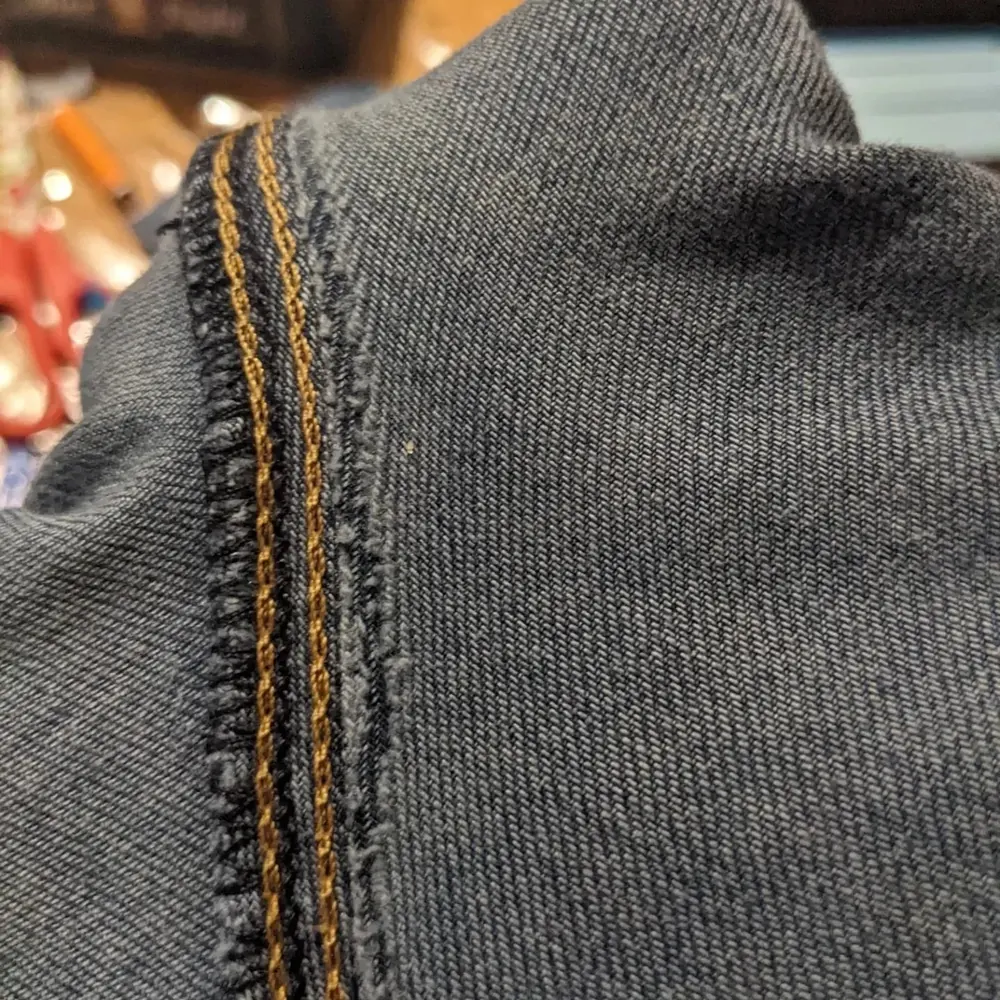
Not every repair has to show. Ealing Repair Cafe’s volunteers share how they fix the rips that jeans get along the back seam and around the pockets: a patch of similar denim glued in place on the inside with a glue stick, then seed stitches in matching thread worked from both sides to hold it.
It’s a good counterpoint to the bolder repairs above, and the tip about keeping offcuts from jeans that are past saving is one I’d pass on to anyone who mends. They also point out something easy to miss: dark denim fades with washing, but the thread may not, so a “matching” repair can become visible over time.
See the project on Ealing Repair Cafe
Before you start your own repair
If the words sashiko, boro and visible mending are new to you, my explainer on the difference sorts them out. For a step-by-step patch on jeans with supplies and stitch lengths, read how to patch a hole in jeans with sashiko, and once the mend is done, washing embroidered clothes covers how to keep the stitching in good shape.
