
I like working with daisy designs because they are straightforward and don’t take too long to finish.
These ideas are good for beginners since they use basic stitches and small areas of fabric.
I have tried a few of them myself on tote bags and clothing.
They can add a bit of detail without overwhelming the whole piece.
Some of the patterns are variations on the same flower but with different colors or leaf styles.
Gradient Yellow Daisy on a Plain Background

A compact daisy worked in several close shades of yellow gives the petals a soft shift in tone from the outer edges inward. The center uses small clustered stitches in a deeper yellow, and a single narrow stem in muted green drops straight down from the flower. This keeps the design small enough to fit neatly in the middle of a hoop or to repeat across a larger piece of fabric.
The small scale makes this easy to adapt onto a pocket, sleeve cuff, or corner of a pouch without overwhelming the item. Changing the yellow tones to cooler shades or adding a second stem lets you match different fabrics while keeping the same simple layout. A design like this works especially well on light linen or cotton where the thread colors stay visible but do not compete with pattern.
Three Daisies Along a Jean Pocket
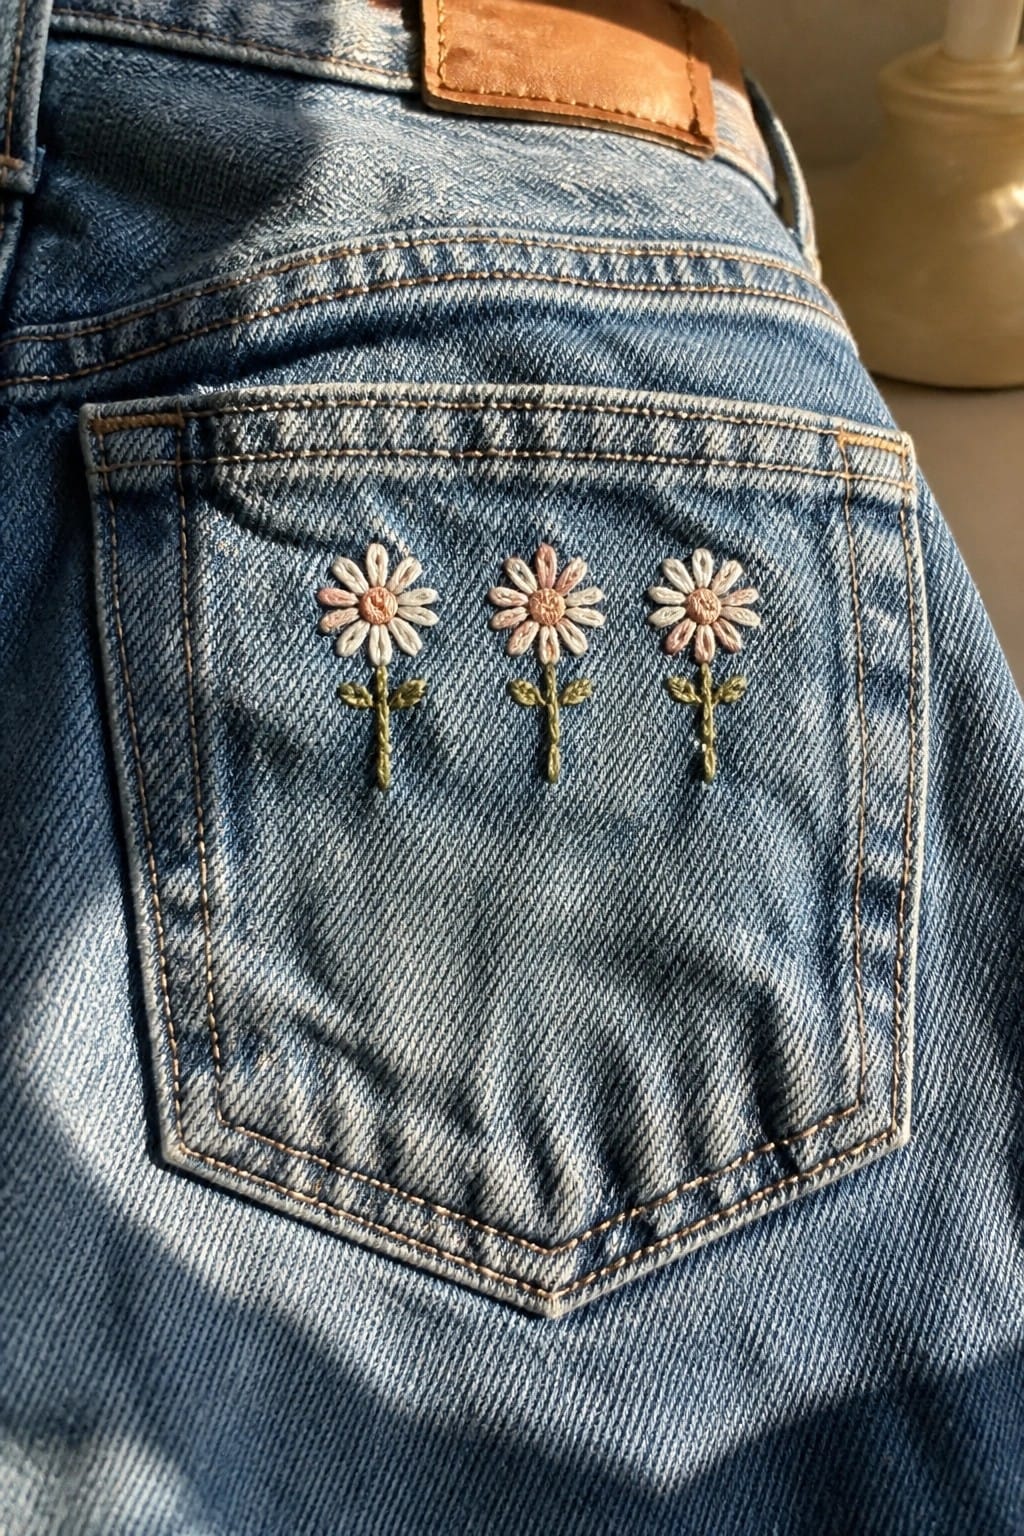
A straight row of three small daisies creates a repeating motif that sits neatly across the upper half of a back pocket. Each daisy uses the same simple shape with white petals, a pink center, and a short green stem plus one or two leaves, so the design stays balanced and compact. This layout works well on denim because the pocket already provides a flat, visible surface without needing extra fabric.
The placement does a lot of the work here because the pocket edges keep the row contained and easy to center. You could shift the same idea onto a front pocket, a jacket cuff, or a tote bag by changing the spacing or dropping one flower. On clothing the small scale keeps the stitching quick while still reading clearly in photos, which helps the design perform well when people share finished pieces.
Daisy Vines Along Shirt Collar Points

Small daisy stems work well when placed directly on the points of a button-up shirt collar. The design uses a handful of flowers with yellow centers and green leaves that follow the shape of each collar edge without crowding the fabric. This keeps the embroidery visible at the neckline while staying light enough for a garment that gets worn and washed regularly. The scattered layout also leaves most of the collar plain so the detail reads as an accent rather than a full pattern.
What makes this idea useful is how simply it adapts to other shirts or jackets by shortening the stems or dropping a flower or two. The same placement works on rounded collars or even the edge of a pocket if you keep the scale small. Switching the thread colors to match a different shirt fabric lets the design stay subtle instead of standing out too much. Because the motif stays narrow it also avoids adding stiffness to the collar points.
Daisy Cluster on a Canvas Tote

A cluster of three daisies with shared stems and leaves makes a clean motif for the front of a tote bag. The flowers sit at staggered heights so the design fills the space without looking flat or centered. White petals and yellow centers keep the look light against the neutral fabric while the green stems pull everything together at the base. This placement works well on bags or other fabric accessories that get carried around.
What makes this idea useful is how the vertical stem arrangement fits the shape of most totes without extra planning. You could shrink the whole cluster to fit a smaller pouch or repeat just two flowers on a jacket pocket. Swapping the petal color to a soft pink or moving the design lower on the bag changes the balance fast. The simple layout also photographs clearly for project shares since the stems create an easy line to follow.
Daisy Patch on a Small Canvas Pouch

A simple daisy worked in a circle makes an easy patch for a zippered canvas pouch. The flower uses blue and cream petals around a yellow center, with the outer ring stitched in a matching blue to frame the design neatly. Keeping the motif small and centered near the zipper lets the pouch stay functional while adding a clear focal point. This approach suits small accessories where you want decoration without a large time commitment.
The circular patch format lets you move the same motif onto other items like a tote corner or a jacket pocket. Scaling the flower down works for even smaller projects such as a key fob or card holder. Changing the petal colors to match the fabric or your thread stash keeps the look fresh without redesigning the layout. The contained shape also helps the design stay visible on busy surfaces like a desk or bag.
Daisies Spaced Along a Scrunchie Band

A simple row of small daisies with pink petals, yellow centers, and green leaves runs along one section of a gathered fabric scrunchie. The flowers sit evenly spaced so the design stays visible even when the fabric bunches. This approach keeps the embroidery flat on the surface while the rest of the scrunchie remains plain. It works best on accessories or small fabric items where a single band of stitching can show without needing full coverage.
What makes this idea useful is how the straight line of motifs follows the curve once the scrunchie is worn. You could move the same spacing onto a headband, a tote strap, or the edge of a pocket. Switching the petal color to one shade or tightening the flower spacing would change how bold the detail looks on lighter or darker fabric. The compact layout finishes fast and still reads clearly on something used every day.
Single Daisy in the Corner of a Napkin

A single daisy embroidered in the corner of a plain white napkin keeps the design small and contained. The white petals and yellow center sit close together while the green stem trails downward, using the fabric edge as a natural boundary. This approach works best on flat linens or similar small fabric pieces where the embroidery needs to stay out of the way during use. The limited color palette and open space around the flower prevent it from feeling crowded on the surface.
What makes this idea useful is how the corner placement automatically frames the motif without extra stitching. You could move the same daisy to a cuff, pocket edge, or towel border with almost no changes to the pattern. Shrinking the scale even more would let it fit on a set of matching napkins, while swapping the center color offers a fast way to vary a batch of gifts. The simple layout also photographs cleanly for project sharing since the fabric stays mostly empty.
Daisy Chain Border on Denim Cuffs

A straight line of small daisies connected by one continuous stem forms a clean border that follows the edge of a denim cuff. The flowers sit right along the finished hem so the stitching reinforces rather than fights the garment’s shape. Keeping the motif narrow and vertical lets it highlight the seam without spreading across the fabric. This approach works best on clothing like jeans, shorts, or jacket sleeves where a repeating floral line can replace plain topstitching.
The placement does a lot of the work here because the cuff already supplies a straight guide and a finished edge to stitch against. You could shift the same connected-stem layout onto a shirt placket, the side seam of a skirt, or the strap of a canvas tote with almost no changes. Adjusting the flower spacing or swapping the center color gives quick variety while the overall scale stays beginner-friendly. On Pinterest this kind of project performs well because it shows embroidery that updates clothes people already wear.
Vertical Daisy Bookmark
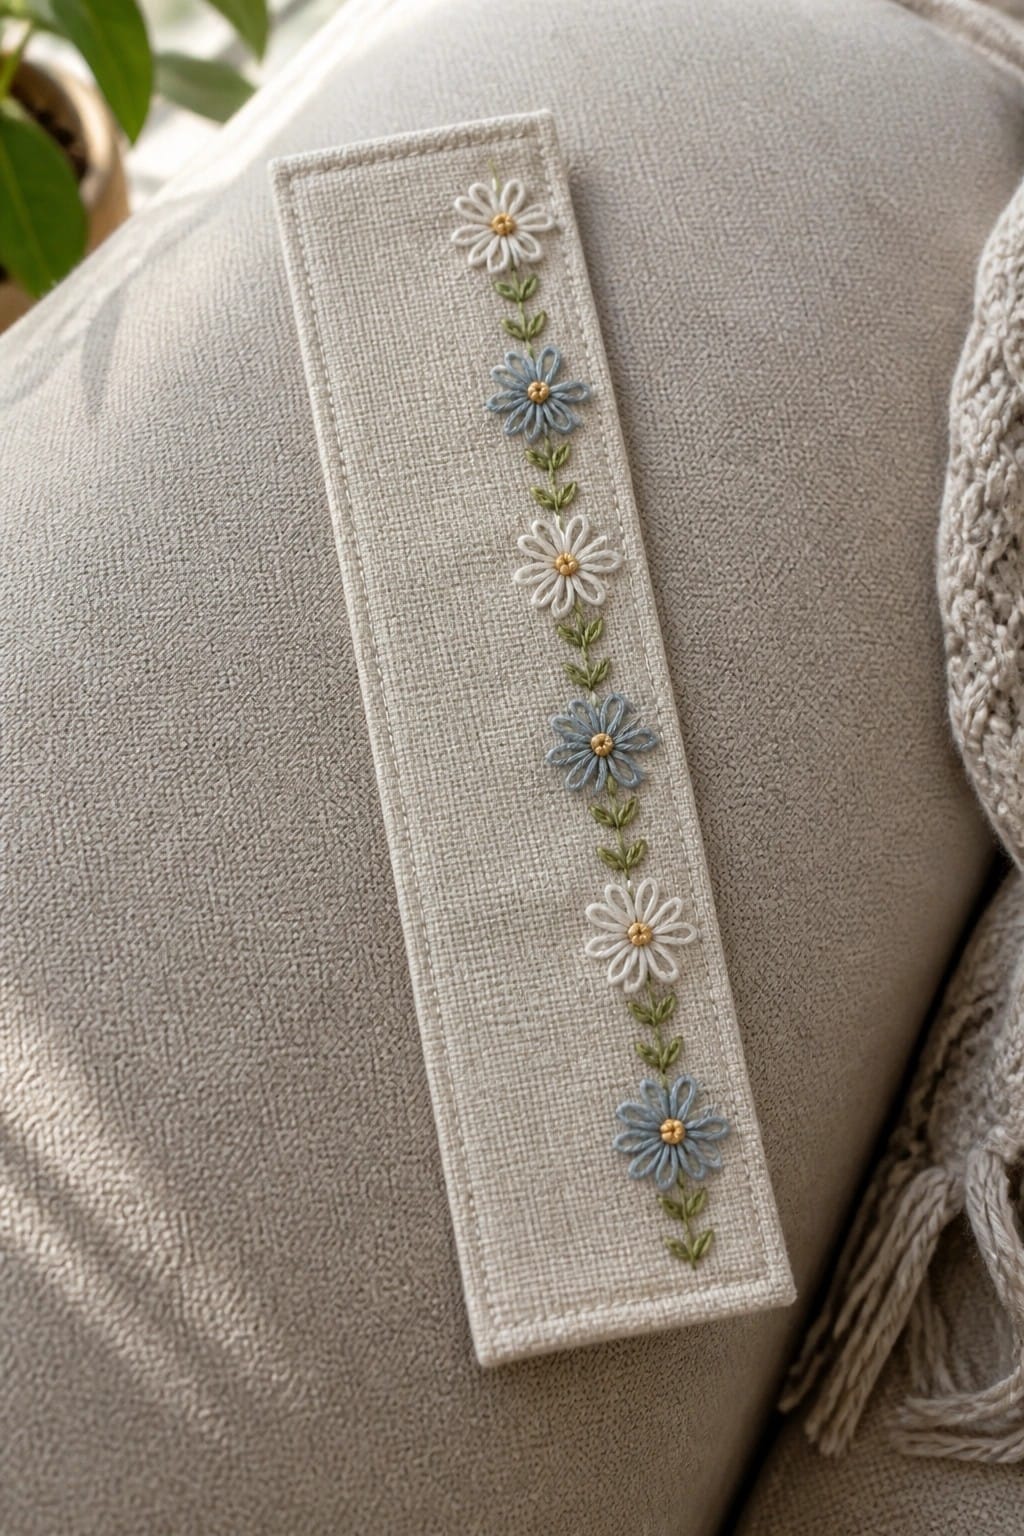
A narrow fabric strip works well for a vertical daisy design that runs the full length of the piece. Alternate white and light blue flowers with small green stems and leaves between them to keep the pattern moving without crowding the space. This layout fits bookmarks, journal wraps, or the front of a small pouch because the shape stays contained and the flowers stay readable at a small scale.
The narrow format does most of the work here by forcing a simple line of flowers that reads cleanly from top to bottom. You could shift the same motif onto a key fob, a zipper pull, or the edge of a pocket by shortening the strip and dropping the bottom flower. Swapping the blue flowers for another color or making every flower the same shade changes the look fast while keeping the project quick to finish. The clean vertical arrangement also shows up well in searches for small floral bookmarks.
Daisy Wreath Patch for Jacket Sleeves

A ring of small daisies arranged in a circle makes an effective motif for a fabric patch. The design sits on a dark round background with a simple border stitch that keeps the edges neat when attached to denim. This approach works well on clothing because the compact layout fits easily on a sleeve or shoulder without overwhelming the garment.
The placement on a jacket shows how the same wreath can transfer to other items like bags or caps by resizing the circle or swapping the background color. A darker base fabric helps the light petals stand out, while a lighter one would shift the look toward something softer. This style also saves time since the patch can be finished separately and sewn on later.
Corner Daisy Cluster on a Napkin

Three daisies in different sizes sit on thin green stems in the corner of a folded white fabric piece. One flower uses yellow thread while the other two are worked in white, creating a simple but varied group that fills the space without crowding it. The stems curve gently and share a few small leaves at the base. This layout suits napkins, tea towels, or the corner of a handkerchief where you want a small accent that still leaves most of the fabric plain.
A design like this works especially well on napkins because the corner placement stays out of the way during use. You could shift the same cluster onto a shirt pocket or the edge of a tote by shortening the stems and dropping one flower. Changing the thread colors to match existing dishes or linens keeps the idea flexible for gifts or sets. The small overall scale also makes it easy to repeat across several items without much extra time.
Daisy Cluster on a Baseball Cap

A small group of three daisies makes a clean motif when stitched across the front panel of a baseball cap. Two flowers sit slightly larger with one smaller bloom tucked to the side, all linked by short green stems that follow the curve of the fabric. The mix of white and pink petals keeps the design from looking too uniform while staying compact enough for the limited space. This approach works well on accessories like hats or bags where the embroidery needs to stay visible but contained.
The placement does a lot of the work here since centering the cluster on the front panel draws the eye without needing extra elements. You could swap the pink cap for a neutral color or adjust the flower shades to match different fabrics. For clothing, this kind of motif translates easily to shirt pockets or jacket sleeves by tightening the spacing between the flowers. The small overall size also makes it simple to test on scrap fabric first before committing to the final piece.
Daisy Embroidery Along a Baby Onesie Neckline

Small daisy motifs placed in a gentle curve along the neckline of a baby onesie create a simple border that follows the shape of the collar. The flowers sit just below the seam so they remain visible when the garment is worn. This approach keeps the design compact and avoids covering large areas of the fabric. It suits small clothing projects or accessories where space is limited.
The placement does a lot of the work here because the neckline already gives the row a natural boundary. You could shift the same spacing onto the edge of a receiving blanket, the front of a bib, or the hem of a toddler shirt. Adjusting the number of flowers lets you fit the design to different neck widths without changing the motif itself. The light color palette on white fabric also translates easily if you swap the base color for pastels or soft prints.
Corner Daisy on a Linen Napkin

A single daisy embroidered near the corner of a folded napkin keeps the design small and contained. The white petals and yellow center sit above a short green stem that points toward the edge, leaving most of the fabric plain. This placement suits napkins, handkerchiefs, or small cloths where the embroidery needs to stay out of the main work area.
What makes this idea useful is how the corner position lets you add embroidery to items you actually use without covering too much surface. You could repeat the same daisy on a set of matching napkins or move it slightly higher for a different balance. Scaling the flower down even more would work on the edge of a pocket or cuff, while keeping the stem short prevents the design from looking stretched out on smaller pieces.
Daisies Stitched onto Canvas Sneakers

A pair of small daisies with connected stems and leaves forms a compact cluster placed on the upper of a canvas sneaker near the laces. The design sits low on the toe area so it stays visible when the shoe is worn without interfering with movement or laces. The scale keeps the flowers in proportion to the shoe surface and lets the fabric texture show through between stitches. This approach works on any fabric shoe, bag, or clothing item where a small motif can sit on a curved or flexible surface.
The placement does a lot of the work here because the toe curve naturally frames the flowers without extra stitching. A design like this transfers easily to other canvas items such as totes or jackets by keeping the same two-flower layout but shifting the angle to match the new surface. Changing the thread colors to match different shoe shades keeps the same structure while making each pair look custom. The small size also means it finishes quickly on fabric that is already part of a finished item rather than starting from scratch on blank cloth.
Daisy on a Fabric Hair Clip

A single daisy stitched onto a small rectangle of neutral fabric creates a finished hair barrette. The flower sits centered with white petals, a yellow middle, and a short green stem and leaves. The rectangular shape keeps the motif contained and balanced on the clip base. This works best for accessories that need a small, flat embroidered detail rather than larger decorative pieces.
The placement does a lot of the work here since the clip already provides a ready-made surface that needs no extra hoop or framing. The same daisy can be shifted onto a headband, a pocket edge, or a small pouch by keeping the scale tight. Changing the background fabric color or thread shades lets you match different outfits without redesigning the motif. This format also travels well for quick gifts since the whole piece stays compact from start to finish.
Simple Daisy Motif for Quick Patches

A daisy worked with white petals around a compact yellow center creates a clean focal point on light fabric. The motif sits centered on a small square that can be cut out later, making it easy to move onto clothing, bags, or other finished items. The contrast between the white and yellow threads keeps the shape readable even at a small scale, so the design stays visible without extra outlining or fill.
What makes this idea useful is how the round shape and limited color palette transfer well to denim pockets or the corner of a tote. You can change the petal color to match existing thread on hand or shrink the whole flower to fit inside a 3-inch hoop for faster stitching. On clothing, this motif avoids the bulk of larger florals while still giving a finished look after the fabric square is turned into a patch.
Vertical Daisy Row on a Fabric Key Fob

Three small daisies in soft pink, yellow, and blue sit in a straight line down a narrow strip of beige fabric, each with a short stem and spaced evenly from top to bottom. The design uses the length of the strip itself to create the layout, turning a simple repeat into a finished accessory once a metal ring is added at the top. This approach keeps the stitching contained and quick while still showing clear progression from one flower to the next. The same idea works for any narrow item where you want a short, repeatable motif rather than a wide spread.
What makes this idea useful is how cleanly it moves to other small accessories like zipper pulls, luggage tags, or even a slim bookmark. You can shift the colors to match different fabrics or swap the order of the flowers without changing the overall structure. Because the motif stays compact, it fits easily on leftover fabric scraps and finishes fast enough to make several at once. The vertical line also helps the piece read clearly even when the key fob is hanging or clipped to a bag.
Frequently Asked Questions
1. What basic supplies will I need to try these daisy embroidery ideas as a beginner? Start with a small embroidery hoop sized 4 to 6 inches, cotton or linen fabric, embroidery floss in white and yellow shades plus green for stems, a pack of embroidery needles in size 5 to 7, small scissors, and a water soluble fabric marker. These items keep projects affordable and portable while allowing you to complete any of the 18 designs without extra purchases.
2. Which stitches should I use to create simple daisy petals and centers? The lazy daisy stitch forms each petal quickly by looping thread and anchoring it at the base. Fill the center with French knots or a small cluster of satin stitches. Outline leaves with a backstitch. Practice these three stitches on scrap fabric first so your daisies look neat even on the smallest projects.
3. How do I transfer the daisy patterns onto fabric without making mistakes? Print the chosen design at the desired size, place transfer paper or use a light box to trace outlines with the water soluble marker. Keep lines light so they wash out easily. For tiny projects mark only the main petal positions rather than every detail to avoid overcrowding the small space.
4. What are good small project ideas for displaying finished daisies? Stitch a single daisy onto a pocket of a shirt, the corner of a cloth napkin, a hair scrunchie, or the front of a greeting card. Multiple small daisies work well on a bookmark or the edge of a tote bag strap. These items let you finish quickly and show off your work without needing large pieces of fabric.
5. How can I avoid common beginner errors when working on these designs? Keep your floss length under 18 inches to prevent tangles and use two strands for most petals. Maintain even tension by not pulling too tight which can pucker the fabric. If a petal looks uneven, simply remove the stitch and try again on the same spot since small projects use little thread overall.