
I’ve been working on some bee embroidery projects lately and they turned out to be a nice way to add a bit of nature to my stitching.
Bees have this simple shape that works well for both beginners and more experienced stitchers.
I like how they can be combined with flowers or leaves for a playful look without getting too complicated.
Here are some ideas I’ve gathered that might give you a few new patterns to try.
Three Bees with Scattered Daisies

Three bees of different sizes form the main motif, each with striped bodies and white wings, while small daisy flowers fill in the spaces around them on the fabric. The design stays compact enough to fit neatly inside a standard hoop without crowding. This arrangement suits a finished hoop piece or can move to a small accessory like a pouch or hat patch where the bees remain the clear focus.
The loose spacing between the bees makes it easy to drop one or two motifs onto a pocket or sleeve without needing extra filler. Scaling the whole group down works for a key fob or bookmark, while keeping the current size fits a medium hoop for a gift. The color split between the bold bee stripes and pale flowers helps the design read clearly on both light and medium fabrics. A design like this works especially well when you want multiple quick projects from one layout by stitching them separately.
Bees Flying Toward a Honeycomb on a Jeans Pocket
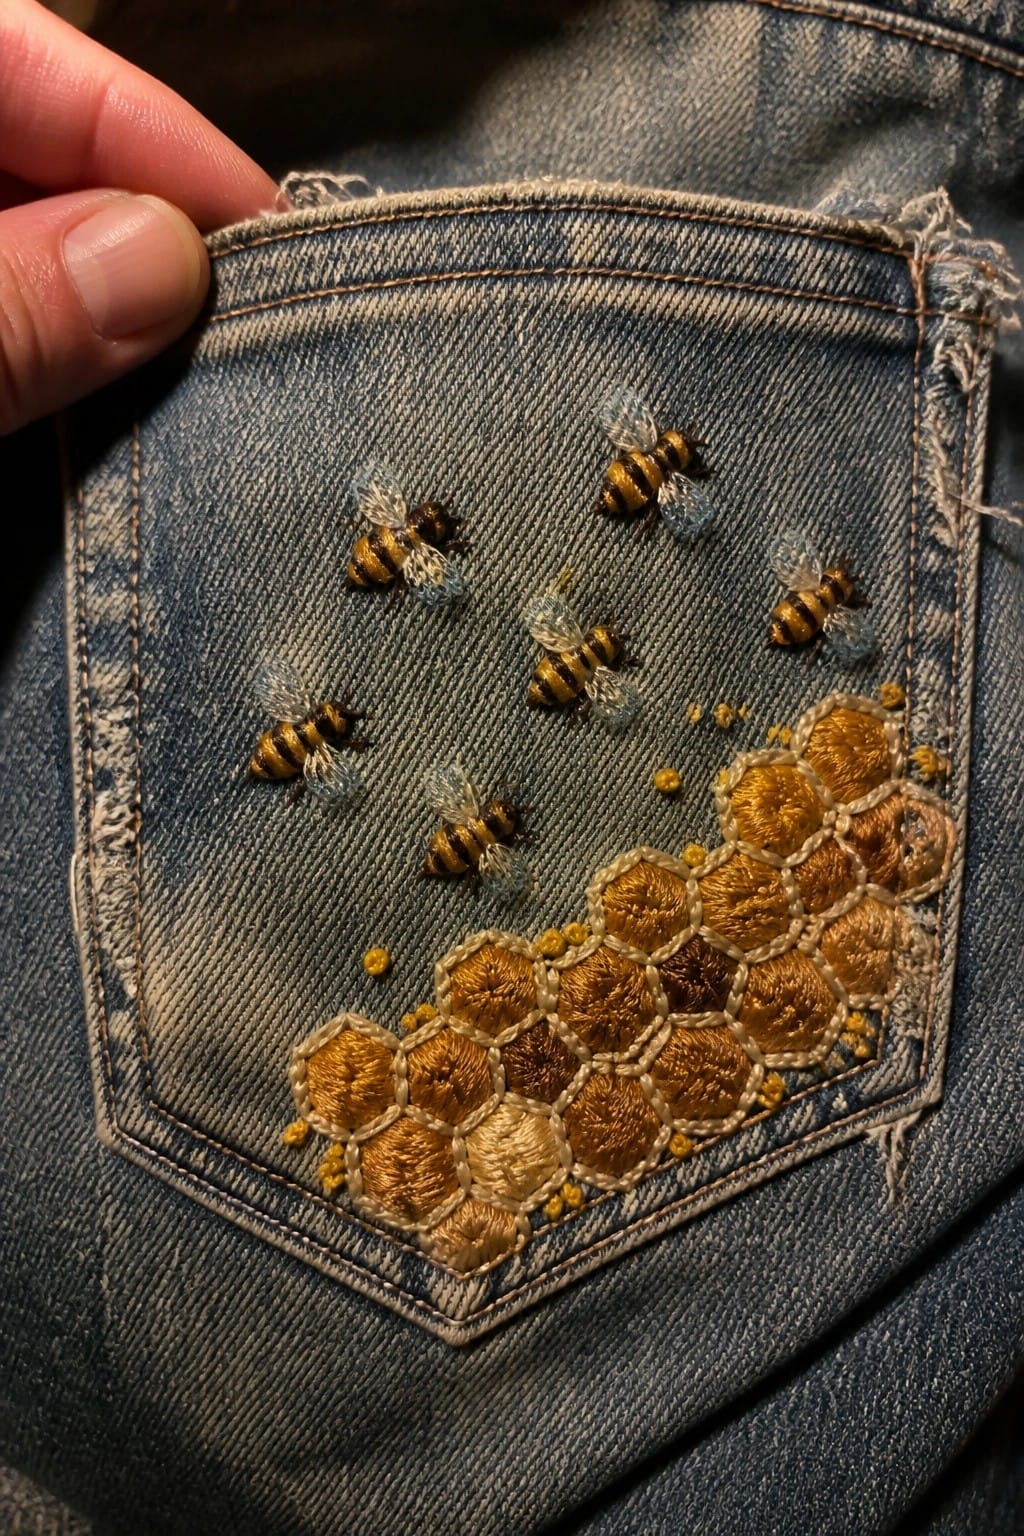
Stitch a line of small bees across a back jeans pocket so they angle toward a honeycomb cluster in the lower corner. The bees use yellow and black stripes with pale wings while the honeycomb builds up in shades of gold and brown to fill the space. This layout fits the pocket shape and creates a clear path that guides the eye without covering the whole area. It suits upcycled clothing projects where the denim already supplies a sturdy base.
The placement does a lot of the work here because the pocket edges keep the design contained. You can reduce the number of bees or move the honeycomb to the top corner if the jeans have a different pocket style. Switching the thread colors to brighter yellows makes the same pattern read more playful on lighter denim or canvas bags. A design like this works especially well on clothing because it stays visible during wear without needing extra framing.
Bee Bouquet on a Canvas Tote

A smiling bee centered over a small bouquet of sunflowers and clover works well as the main design on a plain canvas tote. The stems are stitched to meet at the bottom so the flowers sit in a tidy cluster rather than spreading out. This keeps the whole motif compact enough to sit above the natural fold line of the bag while still leaving plenty of empty fabric around the edges. The idea translates directly to other flat carry items like market bags or zip pouches.
What makes this idea useful is the way the gathered stems create a clear base that anchors the design on a tote without extra outlining. You could drop the same layout onto a smaller pouch by shortening the stems or swap the sunflowers for whatever yellow or orange flowers you already have in your thread stash. On a larger bag the motif can sit a little higher so it stays visible even when the tote is full. The contained shape also makes it easy to move the design to a jacket pocket or the corner of a tea towel if you want to test the pattern first.
Bee and Leaf Motifs on Shirt Collars

A small bee worked in black, yellow, and white threads sits on one collar point of a light shirt while a simple leaf in green threads occupies the matching point on the opposite collar. The designs are scaled to fit the narrow fabric area without crowding the button line or placket. This placement keeps the embroidery visible whether the shirt is worn open or partially buttoned. The idea suits any button-front shirt or blouse where you want a subtle nature detail near the face.
The placement does a lot of the work here because the collar points naturally frame the motifs when the garment is displayed or worn. You could repeat the bee on both collars for a more symmetrical look or move the same pair to the corners of a chest pocket. Swapping the leaf color to match the shirt fabric would make the bee the only focal point. Small paired designs like this transfer easily to other garments such as lightweight jackets or even the corners of a scarf.
Honey Jar and Bee on a Zipper Pouch
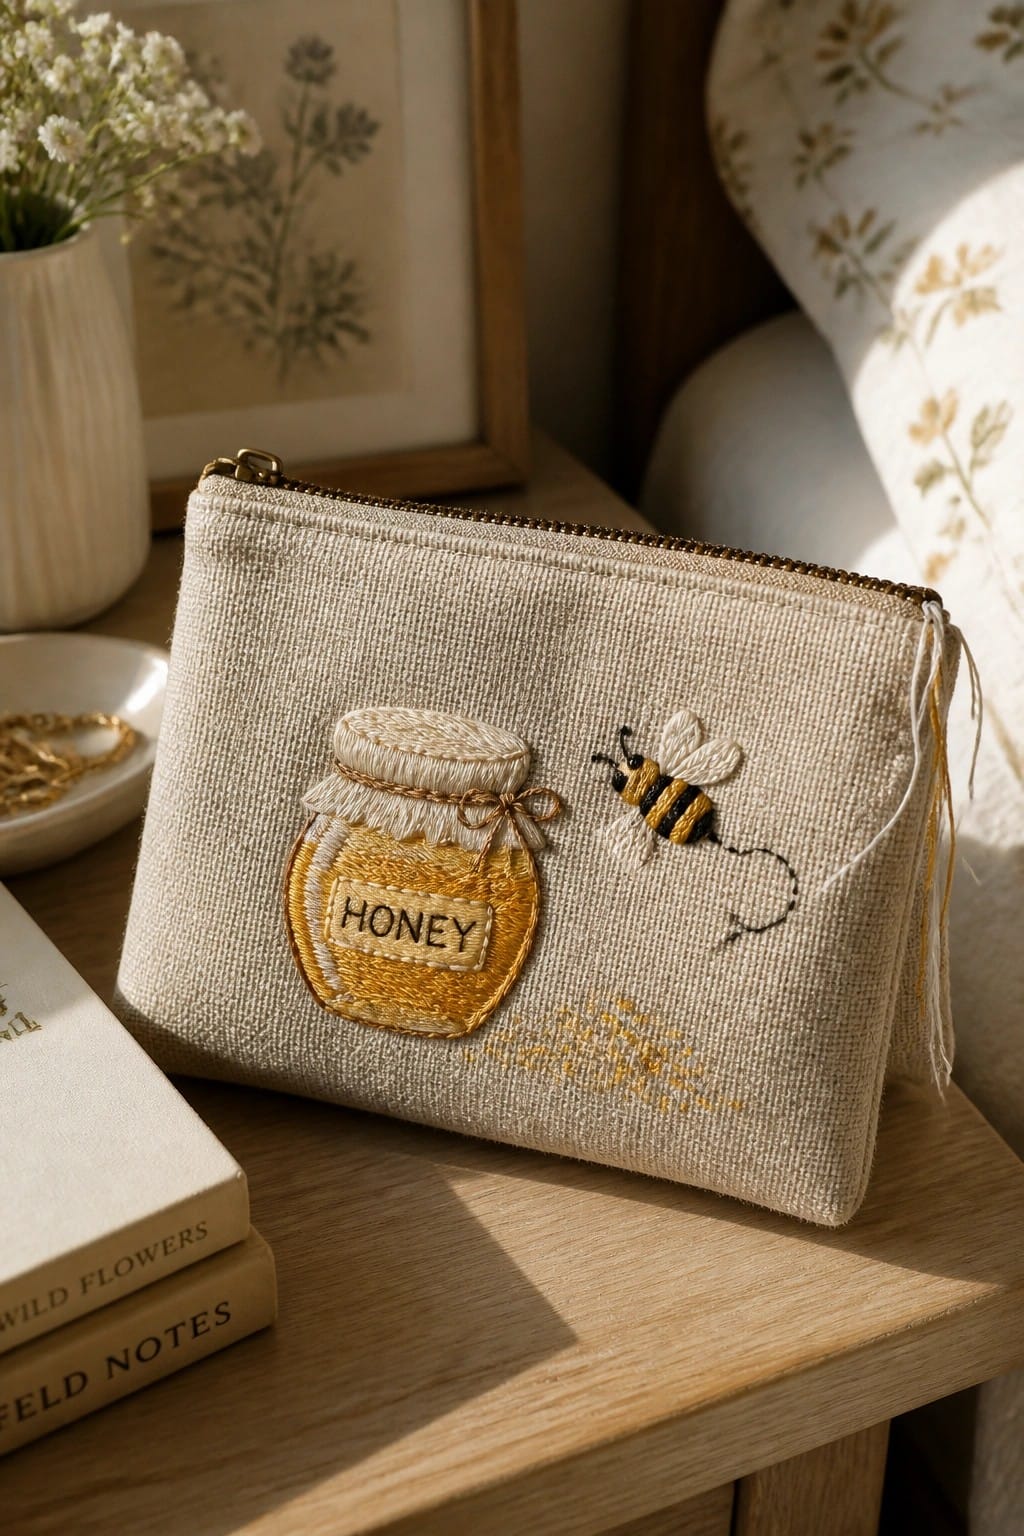
A honey jar labeled “HONEY” paired with a small bee makes a simple motif that fits neatly on the front of a fabric pouch. The jar sits centered on the bag while the bee is stitched to the right, creating a clear focal point without crowding the space. Golden yellow thread on the jar stands out against the light neutral fabric, and the compact size keeps the whole design easy to finish in one sitting. This approach works well for small accessories like pouches, bags, or cases where you want a clear theme without covering the entire surface.
A design like this works especially well on items people carry daily because the motif stays visible but does not interfere with the bag’s function. You could shift the same layout onto a larger tote or scale the jar down for a pocket on a jacket. Changing the jar color to a deeper amber or adding a few more bees would keep the idea fresh while still reading clearly from a distance. The contrast between the filled jar and the plain background helps the design show up well in photos, which is useful if you want to share finished projects online.
Bee Motifs Scattered on a Fabric Scrunchie

Small bees worked in yellow and black thread with white accents sit spaced around a light purple scrunchie. The compact size of each bee keeps the fabric gathers flexible while still showing the design clearly from different angles. This approach turns a basic hair accessory into a quick project that uses only a few repeats of the same motif.
A design like this works especially well on stretch fabric items because the small scale avoids bulk when the scrunchie is worn. You can shift the same bees onto a headband or the corner of a pocket by changing the spacing and thread colors to match the base fabric. The contrast between the light purple and the yellow bees helps the pattern read from a distance without needing extra outlines or fills.
Bee Path on a Napkin Border

A row of sunflowers sits along the bottom edge of a folded napkin or towel, while two bees connect through a simple dashed line that curves upward. The line gives the bees a clear flight path without needing extra fills or background stitching. This keeps the design light and leaves most of the fabric plain, which suits items that get used and washed often.
What makes this idea useful is how the bottom placement stays visible when the napkin is folded on a table or stacked in a drawer. The same path works on a tea towel if you move the flowers a bit higher, or you can shrink the whole thing for a pocket on an apron. Switching the sunflower centers to different browns or oranges lets you match it to other kitchen colors without changing the layout.
Bee on a Crescent Moon Pillow
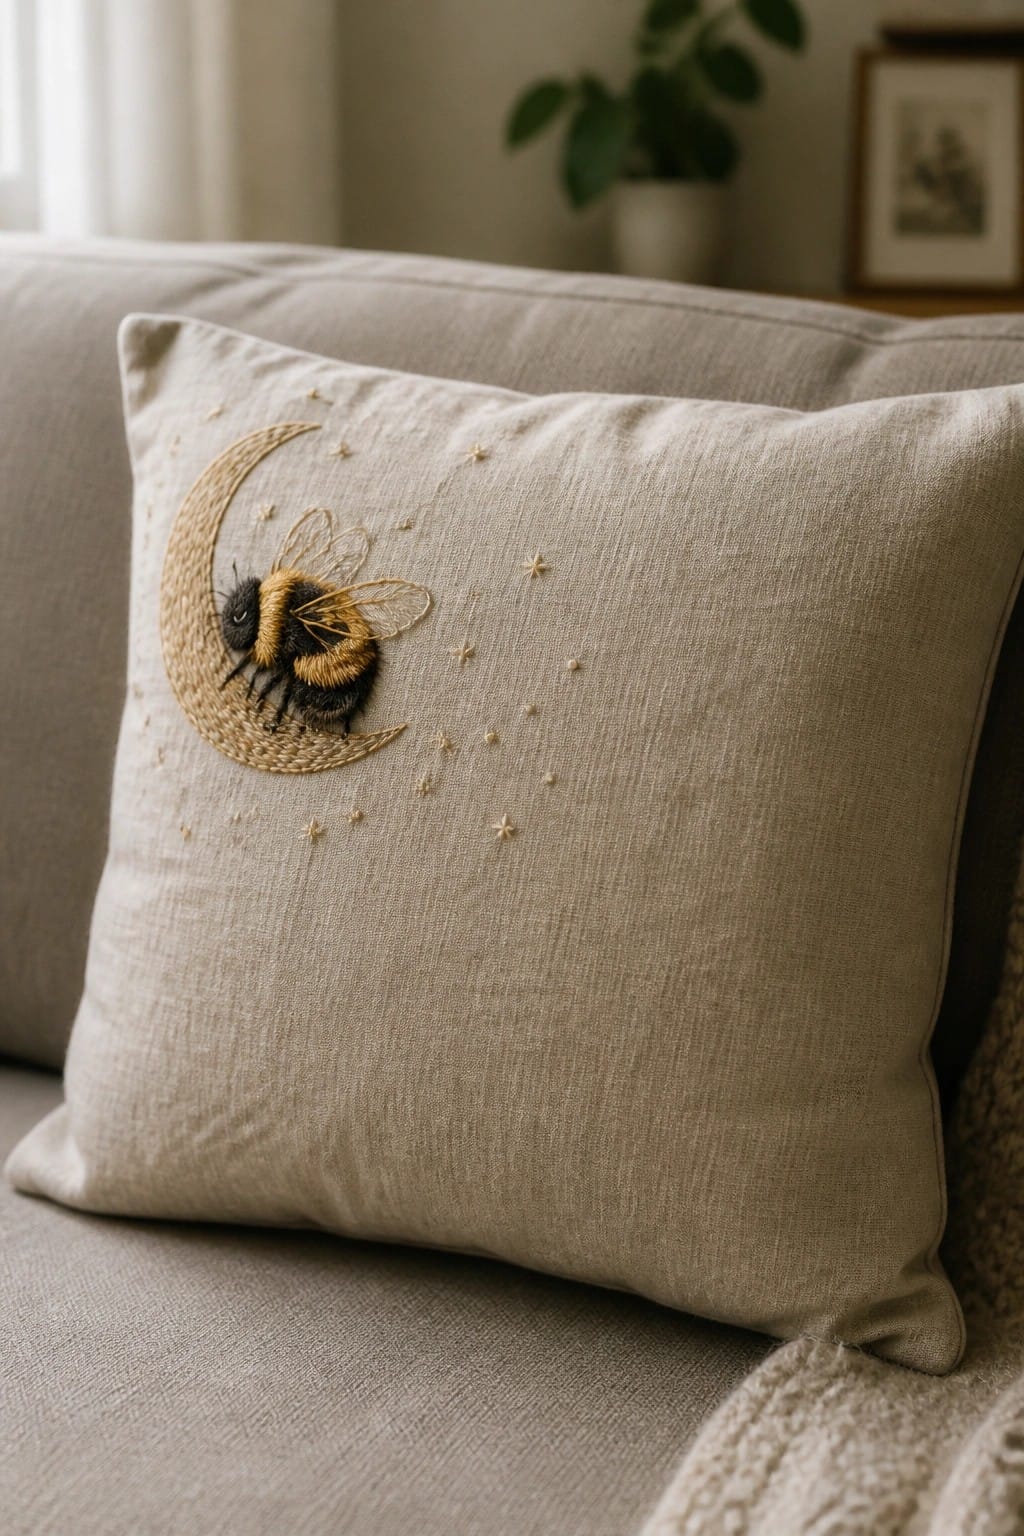
A bee perched on a crescent moon with scattered stars creates a compact motif suited to throw pillows or cushions. The moon provides a clear base that anchors the bee and prevents the design from floating in the center of the fabric. Small stars spread across the remaining space keep the layout balanced without adding bulk. This approach works well on linen or cotton home textiles where the design can be centered or shifted slightly off to one side.
What makes this idea useful is how the moon shape lets you move the bee to different angles or corners when you adapt it to bags or smaller fabric pieces. Scaling the whole motif down keeps the same balance on a pocket or pouch. Switching the moon thread to match your base fabric makes the bee stand out more while keeping the project quick. The scattered stars also transfer easily if you want to fill empty areas on a larger blanket edge.
Three Bees in a Row on a Baby Onesie

Line up three small bees across the chest of a baby onesie to create a repeating motif that stays balanced on a small garment. Each bee uses a yellow body with gray stripes and white wings, keeping the shapes distinct against the light fabric. The compact scale prevents the design from crowding the neckline or snaps while still showing clearly when the onesie is worn. This layout works best on infant clothing where a simple horizontal accent fits the available space.
The placement does a lot of the work here because centering the row on the chest keeps the focus without extra borders or text. You can shift the same bees onto a toddler t-shirt by spacing them farther apart or reduce them to two on a smaller size. Swapping the stripe color or wing shade lets the design match different base fabrics without changing the overall pattern. This straightforward row also photographs cleanly for project shares since the repetition reads well at thumbnail size.
Bee with Dotted Flight Path to Clovers on Napkin Corner

A small bee sits in the upper part of a fabric corner while a dotted line curves down to three four-leaf clovers grouped below. The path creates movement across the empty space and keeps the design from looking static. This layout fits napkins, handkerchiefs, or small tea towels where the corner placement leaves most of the fabric plain. The scale stays compact so the embroidery does not overwhelm the item.
What makes this idea useful is how the dotted line adds direction without extra colors or dense stitching. You can shift the whole design inward a couple of inches for a placemat or shorten the path if you want it on a pocket. Switching the clovers to a single shade of green keeps the look clean on white or light fabric. The corner placement shows up clearly in flat-lay photos without needing a hoop or frame.
Beehive Circle Patch for Jacket Backs
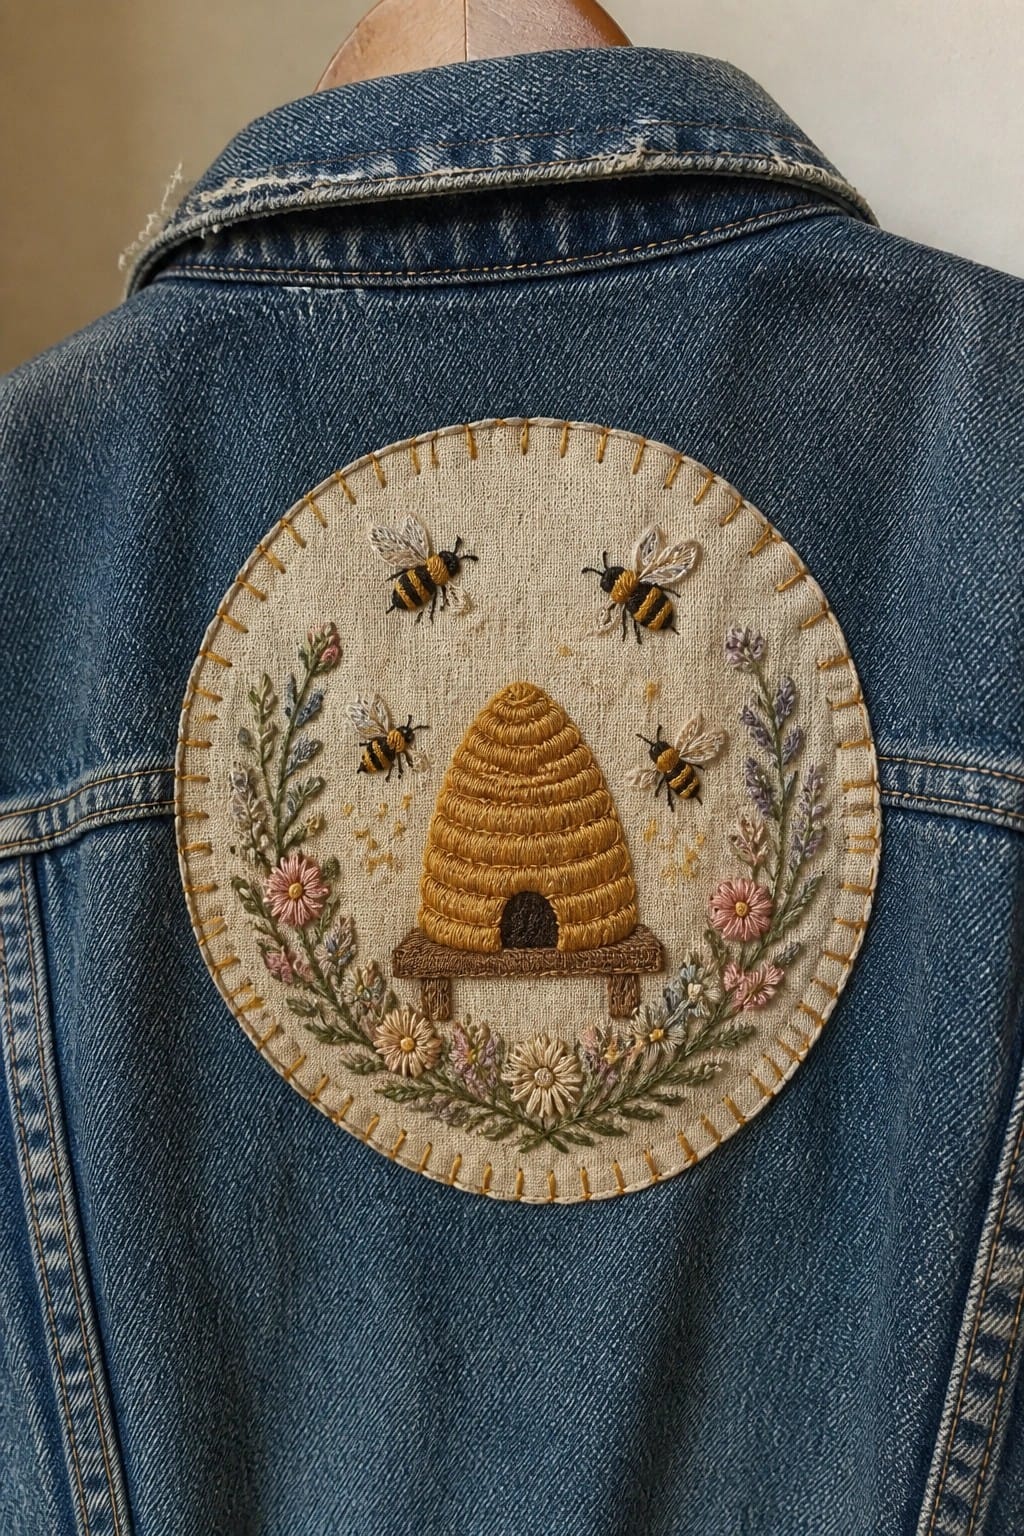
A round patch centered on a beehive with four bees in flight and a ring of flowers and leaves creates a complete motif that sits cleanly on the back of a denim jacket. The circular layout keeps the bees spaced evenly around the hive so the design reads clearly from a distance. This placement works especially well on outerwear because the patch covers a large flat area without interfering with seams or pockets.
What makes this idea useful is how the self-contained circle lets you lift the same design onto other garments like hoodies or work shirts. You can shrink the whole motif for a front pocket or swap the flower colors to match different jacket washes. For clothing projects the stitched border also helps the patch stay secure through wear and washing.
Bee and Daisy Bookmark Strip

A narrow strip of fabric gets a simple repeating line of small bees and daisies stitched down the center. The motifs alternate in a steady rhythm that fits the slim shape without crowding or stretching the fabric. This layout works best as a bookmark, a ribbon tie for a gift, or a decorative insert for a journal cover.
The placement does a lot of the work here because the straight vertical row stays readable even on a thin piece. You can shorten the strip for a key fob or lengthen it for a bag pull. Switching the daisy centers to a different color or spacing the bees farther apart gives quick variations without changing the whole pattern. The small scale also makes the finished piece easy to photograph for sharing.
Bee and Daisies on Canvas Sneaker Toes

A small bee worked in yellow and black sits above three simple daisies on the toe of a canvas sneaker. The compact arrangement fits neatly on the curved surface and leaves most of the shoe plain. Light fabric makes the thread colors read clearly while the size keeps the design from interfering with wear. This motif suits customizing footwear or other small fabric areas on casual clothes.
The placement does a lot of the work here because the toe area stays visible but gets less wear than the sides. You can shift the same bee and daisy layout onto a tote bag or hat by keeping the total width under two inches. Swapping the daisy color to match different shoe tones gives quick variety without redrawing the pattern. Designs this size show up often in searches for shoe embroidery because they require little fabric and finish fast.
Bees Scattered Along a Hat Band

Embroider small bees and leaf motifs in a repeating line around the band of a fabric sun hat. The bees sit between the leaves with tiny dots filling the spaces, keeping the scale small enough to follow the curve without crowding. This placement turns the hat band into a natural frame that highlights the embroidery while the neutral fabric keeps the yellow and green threads visible. The idea suits any accessory with a defined band such as hats, bags, or even jacket cuffs.
What makes this idea useful is how the narrow strip format limits the amount of stitching needed. You can adapt the same line of bees to a tote strap, a shirt placket, or the edge of a pocket by shortening the repeat or changing the spacing. The contrast between the dark bee bodies and the light fabric helps the design read clearly from a distance, which is why similar hat-band projects perform well on Pinterest. Scale the bees down further and the layout works on smaller items like a key fob or a bookmark.
Corner Bees with Foliage on Woven Placemats

Small bees paired with short leafy branches fill the four corners of a rectangular placemat made from coarse woven fabric. The motifs stay tight to the edges so the center stays open for plates and cups. This keeps the embroidery functional while still visible when the table is set. The same corner treatment suits other flat items like napkins, coasters, or a short table runner.
What makes this idea useful is how the corner layout leaves the middle clear for daily use. You can repeat the exact bee and leaf unit on four matching placemats without the design feeling crowded. Changing the leaf colors to match your dishes or season gives quick variety without redrawing the pattern. The small scale also transfers easily to smaller projects like a bread basket liner or the flap of a fabric tote.
Chef Bee on Apron Pocket with Honey Dipper
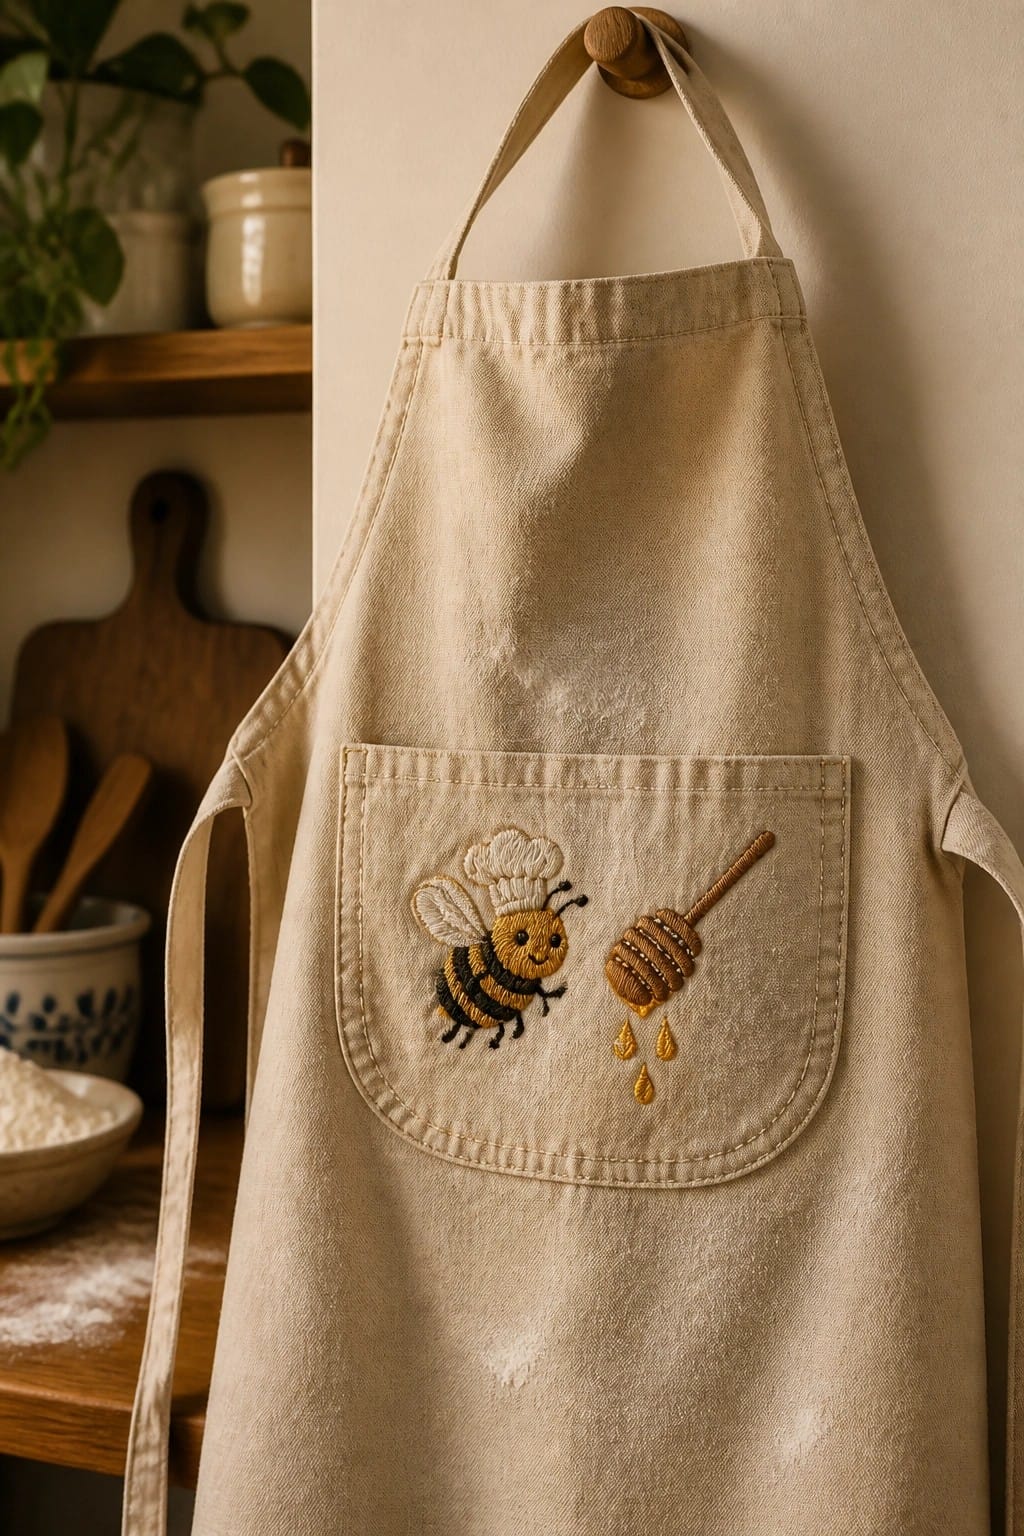
A bee wearing a small chef hat pairs with a honey dipper that drips three drops of honey. The design sits centered on the pocket of a canvas apron, using yellow, black, and brown thread to keep the shapes clear against the light fabric. The chef hat gives the bee a simple character detail while the dipper adds a direct baking reference. This motif fits kitchen projects like aprons, towels, or oven mitts where the pocket placement keeps the embroidery visible during use.
The placement does a lot of the work here because the pocket already creates a natural frame. You can shrink the whole design to fit a smaller pocket or move it to the corner of a tea towel without losing the balance. Changing the hat color or using a different shade for the honey gives quick variety if you want to make several versions as gifts. The compact size also makes it easy to test on scrap fabric before committing to a larger item.
Bee Flight Path on a Denim Cuff

A line of small bees stitched along a denim cuff with a dashed black thread connecting them creates a simple flight path motif. The placement keeps the design visible on the rolled edge of jeans or a jacket without taking up much space. The small size and minimal connecting line let the bees read clearly against the blue fabric while staying casual enough for daily wear. This approach fits clothing projects like jackets, jeans, or shirts where you want a repeating nature element that moves with the fabric.
The placement does a lot of the work here by using the cuff curve to give the line natural flow. You could shift the same idea to a jacket hem, the edge of a pocket, or even a canvas tote strap by adjusting the spacing between bees. Keeping the bees small makes it easy to add more or fewer depending on the length of the edge you are stitching. The high contrast of the yellow and black bodies against denim also helps the design show up well in photos if you want to share the finished piece.
Split Bee and Wildflower Hoop with Outline Guide
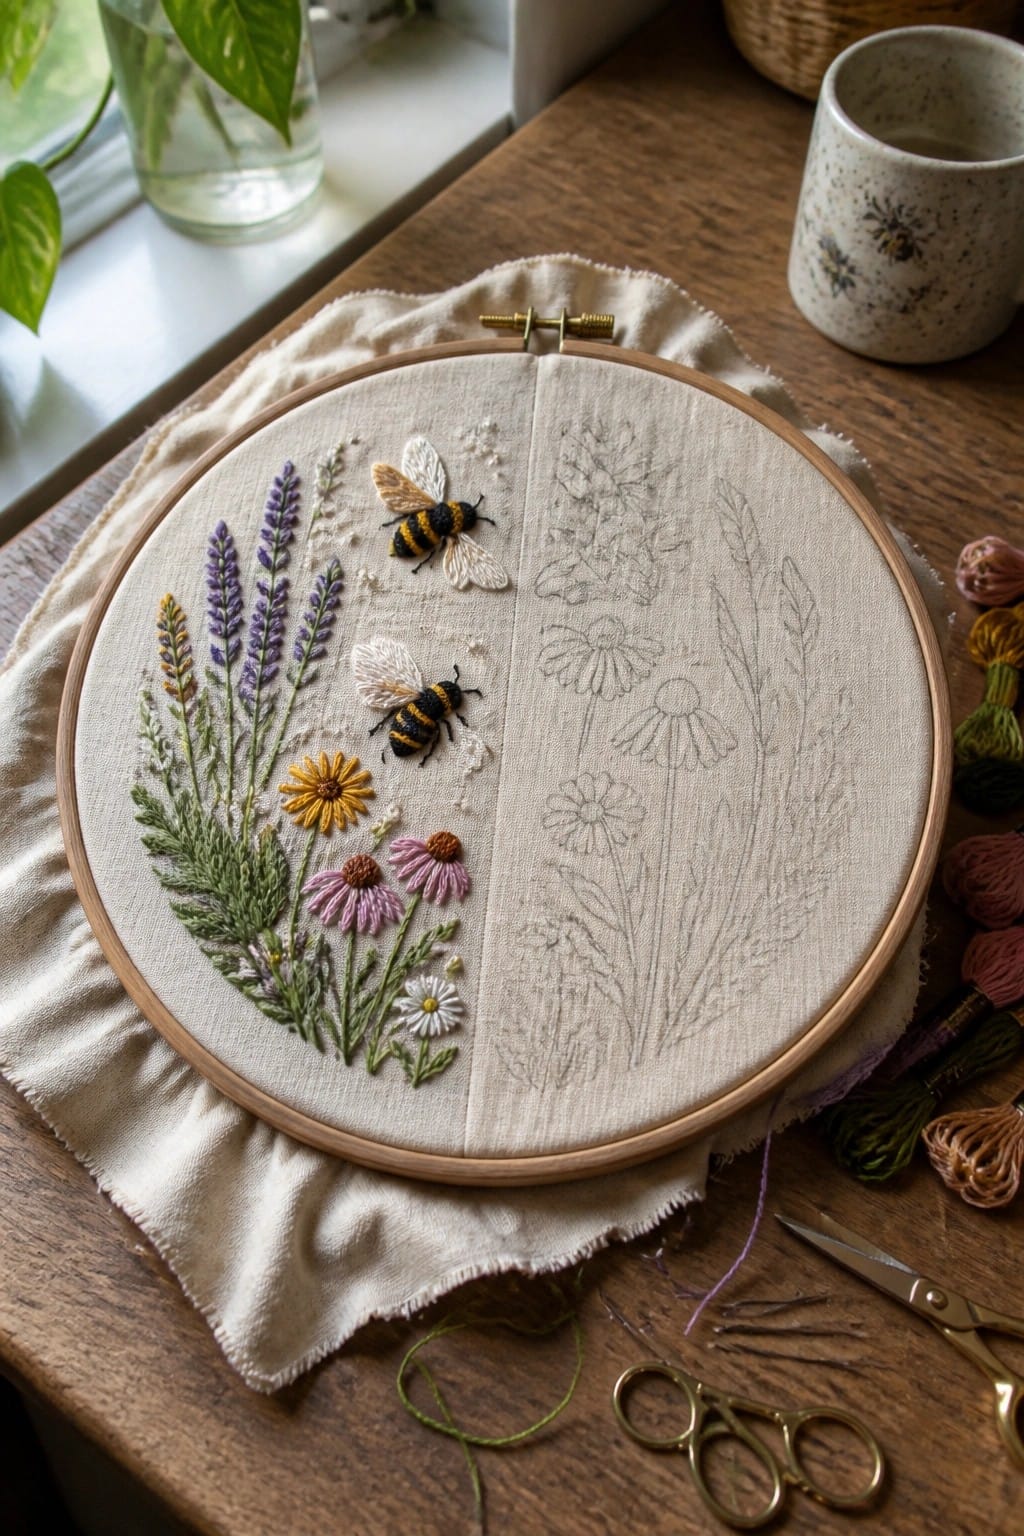
A pair of bees sits among stitched lavender stalks, a yellow daisy, pink coneflowers, and a small white daisy on the left half of the fabric. The right half holds only pencil outlines of matching flowers, creating a clear before-and-after view inside the hoop. The finished side uses dense thread coverage on the bees and varied greens for the foliage, while the outlines stay light so the contrast stays readable. This layout works well as a standalone hoop piece or as a template you can trace onto a pouch or jacket panel.
What makes this idea useful is the built-in guide that removes the need for separate pattern transfer. The small scale lets you finish the stitched half in a few evenings before deciding whether to mirror it or leave the outlines as texture. You could swap the lavender for other tall flowers or change the bee colors to match a specific fabric without redrawing the whole design. On a hoop the split keeps the project interesting to display while you work; on clothing the same motif shrinks easily to a pocket or sleeve.
Bee and Rainbow on a Backpack Pocket

A small bee embroidered in yellow and black sits on a curved rainbow that stretches across the front of a canvas backpack, with a row of simple flowers stitched along the bottom edge. The rainbow serves as the main path for the bee, keeping the design balanced without needing extra filler stitches. This layout works especially well on bags or pouches because the curved shape follows the pocket area naturally. It suits everyday accessories where the embroidery stays visible but does not cover the whole surface.
What makes this idea useful is the way the rainbow gives the bee a clear place to land while using the bag’s shape. You could move the same elements to a smaller crossbody bag or shorten the rainbow for a pencil case. Swapping the bright rainbow for softer tones would make the design less bold if you want it on clothing instead. The open space around the motif also helps it photograph clearly for project shares.
Bee Patch on a Sweater

A bee worked in yellow and black stripes with white thread wings sits on a round felt circle that has a simple running stitch border in yellow. The whole piece is made as a separate patch and then attached to the front of a knit sweater. This keeps the embroidery contained and lets you add the motif to finished clothing without stitching through thick or textured fabric. The patch format works especially well for sweaters, jackets, or bags where you want a clean, removable accent.
The small circular shape makes it simple to move the same bee onto a hat, tote, or pair of jeans later. You could swap the yellow border for another color or shrink the whole patch to fit a smaller area like a pocket. Because the felt base holds its shape, the design stays neat even on stretchy knits where direct stitching might pucker. This kind of finished patch also saves easily in a box for quick use on future projects.
Frequently Asked Questions
What basic supplies are required for creating cute bee embroidery designs? You will need embroidery floss in yellow black and green shades a hoop fabric like cotton or linen needles and scissors. Start with simple stitches like backstitch for outlines and satin stitch for filling in the bees to bring the playful ideas to life.
Can beginners try these bee embroidery ideas successfully? Yes many of the ideas use basic stitches and can be adapted for starters. Begin with simpler designs like a single bee on a flower before attempting more detailed scenes with multiple nature elements.
How do I add a playful nature theme to my bee embroidery? Incorporate elements like flowers leaves honeycombs and sun rays using vibrant colors. Add whimsical touches such as smiling bees or tiny butterflies to enhance the fun nature-inspired look across your projects.
What fabrics work best for these embroidery projects? Cotton linen or even felt are ideal because they hold stitches well and provide a natural feel that complements the theme. Avoid slippery fabrics like silk for beginners to ensure clean results.
How should I care for embroidered items featuring bees? Hand wash gently in cold water with mild soap avoid wringing and air dry flat. This preserves the stitches and colors for long-lasting enjoyment of your finished pieces.