
I enjoy exploring new embroidery projects because there are so many creative ways to turn simple stitches into something meaningful and beautiful.
Over the years, I have experimented with different patterns, themes, and hoop designs that work well for both home decor and handmade gifts.
Some ideas are quick and beginner-friendly, while others offer more detail for experienced stitchers looking for a new challenge.
Whether you prefer floral motifs, personalized designs, seasonal artwork, or modern embroidery styles, there is something inspiring about creating a piece that feels uniquely your own.
This collection brings together a variety of embroidery ideas to help spark creativity for your next hoop art project or thoughtful handmade gift.
Floral Wreath Banner for Custom Text
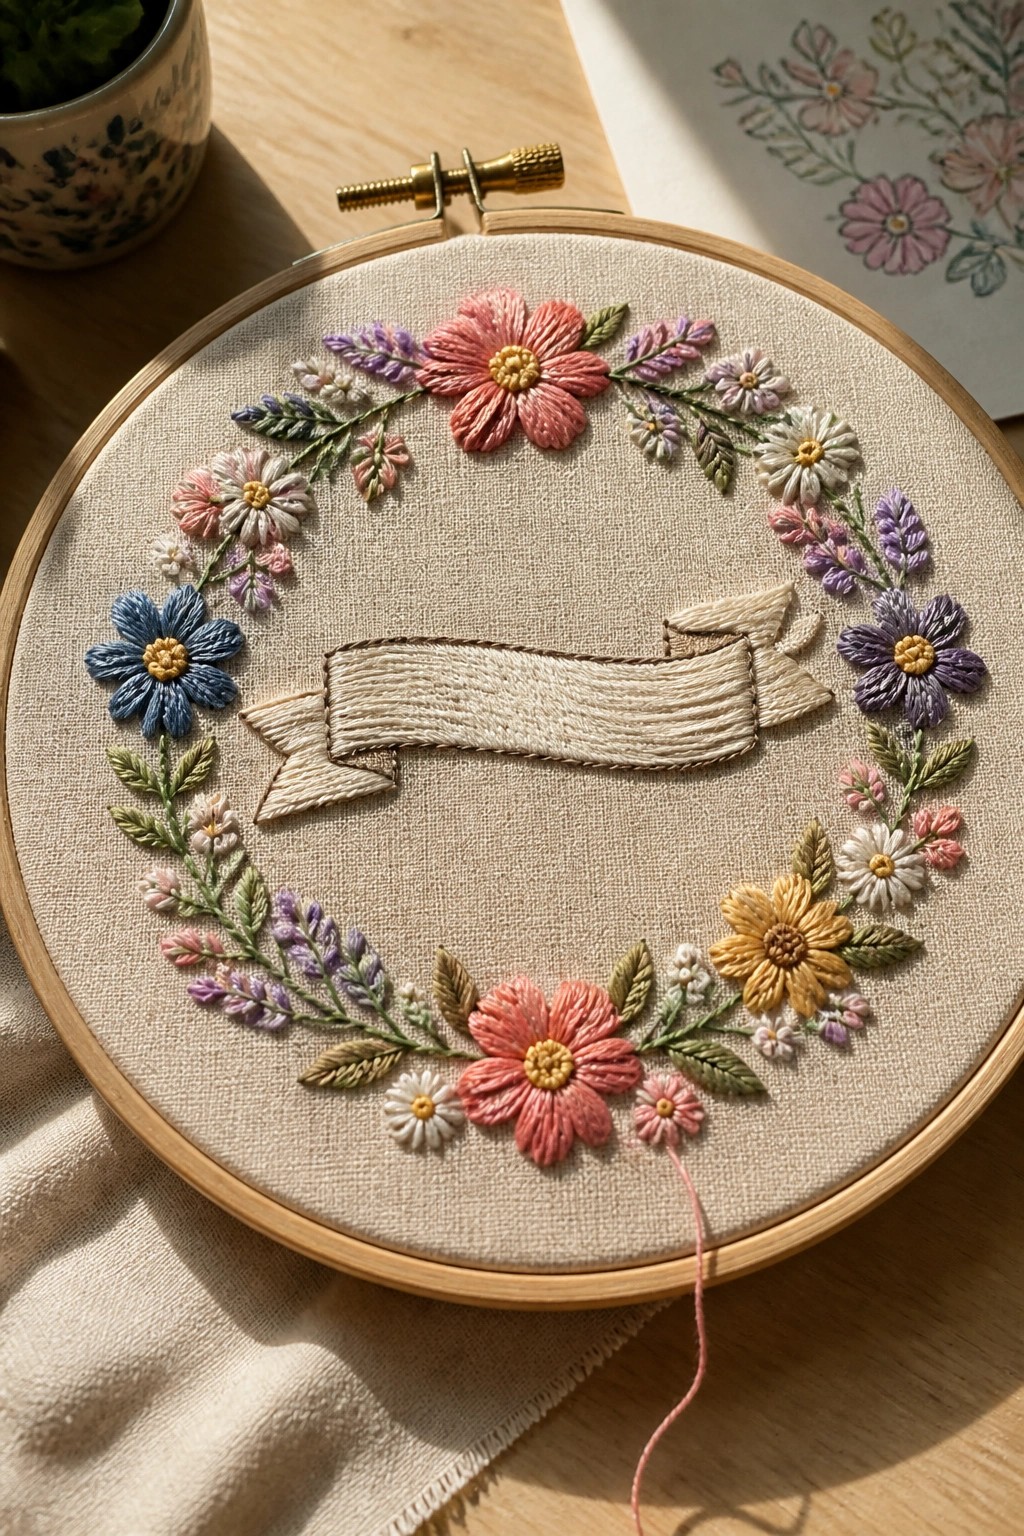
A circular arrangement of small flowers and leaves frames an empty ribbon banner at the center of the hoop. The flowers sit around the outer edge while the banner stretches across the middle, leaving open space for a name, date, or short phrase. This layout keeps the text as the main focus and works best as a finished hoop piece or a gift that needs a personal word added.
What makes this idea useful is how the banner gives you a clear spot to stitch letters without crowding the flowers. You can swap in different colors for the blooms or shrink the whole wreath to fit a smaller hoop for a keychain or ornament. The open center also makes it simple to change the text later if you want to reuse the design for multiple gifts.
Heart Label Patch on Denim Cuffs
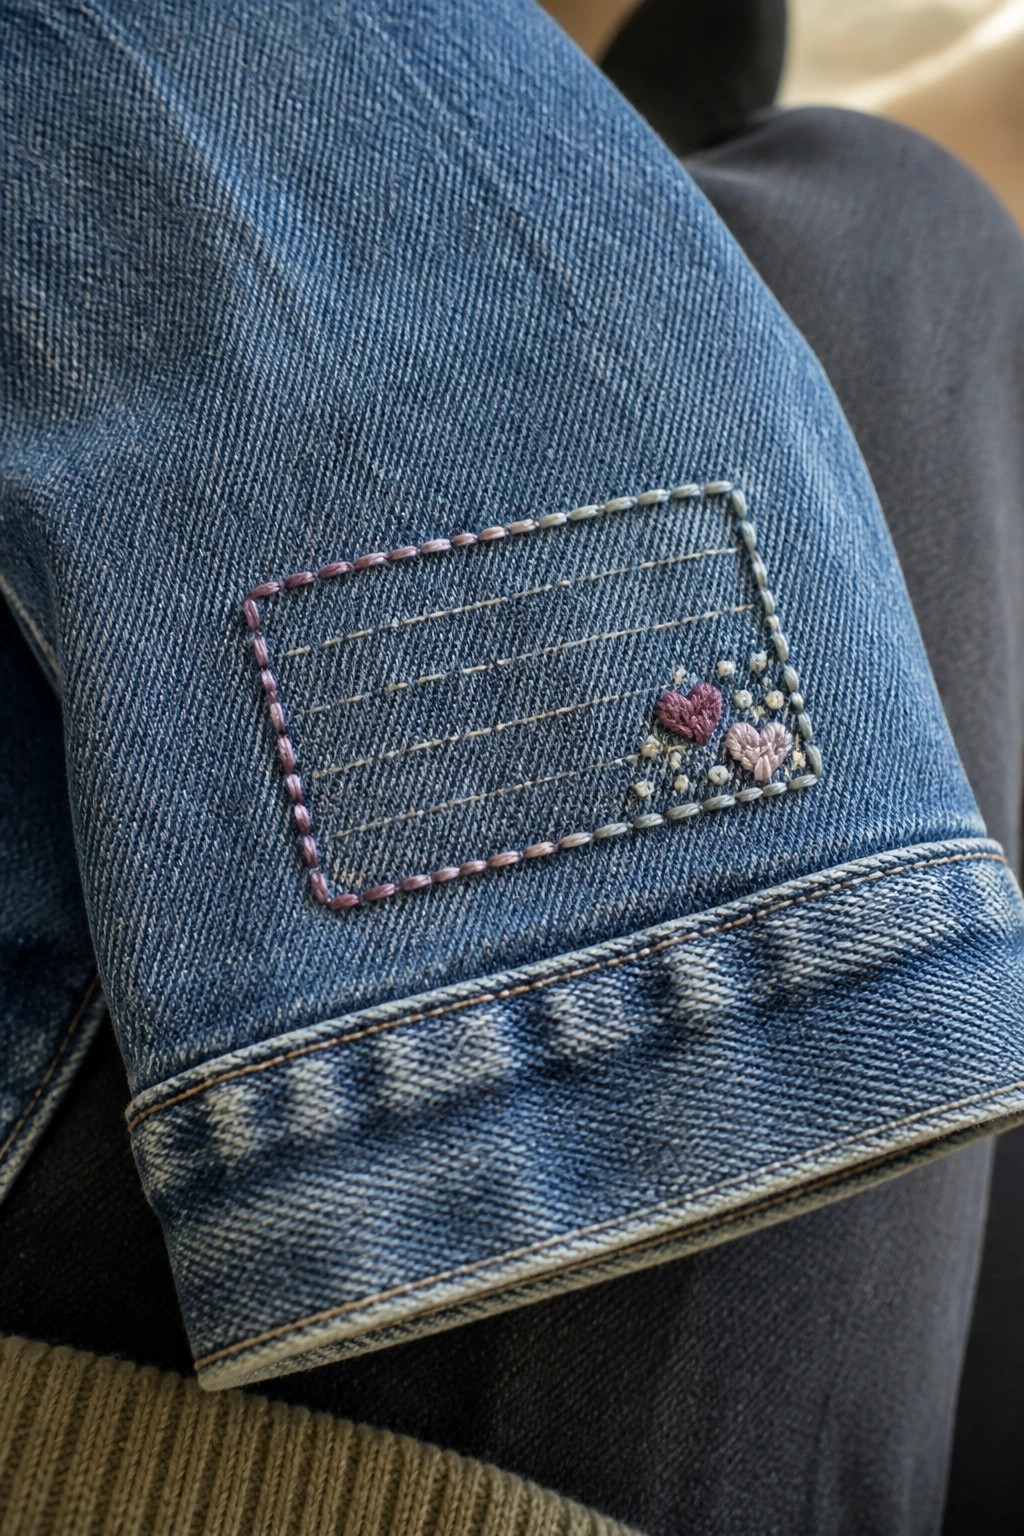
A rectangular patch styled like a clothing label works well on the cuff of a denim jacket. The design uses a stitched border to frame several horizontal lines with a cluster of small hearts and dots placed to one side. This placement keeps the embroidery visible when the sleeve is rolled or worn normally. The idea suits customizing jackets, jeans, or other denim pieces where a small, contained motif fits the fabric weight and shape.
The placement does a lot of the work here because cuffs already draw the eye during wear. You can adapt the same layout by swapping the hearts for initials, shortening the rectangle for a pocket, or using it on the back hem of a jacket. Scale the whole patch smaller and it transfers easily to a tote or cap. The bordered format also makes color changes simple since the lines and hearts sit in their own space.
Scalloped Border with Corner Berry Sprigs on a Tote
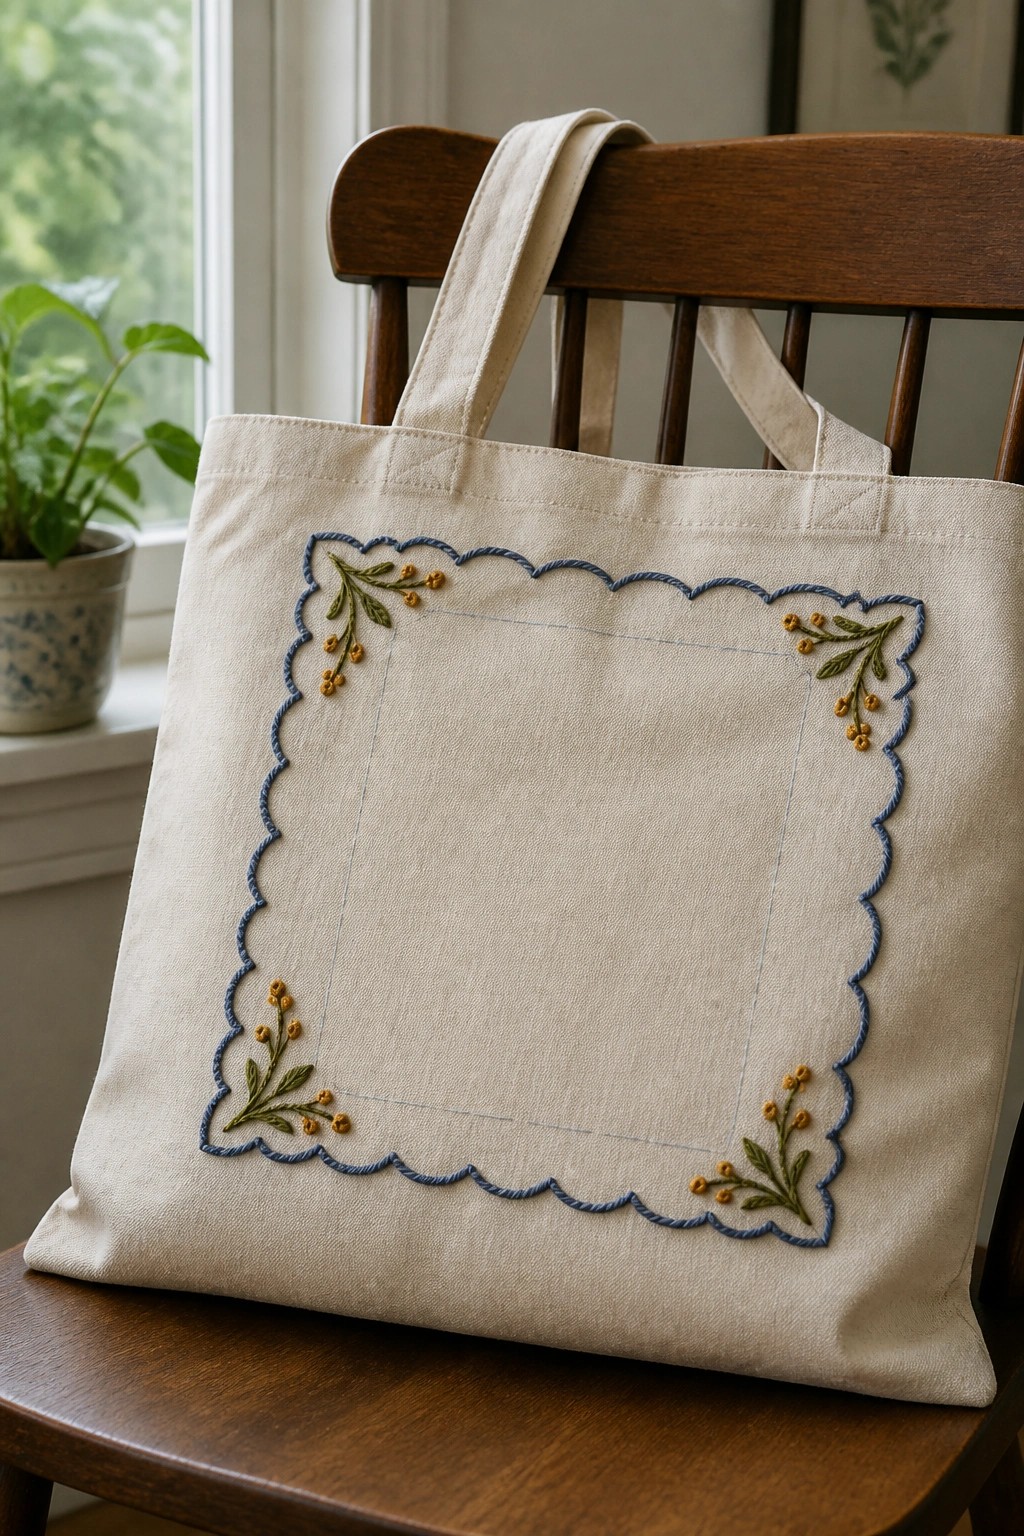
A scalloped blue border runs around the front panel of a canvas tote, creating a clear frame while leaving the center open. Small sprigs of green leaves and yellow berries sit in each corner, tucked just outside the wavy line. The design stays limited to the edges so the bag stays practical for daily use. It suits tote bags, pouches, or any flat fabric item where you want decoration without blocking the main area.
The placement does a lot of the work here because the border already organizes the space. You could drop the same border onto a zip pouch or a book sleeve and keep the corner sprigs for balance. Swapping the berry color or making the scallops tighter would change the look without needing a full redesign. This layout works well for gifts since it leaves room in the middle for initials or a short phrase added later.
Leaf Wreath Circle on a Pillow Cover
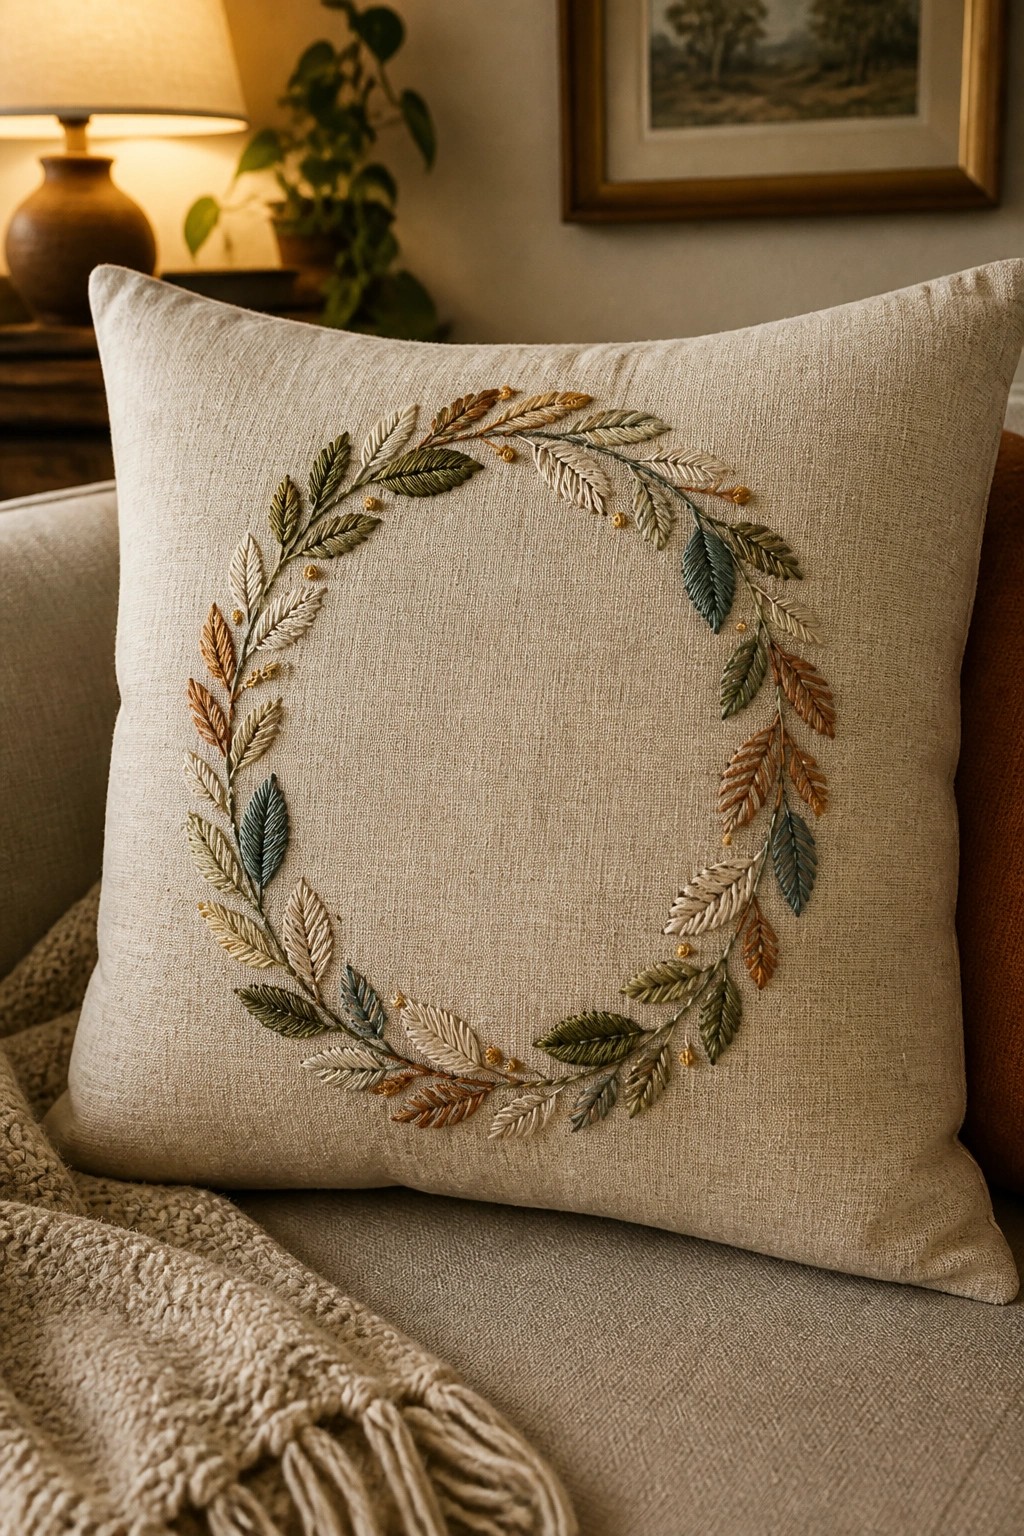
A ring of embroidered leaves arranged in a loose circle works well as a central motif on a pillow cover. The design uses several thread colors in browns, greens, and creams to create variation across the individual leaves, with small accent dots breaking up the line. This layout leaves the middle of the fabric open, which keeps the scale balanced on a larger item like a cushion. The project suits fabric home items where the embroidery can be seen from a short distance.
The placement does a lot of the work here because the wreath shape fits neatly inside the square edges of the pillow without needing extra borders. You could shift the same leaf ring onto a smaller pouch or a jacket back by reducing the number of leaves and tightening the curve. Changing the thread palette to cooler tones would make it read more like a winter accent while keeping the same layout. A design like this stands out on Pinterest when the background fabric stays neutral so the color shifts in the leaves stay visible.
Corner Banner Motif on Fabric Items

A narrow light blue banner sits low in the corner of a white fabric piece, with a small pink rose and two green leaves placed above the right end. The design stays compact so it remains visible when the fabric is folded or stacked without interfering with the main surface. This layout works especially well on napkins, handkerchiefs, or the edge of a small pouch where larger motifs would feel crowded. The contrast between the banner and the tiny floral accent keeps the overall look balanced at a small scale.
What makes this idea useful is how the banner shape can easily hold a short word, initial, or date once you have the outline in place. The same corner placement transfers directly to tea towels or shirt hems with only minor size adjustments. Swapping the rose color or using a darker banner thread changes the look enough to suit different fabrics or gift sets. The small footprint also helps the finished piece photograph cleanly for sharing or selling.
Scattered Stars on a Fabric Scrunchie

Small yellow stars embroidered directly onto light blue fabric create a simple repeating motif across a scrunchie. The stars sit at irregular intervals around the gathered surface instead of forming a border or center pattern. A few small white dots fill some of the empty spaces between them. This approach suits hair accessories or other elastic fabric items where the embroidery needs to stay flexible and low-profile.
What makes this idea useful is how the scattered placement avoids bulk on stretch fabric. The same small motifs can move to headbands, small pouches, or the corners of pocket squares with almost no adjustment. Switching the star color to match or contrast the base fabric changes the look quickly without redrawing the design. On Pinterest this stands out because it shows embroidery on a wearable item rather than another hoop.
Oval Rose Frame on Shirt Collar

A pair of small pink roses set inside a stitched oval makes a neat detail for the inside of a shirt collar. The oval sits centered on the collar band with one rose at each end, keeping the whole motif compact and balanced. The light thread border helps the design stand out against the pale blue fabric without overwhelming the small space. This approach works best on button-down shirts or similar buttoned tops where the collar can be flipped open.
The placement keeps the embroidery mostly hidden during normal wear yet easy to spot on a hanger or when the top button is undone. You can adapt the same oval and rose layout to a cuff, pocket edge, or even a facing on a jacket. Swapping the pink roses for a single color that matches the shirt fabric tones the whole thing down while the border thread can stay contrasting. A design this size transfers quickly to other garments without needing much fabric or time.
Recipe Card Layout on a Kitchen Apron
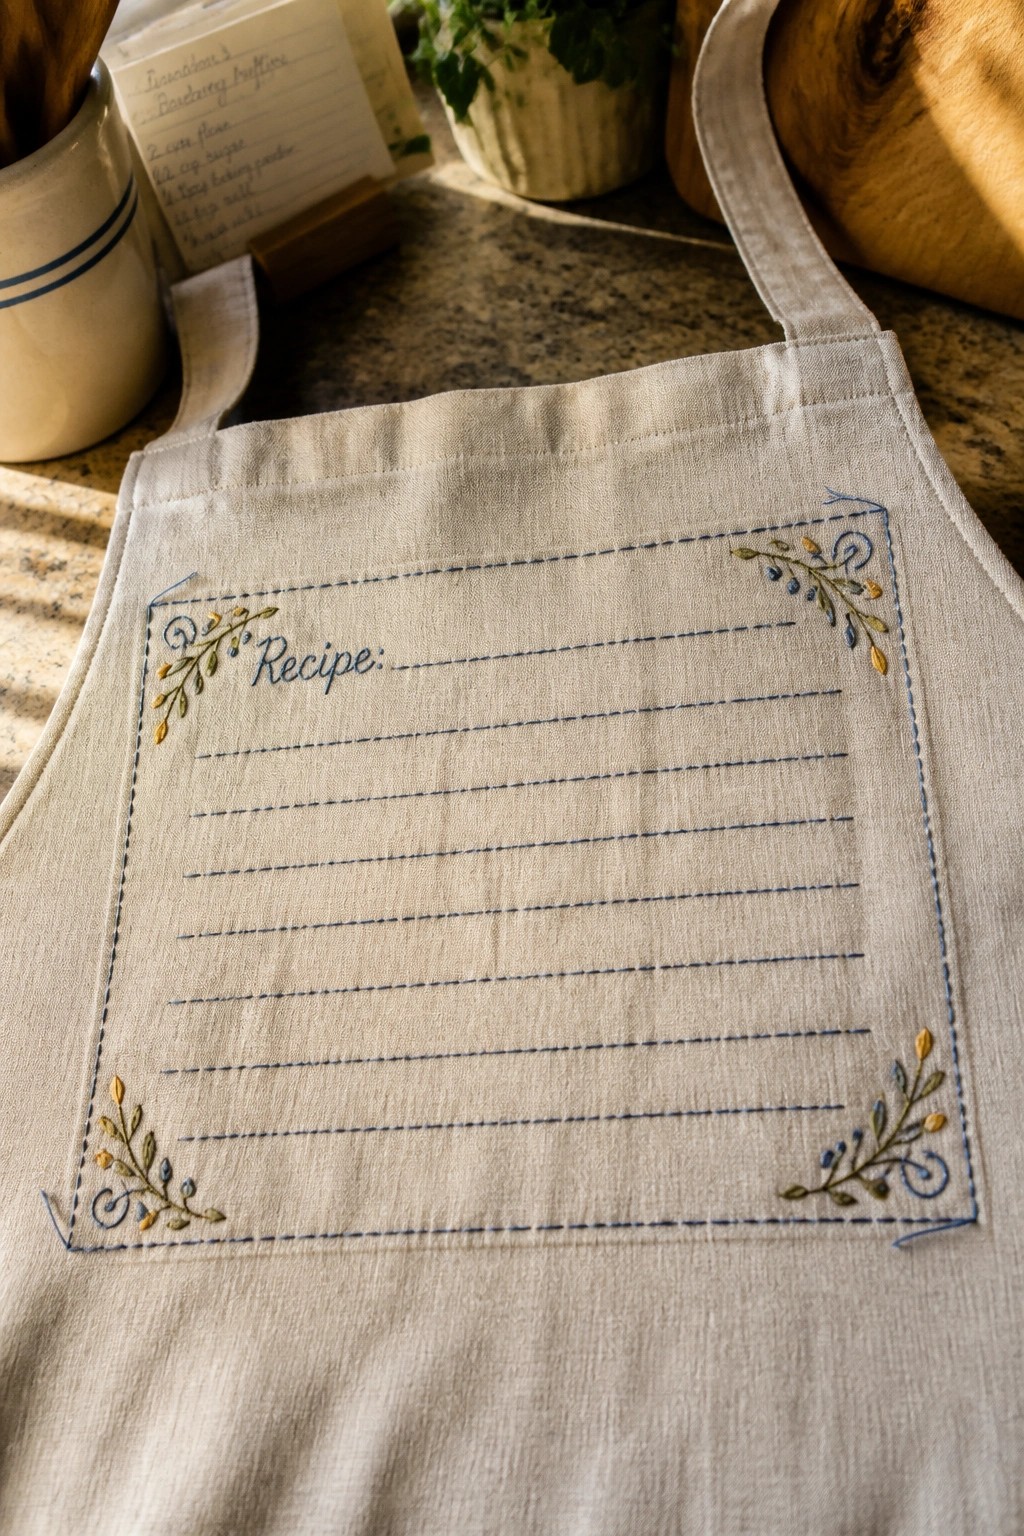
A recipe card design works well when you embroider the word “Recipe” followed by blank lines inside a rectangular border. Corner florals keep the decoration limited to the edges so the writing space stays clear. This layout sits on the upper bib of an apron where it remains visible during use. The blue dashed border defines the area while the small floral accents in the corners add interest without taking over the lines.
What makes this idea useful is how it turns an everyday apron into a working surface for jotting notes. The same rectangle and corner motif could shift to a tea towel or a fabric notebook cover with only minor size adjustments. Swapping the thread colors lets the design match different kitchen palettes. The open center keeps the focus on function rather than filling every inch with stitches.
Denim Pocket Border with Dashes and Dots

Short horizontal bars and small clusters of dots run along the top edge of a jeans pocket to create a broken-line border. The white stitches sit directly on the seam line of the blue denim, following its curve without adding bulk. This placement keeps the pattern visible when the garment is worn while staying contained to a small area. The idea works best on clothing like jeans, jackets, or shorts where you want to customize an existing item.
The placement does a lot of the work here because the pocket edge already gives you a clear path to follow. You can stretch the same pattern across a longer seam or shrink the bars and dots to fit a smaller pocket on a child’s garment. Switching the thread color to something that matches the existing stitching on the jeans makes the addition look intentional rather than added on. This kind of border shows up well in photos because the contrast stays high even at small sizes.
Star on a Zipper Pull Tab

A small embroidered star on a fabric tab attached to a zipper pull gives a simple detail to pouches or bags. The star is worked in a single color and centered on the tab, with a border stitch keeping the whole piece compact. This approach suits small accessories where the embroidery needs to stay out of the way during use.
The small scale makes this easy to adapt to different bag styles or even clothing with zippers. You could swap the star for other simple shapes like a heart or initial without changing the overall layout. Using a contrasting thread color on the tab helps the detail stand out against the main fabric. This keeps the embroidery minimal while adding a clear focal point to functional items.
Floral Stem Over a Banner for Custom Text

A single tall stem with pointed leaves and small rounded flower clusters sits centered above a long banner shape. The banner outline stays empty so you can add any word, name, or date in the space below the plant. This arrangement keeps the greenery as a frame while making the stitched text the clear focal point of the hoop.
The placement does a lot of the work here. You can change the banner text for a birthday, last name, or short phrase without redrawing the leaves or flowers. A design like this works especially well on a finished hoop gift or on the front of a small linen bag where the banner acts as a label. Scaling the whole motif down lets you move it onto a jacket pocket or notebook cover while keeping the same balance between the stem and the word.
Rectangular Border Frame with Corner Clusters

A rectangular border stitched in one color creates a simple frame on fabric, leaving the center open for text or initials to be added later. Small clusters of contrasting stitches sit at each corner just outside the border lines, giving the shape definition without filling the space. This layout suits patches on bags, journal covers, or small gift tags where the border highlights a short word or name inside. The rounded corners and even spacing prevent the frame from looking rigid on plain fabric.
What makes this idea useful is how the empty center adapts to different word lengths or fonts without changing the border itself. Scale the whole design down for clothing labels or up for a larger hoop, and swap the corner cluster color to match thread already in use. It stands out on Pinterest because the structure reads as finished even before words are added, making it easy to save as a template for quick personalized gifts.
Cloud Motif with Scattered Drops on Baby Clothing

A simple cloud shape outlined in light blue thread sits on the chest of a baby onesie, with the interior left in the garment’s own fabric color. Small dots in blue, green, and cream are stitched below in an irregular pattern to suggest rain. The design stays compact and centered, which keeps the scale appropriate for a small garment and avoids crowding the fabric.
What makes this idea useful is how well the loose dot placement works on curved or small surfaces like onesies. You can shift the same layout onto bibs, burp cloths, or even a pocket on a toddler shirt by reducing the number of drops. Changing the dot colors to match the rest of an outfit keeps the look coordinated without extra work. The open spacing around the cloud also leaves room to add a short name or date underneath if you want to turn it into a gift piece.
Mini Motif Rows on a Pocket Flap

Line the inner flap of a pocket or bag with a row of small embroidered shapes such as stars, hearts, and flowers worked in different thread colors. The designs sit close together across the fabric so the eye moves along the line without any single motif dominating. This approach keeps the embroidery functional since it stays mostly out of sight until the pocket is used. It suits clothing like jeans or canvas totes where a hidden detail adds interest without changing the outer look.
What makes this idea useful is how simple it is to repeat the same row on other pockets or shorten it for a smaller flap. You can swap in different colors to match existing fabric or change the spacing if the pocket is narrower. The small scale also lets you test the layout on scrap fabric first before committing to the final piece. For clothing, this kind of motif stays protected from daily wear while still showing when the item is opened.
Mini Motif Grid for Hoop Samplers

A 5×5 grid of small squares holds separate motifs like flowers, rainbows, suns, and leaf clusters, each kept distinct by a dashed pink border. The even spacing and repeated square format turn a collection of quick stitches into one cohesive piece that fits neatly inside a standard hoop. This layout suits beginners who want to practice multiple patterns without starting several separate projects, and the finished hoop can hang as a reference or be left as is for simple wall display.
What makes this idea useful is how the fixed grid size forces you to keep every motif small and contained, which makes it simple to copy the same structure onto a tote bag pocket or a zippered pouch. Swapping the pastel threads for brighter colors or adding a single word in one square changes the whole feel without altering the layout. The even borders also help the design photograph clearly, which explains why similar samplers spread quickly on Pinterest boards.
Location Pin Inside a Textured Circle on Fabric
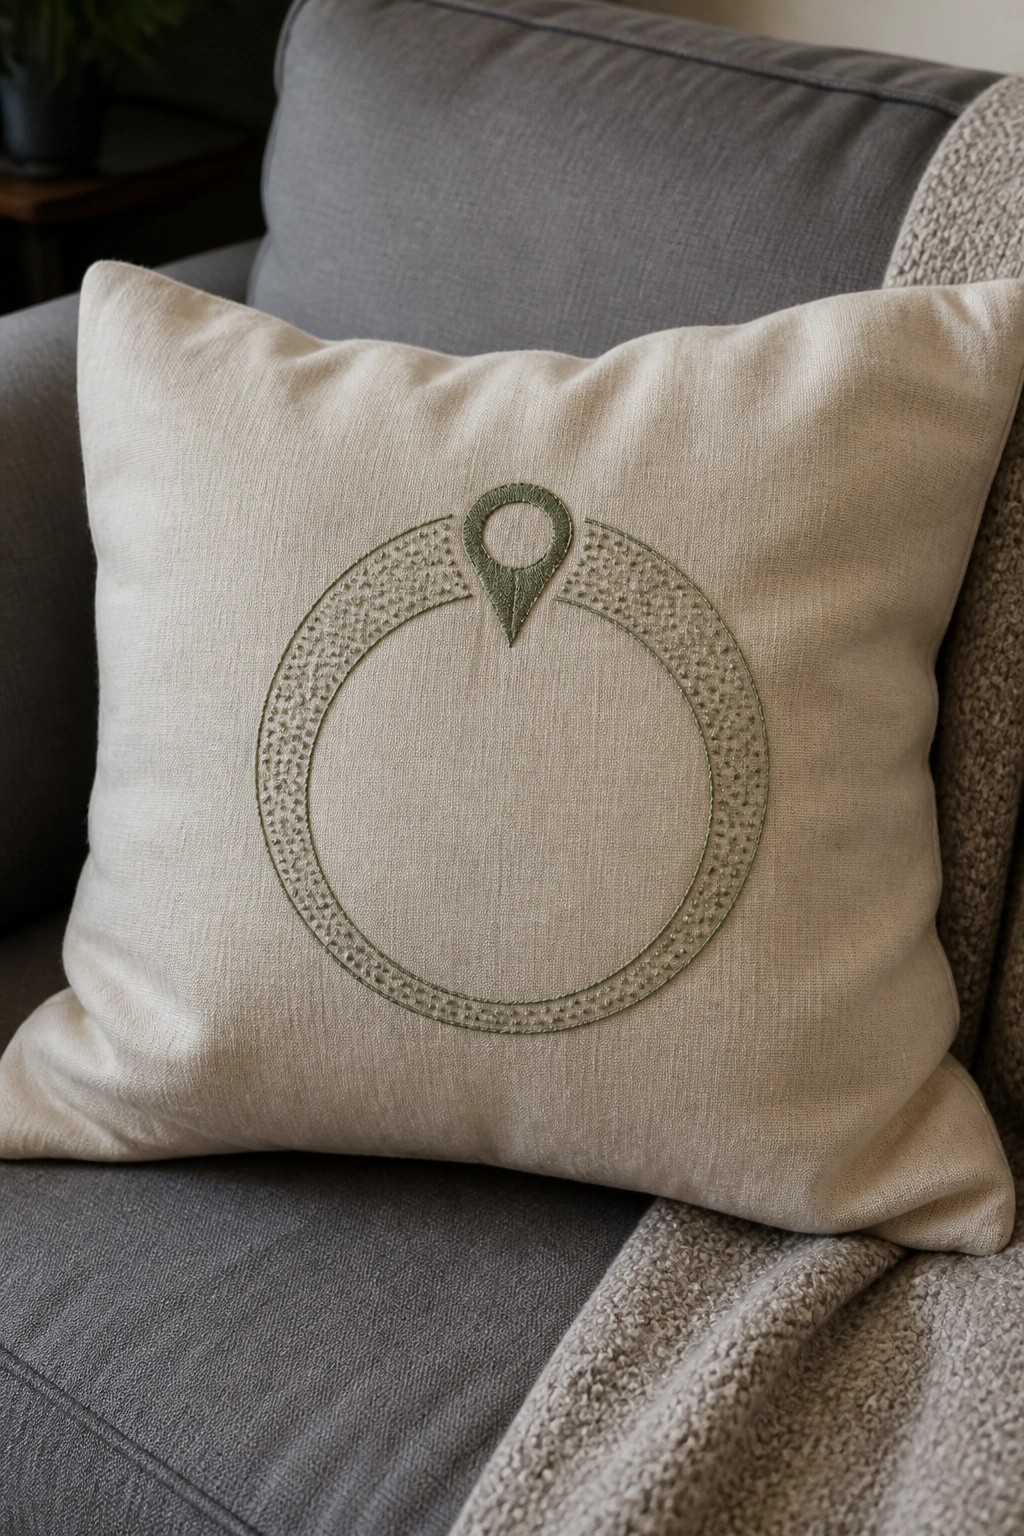
A location pin motif centered inside a dotted circular border makes a clean focal point on a pillow cover. The circle uses a repeated small stitch to create texture and weight, while the pin sits slightly above the center for balance. This layout suits square home items like cushions or even larger fabric bags where the design can stay visible without competing with other details.
The placement on a neutral base lets the green thread stand out without extra color layers. You could shift the same motif onto a jacket pocket or a smaller pouch by scaling the circle down a few inches. It also adapts easily to gift projects since the shape reads clearly in one thread color and finishes on medium fabric without much background stitching.
Wreath Frame on Jean Cuffs

A simple oval wreath stitched in beige thread creates a clean border on the folded cuff of blue jeans. Small pink flowers sit at the top and bottom to break up the circle and add a bit of color. The design stays compact so it fits neatly on the hem without interfering with movement or washing. This approach suits everyday clothing like jeans or a denim jacket where you want a subtle custom detail.
What makes this idea useful is how the empty center leaves room for initials or a short word if you want to add text later. You can shrink the whole wreath for a pocket or repeat it along a sleeve seam. Swapping the thread color to match or contrast the denim changes the look quickly without redrawing the pattern. The curved shape also helps the embroidery hold up better on areas that get bent or folded.
Embroidered Bookmarks with a Blank Panel for Words

A fabric bookmark uses a bordered rectangle at the top to leave space for a short word or initial while the rest of the surface gets covered in small scattered stitches. The stitches sit close together in varied pastel colors to build texture without filling the whole area, and the tassel keeps the finished piece easy to handle. This layout suits a slim accessory that can be tucked into a book or given as a gift.
The blank panel lets you add any name, date, or short phrase after the texture is done, which keeps the project flexible. You can shrink the textured area to fit a narrower strip of fabric or swap the thread colors to match a specific book cover. A design like this works especially well on a bookmark because the scale stays small and the result stays practical rather than purely decorative.
Speech Bubble with Typing Dots

A speech bubble stitched as a clean outline in one color creates a large open shape that fills the hoop without needing extra details. Three small dots in separate colors sit inside near the right edge to suggest a short message or typing indicator. The empty space on the left keeps the design balanced while the dots provide a focal point that draws the eye. This motif suits a finished hoop or a base you can adapt for small fabric gifts.
The placement of the dots leaves open fabric where you could add initials or a short phrase later. Shrinking the bubble turns it into a quick patch for a tote or jacket pocket. Switching the dot colors to match a recipient’s favorite palette makes the same layout feel new for different gifts. The simple outline stands out in photos because the negative space and small accents create clear contrast.
Compass Banner Design for Canvas Bags

A compass rose with a central vertical arrow and two crossed side arrows forms the base motif here. The blank banner sits across the middle as the main area for text, placed directly on the front flap of a canvas bag. Radiating lines and layered stitching keep the layout compact while giving the banner clear visual weight. This setup suits bags, pouches, or jackets where the owner can add a name, coordinates, or short phrase later.
What makes this idea useful is the built-in text space on a travel motif that already reads as complete even when the banner stays blank. You can move the same layout to a smaller scale on a hat or notebook cover by dropping the side arrows. Changing the banner fabric color or thread shade lets it match different bag tones without redrawing the compass. The centered placement on a flap also keeps the design visible when the bag is carried.
Monogram Wreath on Small Pouches

A circular frame stitched in light thread sits at the center of a small fabric pouch, topped by a bow with floral sprigs on each side. The open middle leaves space for adding a name, initial, or short word later. This layout fits drawstring bags or sachets because the rounded shape matches the item and stays within the visible front area.
The blank circle makes it simple to customize the same pattern for different people without redrawing anything. You can shift the whole wreath onto a pocket or corner of a larger bag by reducing the scale and keeping the bow. Color changes in the bow or flowers also let the design match various occasions while the basic placement stays the same.
Baby Milestone Bib with Monthly Grid

A bib uses the phrase “watch me grow” above a grid of twelve empty squares, each labeled with a month from one to twelve. The squares sit in neat rows with a dashed border and small anchor accents at the top corners. This setup works on a bib because the fabric stays stable for stitching and the design stays visible while the item gets used. The project fits baby clothing or milestone gifts that track growth rather than sit in a hoop.
What makes this idea useful is the built-in function of filling one square per month as the baby grows. The grid layout could move to a onesie or small blanket if twelve squares feel tight on a bib. Swapping the anchors for simple stars or changing the thread color keeps the structure but matches a different theme. The clear monthly sequence helps the design perform well in searches for practical baby embroidery projects.
Ornate Scroll Frame on a Clutch

An ornate scrolling frame built from curves, leaves, and flourishes creates a centered oval on the front of a small clutch bag. The motif sits flat on the fabric and uses metallic threads in two tones to stand out against the dark base. This placement keeps the design balanced on a rectangular surface while leaving the middle open. The approach suits accessories like evening bags or small purses that need a single focal point rather than all-over stitching.
What makes this idea useful is how the empty center invites a short word or initials without crowding the surface. You could shift the same frame onto a zip pouch, a notebook cover, or the corner of a scarf by simply resizing the motif. Changing the thread colors to match the bag fabric softens the look, while keeping high contrast makes the shape read from farther away. Designs like this often perform well on Pinterest because the clean negative space inside the frame leaves room for personalization.
Icon Rows Framed by Stitched Lines
Place three small motifs in a horizontal row across the center of the fabric, with two parallel lines stitched above and below to create a clean band. The apple, anchor, and sun each use a different thread color so they read clearly against the background, and the consistent spacing keeps the row balanced even when the order changes. This layout works especially well for hoop projects or small fabric squares that can be turned into patches or bag accents.
What makes this idea useful is how easy it is to swap the motif order or swap in new icons without redrawing the whole piece. The bordered strip format stays readable at a small scale, so the same design can move from a 6-inch hoop to a pocket or a notebook cover. Changing just one color or motif gives you a quick variation for a set of matching gifts.
Frequently Asked Questions
1. What fabrics work best for creating word embroidery hoop art that will last as gifts? Cotton, linen, and canvas are excellent choices because they hold stitches securely without fraying easily. Pre-wash the fabric to prevent shrinkage later, then stretch it tightly in the hoop before starting. For gifts, opt for medium-weight options that feel durable yet soft to the touch, and consider adding a backing layer of felt or interfacing for extra stability.
2. How can I transfer the word designs from the 24 ideas onto fabric accurately? Use a water-soluble stabilizer or lightbox method to trace the words lightly with a pencil or disappearing ink pen. Print the chosen phrase in your preferred font size, place it under the fabric, and trace directly. This keeps letters neat and proportional, especially for longer quotes or names, and allows easy removal of any marks once stitching is complete.
3. What embroidery stitches work well for lettering in these personalized hoop projects? Backstitch or stem stitch creates clean, readable lines for most words, while French knots add texture to dots or emphasis points. Split stitch offers a smoother fill for thicker letters. Practice on scrap fabric first to match the style of your chosen idea, and vary stitch tension slightly to give words a handmade yet polished appearance suitable for gifting.
4. How do I personalize the 24 word embroidery ideas to make them meaningful gifts? Select phrases that reflect the recipient’s interests, such as favorite quotes, inside jokes, or milestone dates, then adjust fonts or add small motifs like hearts or stars from other ideas on the list. Incorporate their name or initials in a contrasting thread color for a custom touch, and finish with a ribbon hanger or decorative hoop edge to turn the piece into a ready-to-display present.
5. What common mistakes should beginners avoid when trying these word embroidery ideas? Avoid pulling stitches too tight, which can pucker the fabric, and always knot threads securely on the back to prevent unraveling over time. Start with shorter phrases from the list to build confidence before tackling longer ones, and keep your hoop tension even throughout. If colors bleed during washing, test threads beforehand on a sample to ensure the finished gift stays vibrant.